
Windshield: Service and Repair
- Make
- Honda
- Model
- Fit
- Engine
- L4-1.5L
- Year
- 2008
- Section
- Windshield › Service and Repair
Windshield: Service and Repair
Windshield Replacement
NOTE:
-
Put on gloves to protect your hands.
-
Wear eye protection when removing the glass with piano wire.
-
Use seat covers to avoid damaging the seat.
-
When replacing a broken windshield, a commercially available windshield cutter can be efficiently used for cutting the adhesive. For details,
follow the instructions of the manufacturer of the tool.
1. Remove these items:
-
Rearview mirror
-
Windshield wiper arms
-
Cowl covers
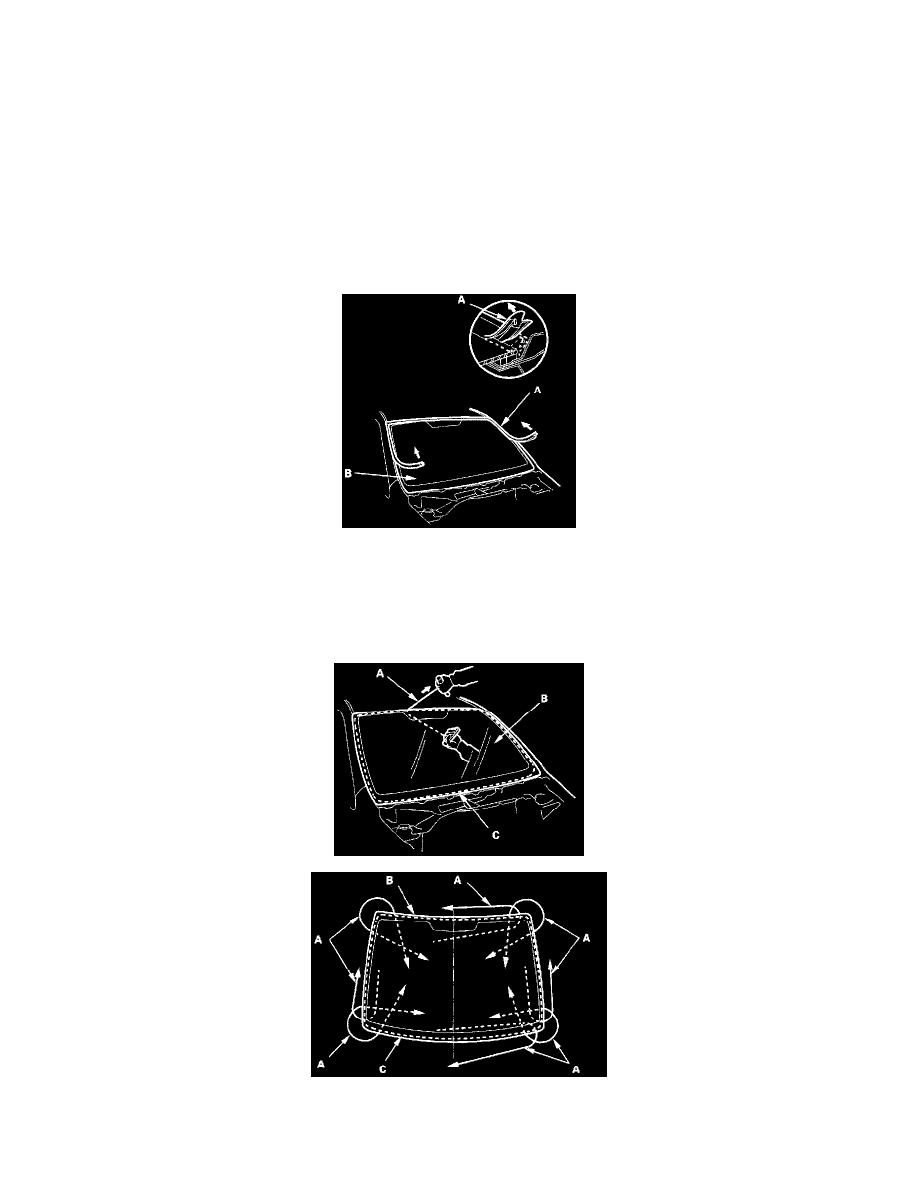
2. Remove the molding (A) from the edge of the windshield (B). If necessary, cut the molding with a utility knife.
3. If the old windshield is to be reinstalled, make alignment marks across the glass and body with a grease pencil.
4. Pull down the front portion of the headliner. Take care not to bend the headliner excessively, or you may crease or break it.
5. Apply protective tape along the edge of the dashboard and body. Using an awl, make a hole through the rubber dam, adhesive, and dashboard seal
from inside the vehicle at the corner portion of the windshield. Push a piece of piano wire through the hole, and wrap each end around a piece of
wood.
Cutting positions
6. With a helper on the outside, pull the piano wire (A) back and forth in a sawing motion. Hold the piano wire as close to the windshield (B) as
Pinch or Ctrl + scroll to zoom. Double-tap to reset.
Parts & tools for this job For 2008 Honda Fit 1.5L
- TOOLTrim removal tool kitSearch: trim removal tool kit
- PARTTouch-up paintSearch: Honda touch up paint
- PARTPanel clip assortmentSearch: Honda panel clips assortment
Links open Amazon search results in a new tab. As an Amazon Associate I earn from qualifying purchases.