
Hombre XS Space Cab L4-2.2L CPC (1997)
Hydraulic Control Assembly - Antilock Brakes: Service and Repair
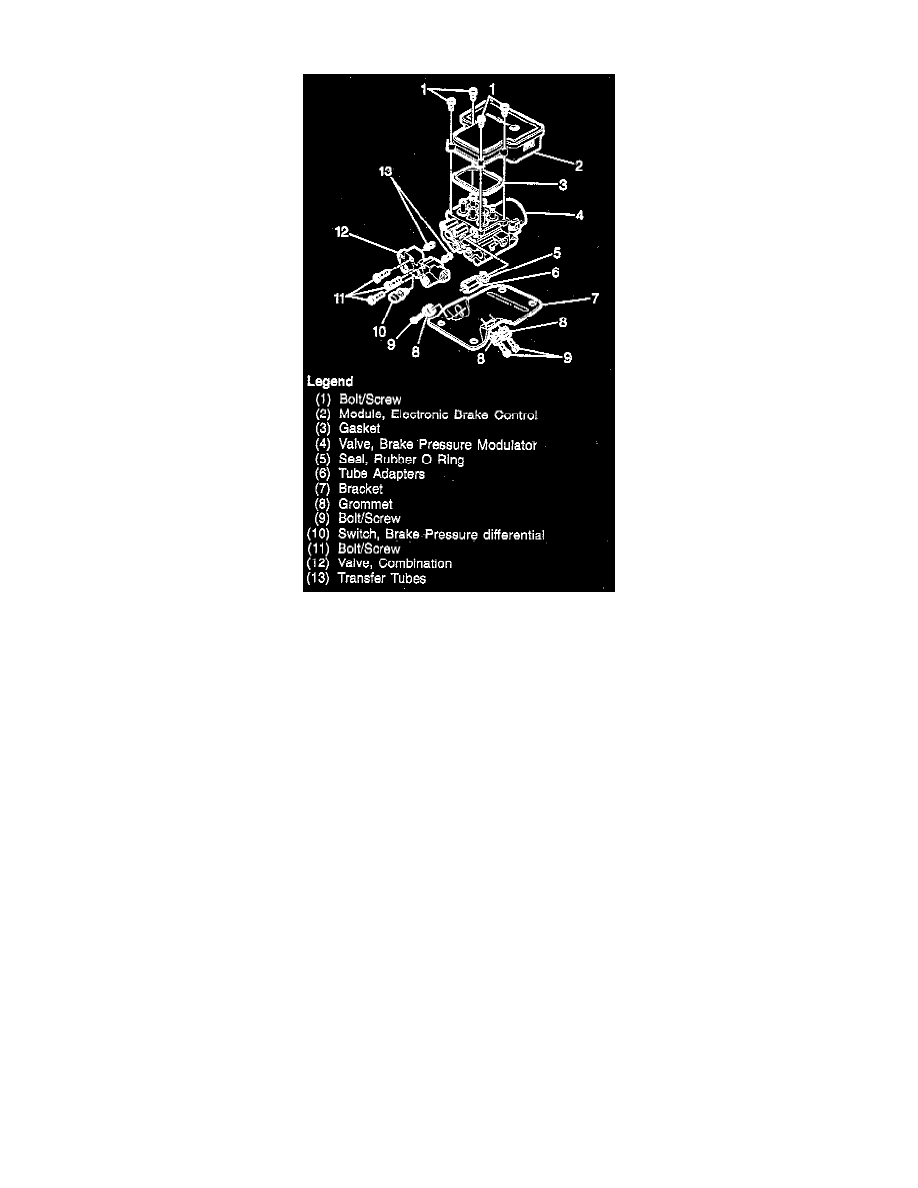
Electro-Hydraulic Control Unit (EHCU)
REMOVE OR DISCONNECT
1. Negative battery cable.
2. Raise the vehicle
3. Two 13 mm weld/shield nuts fastening the shield and the BPMV to the EHCU mounting Bracket.
4. Four electrical connectors from Electronic Brake Control Module (EBCM).
5. Electrical connector from combination valve.
6. Front and rear brake pipes from combination valve.
7. Three hydraulic line from the tube adapters on the Brake Pressure Modulator Valve (BPMV).
8. Electro-Hydraulic Control Unit (EHCU) assembly from vehicle.
9. Four T-25 Torx bolts from EBCM.
10. EBCM from BPMV. A light amount of force may be necessary to remove the EBCM.
NOTE:
^
Do not pry on the EBCM or BPMV. Excessive force will cause damage to the EBCM
^
Do not reuse the EBCM gasket or mounting bolts. Always install a new gasket and new bolts.
11. Three Allen bolts from the combination valve.
12. Combination valve from the EBCM.
13. Two transfer tubes
14. Three 13 mm bolts retaining the BPMV to the base bracket.
NOTE:
^
Do not reuse the transfer tubes. Always install new transfer tubes.
INSTALL OR CONNECT
1. New transfer tubes into the combination valve until fully seated.
2. Combination valve to BPMV.
3. Three Allen bolts.
^
Tighten Bolts in two steps.