
Hombre XS Space Cab L4-2.2L CPC (1997)
Compressor Clutch Coil: Service and Repair
V5 Type
Remove or Disconnect
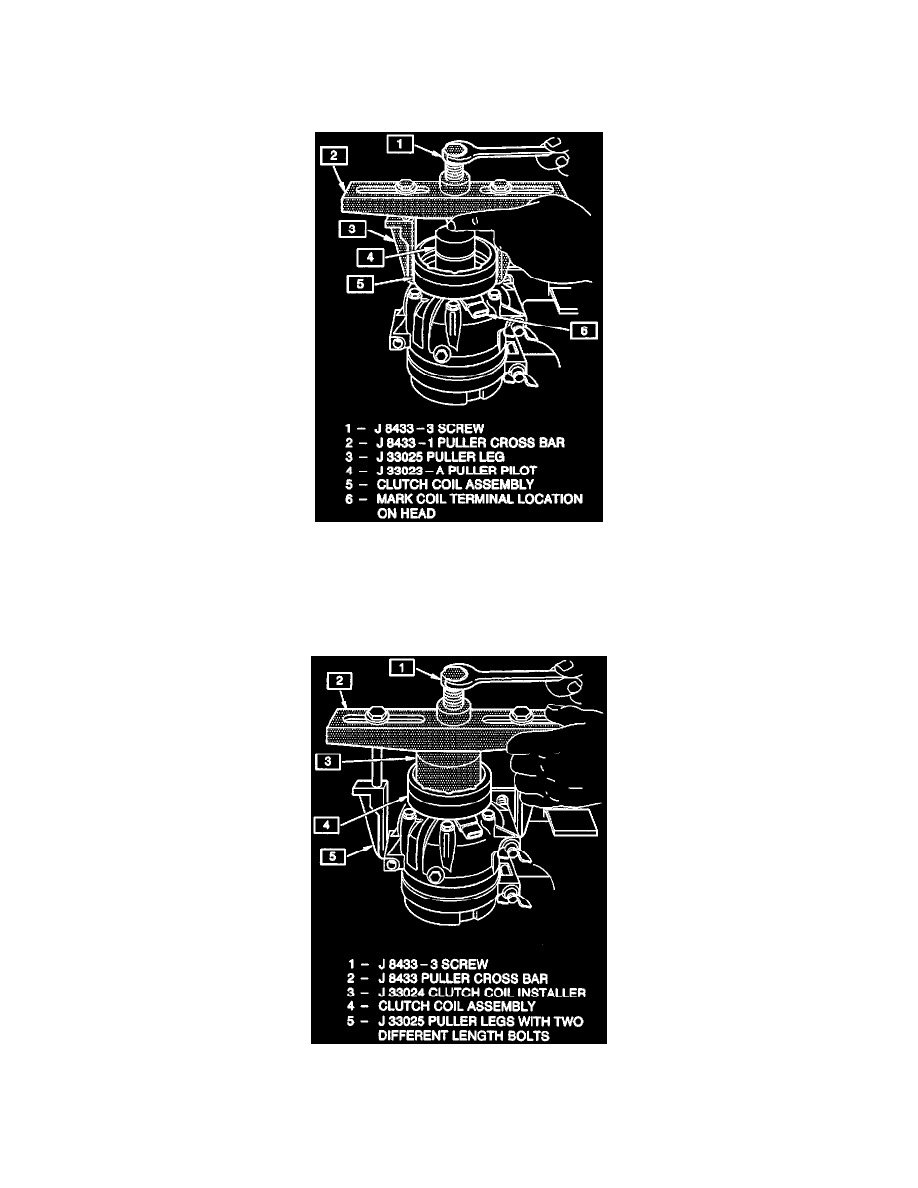
1. Perform Steps 1 through 4 of "Clutch Rotor and/or Bearings" removal procedure. Mark clutch coil terminal location on compressor front head.
2. Install J33023-A puller pilot on front head of compressor, also install J 8433-1 puller crossbar with J 33025 puller legs.
3. Tighten J 8433-3 forcing screw against the puller pilot to remove the clutch coil.
Install or Connect
1. Place the clutch coil assembly on the front head with the terminals positioned at the "marked" location.
2. Place the J 33024 clutch coil installer over the internal opening of the clutch coil housing and align installer with the compressor front head.
3. Center the J 8433-1 puller crossbar in the countersunk center hole of the J 33024 clutch coil installer. Install the J 34992-2 through bolts and
washers through the crossbar slots and thread them, into the holding fixture J 34992 to full fixture thickness.
4. Turn the center forcing screw of the J 8433-1 puller crossbar to force the clutch coil onto the front head. Be sure clutch coil and J 33024 installer
stay "in-line" during installation.