
Hombre XS Space Cab L4-2.2L CPC (1997)
Tie Rod: Service and Repair
Installation
NOTE: If the tie rod ends were removed, lubricate the tie rod threads with chassis lubricant.
1. Attach the tie rod ends to the adjuster tube. The number of threads on both the inner and outer tie rod ends must be equal within three threads.
2. Inner tie rod ball stud to the relay rod. Make sure the seal is on the stud. Tighten the Special Service Tools (SSTs) J 29193 or J 29194 tool to 54
Nm (40 ft. lbs.) to seat the tapers. Remove the tool.
3. Put the nut on to the inner tie rod ball stud and tighten to 53 Nm (39 ft. lbs).
4. Attach the outer tie rod ball studs to the steering knuckle and tighten the nut to 53 Nm (39 ft. lbs).
NOTE: Advance the nut to align the nut slot with the cotter pin hole. Never back the nut off to align the cotter pin hole.
5. Install the new cotter pin spreading the cotter pin ends.
6. Lower the vehicle.
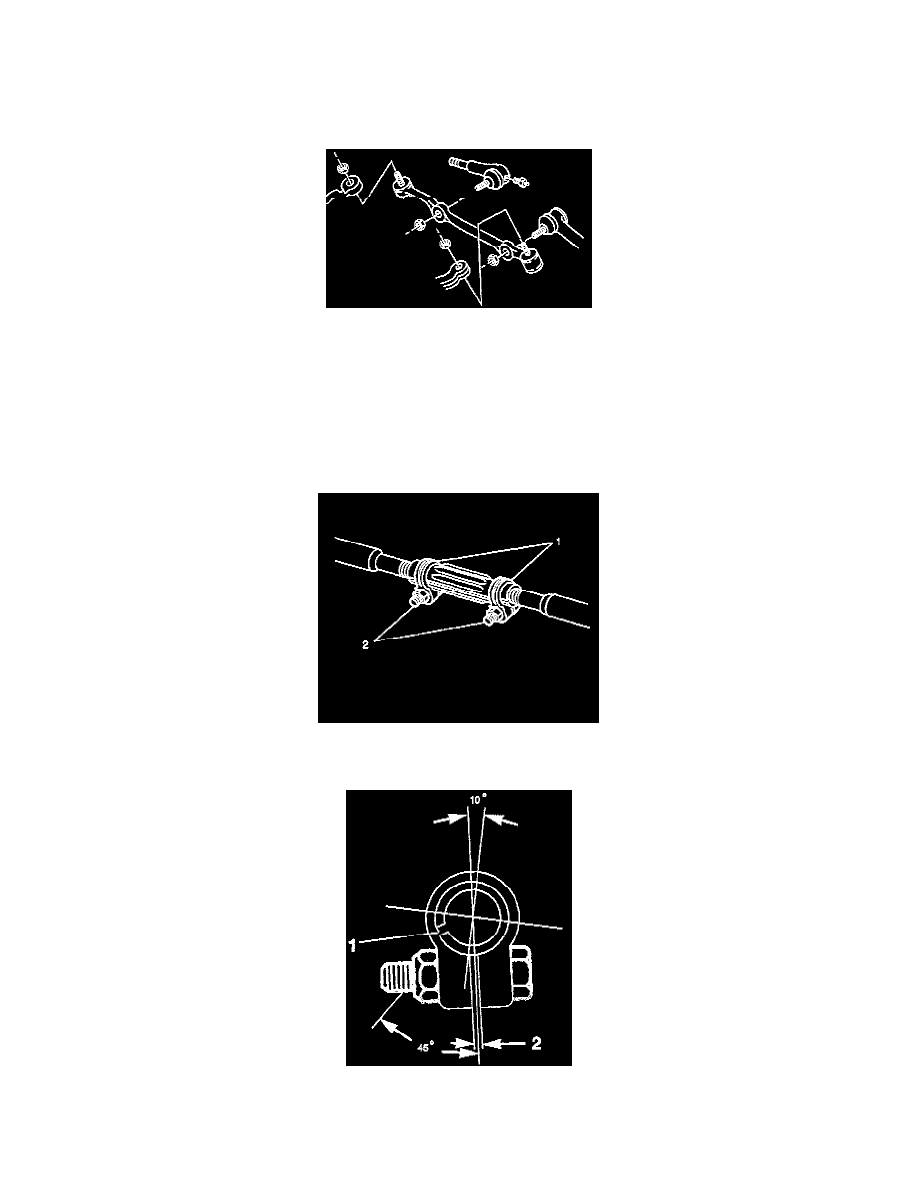
7. Attach the adjuster tube clamp bolts. Before tightening the clamp bolts, make sure the following conditions have been met.
a. The clamps (2) must be positioned between the locating dimples (1) at either end of the adjuster tube.
b. The clamps must be positioned within the angular travel shown in the illustration.
c. The relationship of the clamp slot (2) with the slot in the adjuster tube (1) must be as shown in the illustration .
d. Both inner and outer tie rod ends must rotate for their full travel. The position of each tie rod end must be maintained as the clamps are
tightened to ensure free movement of each joint.