
Hombre XS Space Cab L4-2.2L CPC (1997)
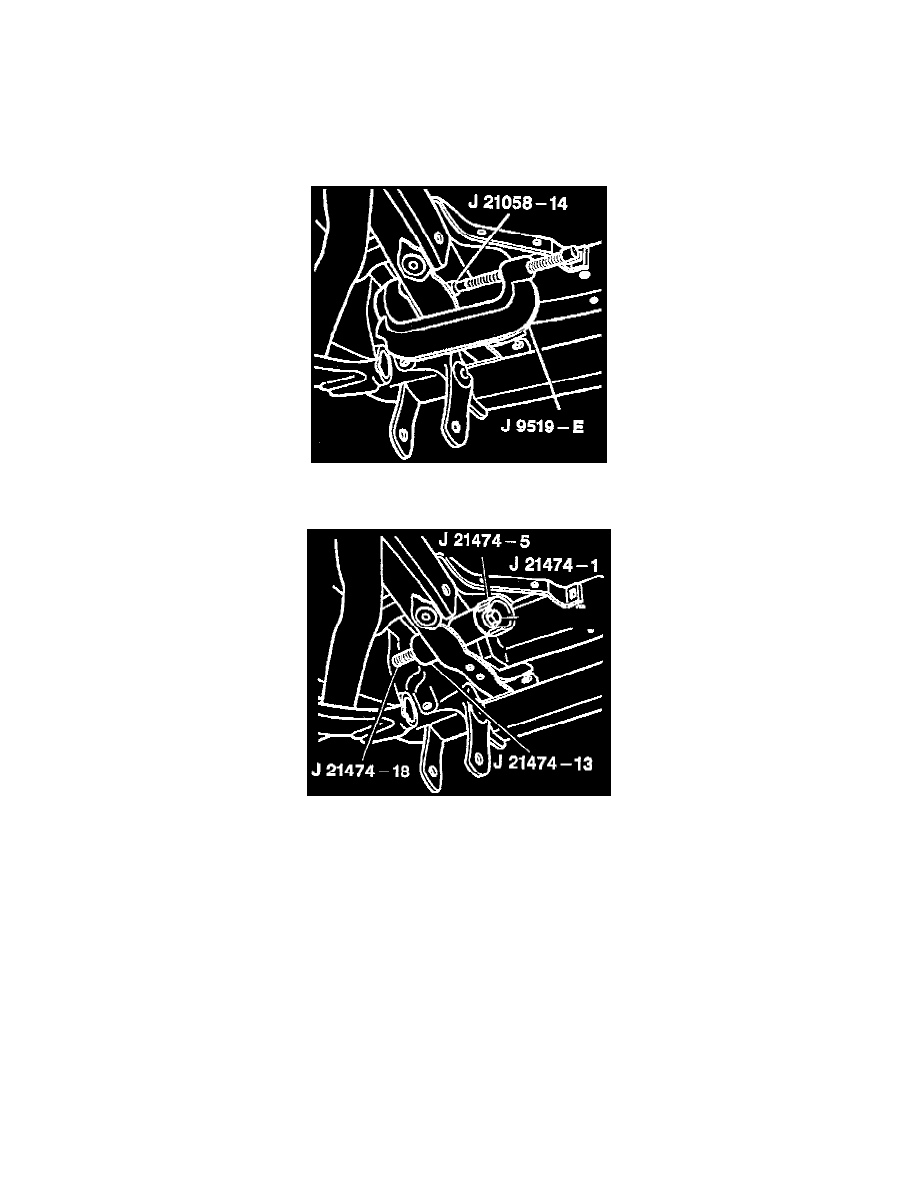
NOTE: To replace the bushing, the Special Service Tools (SSTs) required are a J 9519-E ball joint remover a, 21058-14 adapter (Part of J 21058), a J
21474-5 bushing receiver J 21474-13 control arm bushing installer a, J 21474-18 3/8 inch nut and a J 21474-19 3/8 inch bolt.
1. Raise the vehicle on a hoist and support with suitable safety stands then loosen the upper shackle bolt, nut, and flat washers.
2. Support the rear axle then do the following.
A. Loosen the lower shackle bolt at the spring and leave it attached.
B. Lower the axle until there is enough clearance to remove the shackle bushing.
C. Using a blunt punch, straighten out the bushing flange that comes through the inner frame.
3. Remove the shackle bushing using the J 21058-14 and J 9519-E tools.
4. Install the new shackle bushing using the tools J 21474-18, J 21474-13, J 21474-19, J 21474. To do this, do the following.
A. Assemble tools as shown in the illustration and pull the bushing into the frame rail until the flanged portion of the bushing is flush with the
rail.
B. Stake the shackle bushing inner flange.
C. Raise the axle into position.
5. Attach the shackle bolt, washers, and nut to the frame and hand tighten.
6. Repeat Steps 1 and 2 for the other bushing and do the following.
^
Support the axle in such a way that there is a distance of 170 mm +/- 6 mm (6.7 inch +/- 0.24 inch) between the axle tube and the bumper
bracket metal surface.
^
Tighten the rear shackle nuts to 122 Nm (89 ft. lbs.) then lower the vehicle.