
Rodeo S 2WD L4-2.2L (1999)
7. Clean the plastigage from the bearings and the crankshaft pins.
REASSEMBLY
1. Install connecting rod.
2. Install piston.
3. Install piston pin.
-
Apply a thin coat of engine oil to the piston pin. Try to insert the piston pin into the piston pin hole with normal finger pressure.
NOTE: When changing piston/connecting rod combinations, do not change the piston/piston pin combination and do not reuse the old piston
pin.
-
Attach the piston to the connecting rod with the piston front mark and the connecting rod front mark on the same side.
-
Heat the connecting rod small end to a suitable temperature to ensure smooth installation.
4. Install piston ring with the piston ring expander.
-
New piston rings with "Top" uppermost-use commercially available pliers.
-
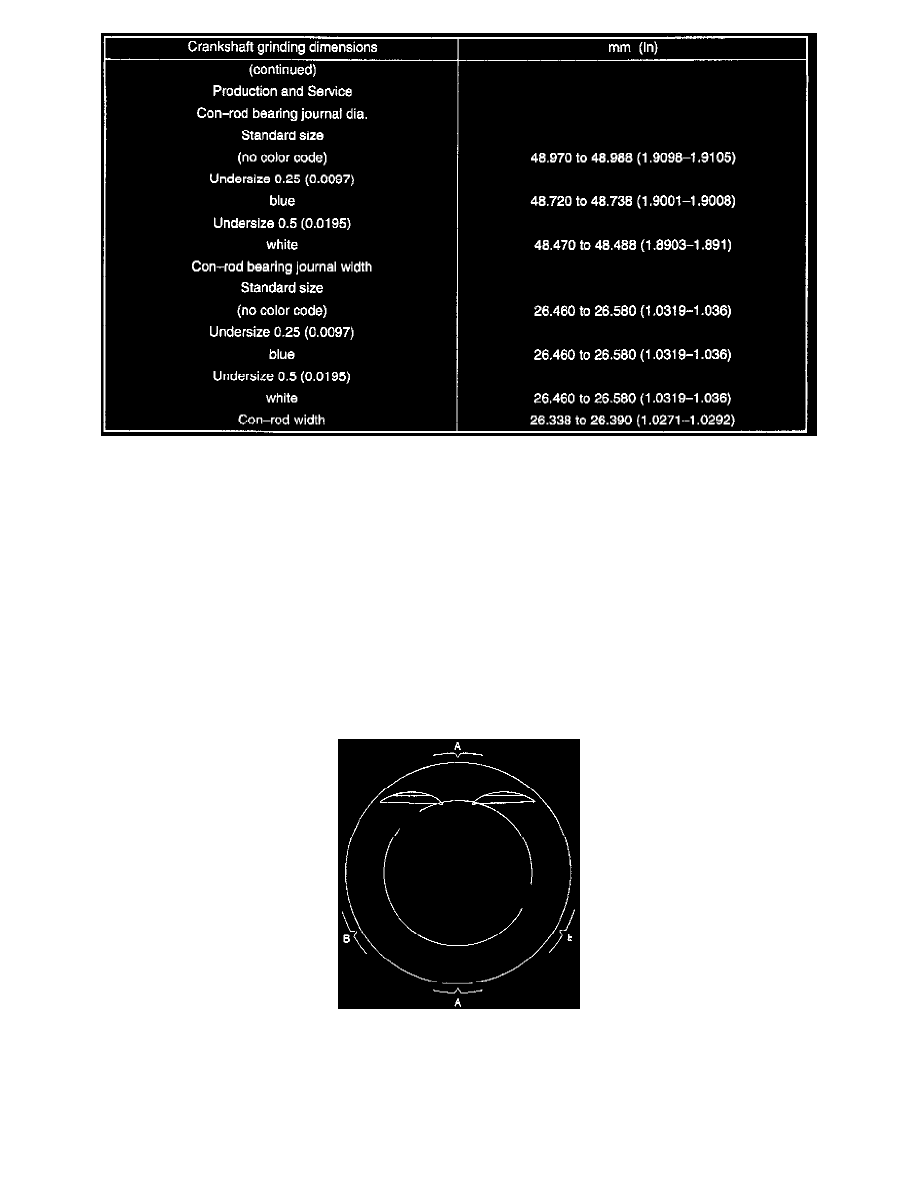
Position ring gaps:
1-Compression rings 180° to each other as illustrated.
2-Offset oil control rings 25 to 50 mm / 1 to 2 inch from gap of second compression ring.
-
After installation, apply engine oil to the entire circumference of the piston rings. Check to see that all the rings rotate smoothly.
5. Install piston and connecting rod assembly.
-
Insert the bearings into the connecting rods and caps. Apply new engine oil to the bearing faces and nuts.
-
Tighten the connecting rod cap nuts in 3 steps: