
Rodeo S 2WD L4-2.2L (1999)
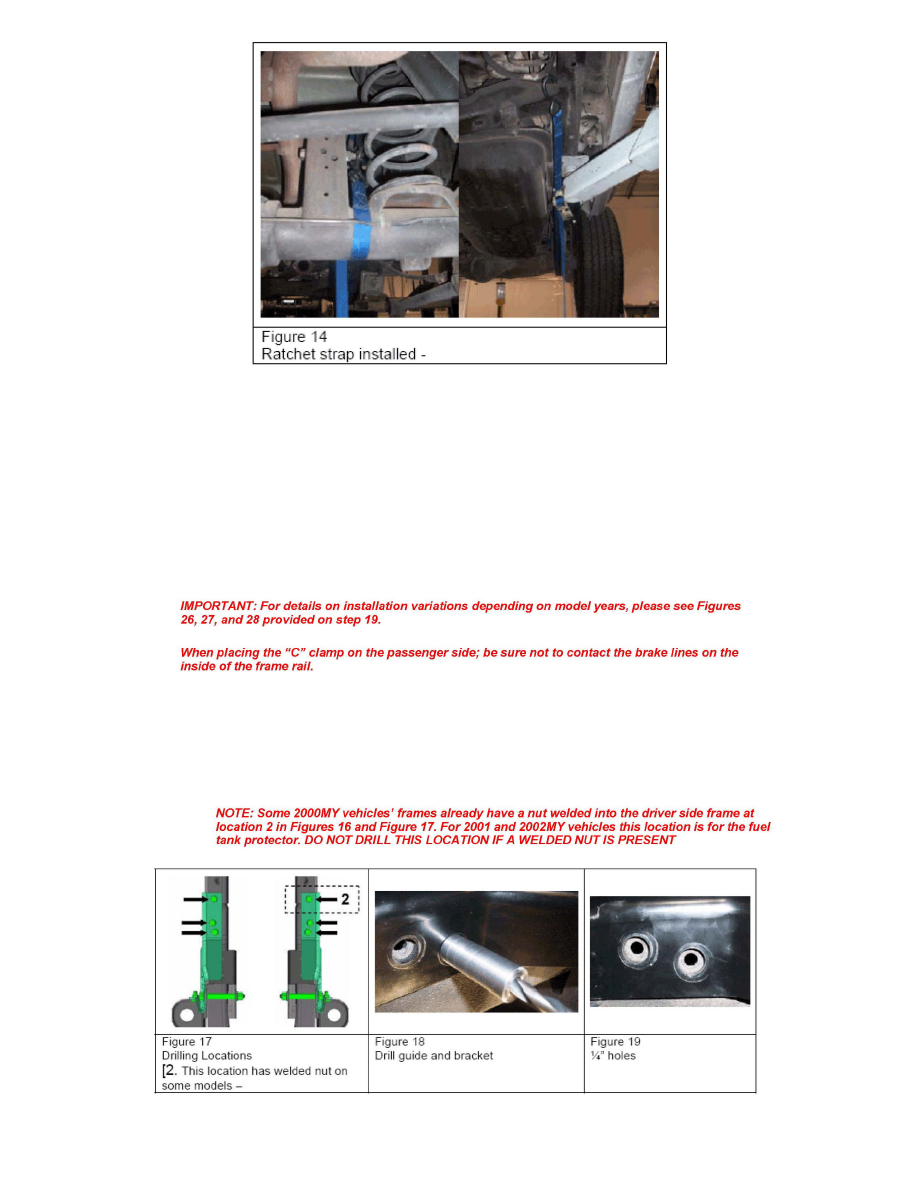
3. Using a ratcheting strap lash up the rear axle. Start by attaching one end of the strap to the upper link mount. Then route the strap around the rear
axle taking care not to cover any brake piping and continue forward under the vehicle aftaching the other end of the strap to the transmission mount
cross member. Apply enough forward tension on the rear axle to allow the lower link mounting bolt to be moved by hand (see Figure 14).
4. Using a hammer knock on the outside of the frame rail to loosen any rust on the inside of the frame.
5. Using a wire brush and scraper remove any loose coating material welding splafter and rust from the outside frame and rear lower trailing link front
mounting bracket area on both driver and passenger sides.
6. Temporarily install both Type "A" reinforcement brackets using the original lower link mounting nut "C clamp and new stud and nut. See Figures 15
and 16
Important
Note:
It will be necessary to remove the fuel tank protector mounting bolt on the driver side for 2001 and 2002 model year vehicles. Save the bolt for reuse.
It will be required for final installation of the reinforcement bracket on the driver side.
7. Using the 14 drill bit guide or equivalent drill 14 pilot holes for 6 new Pop-nut locations (See Note and Figures 17, 18 and 19 for reference).