
Rodeo S 2WD L4-2.2L (1999)
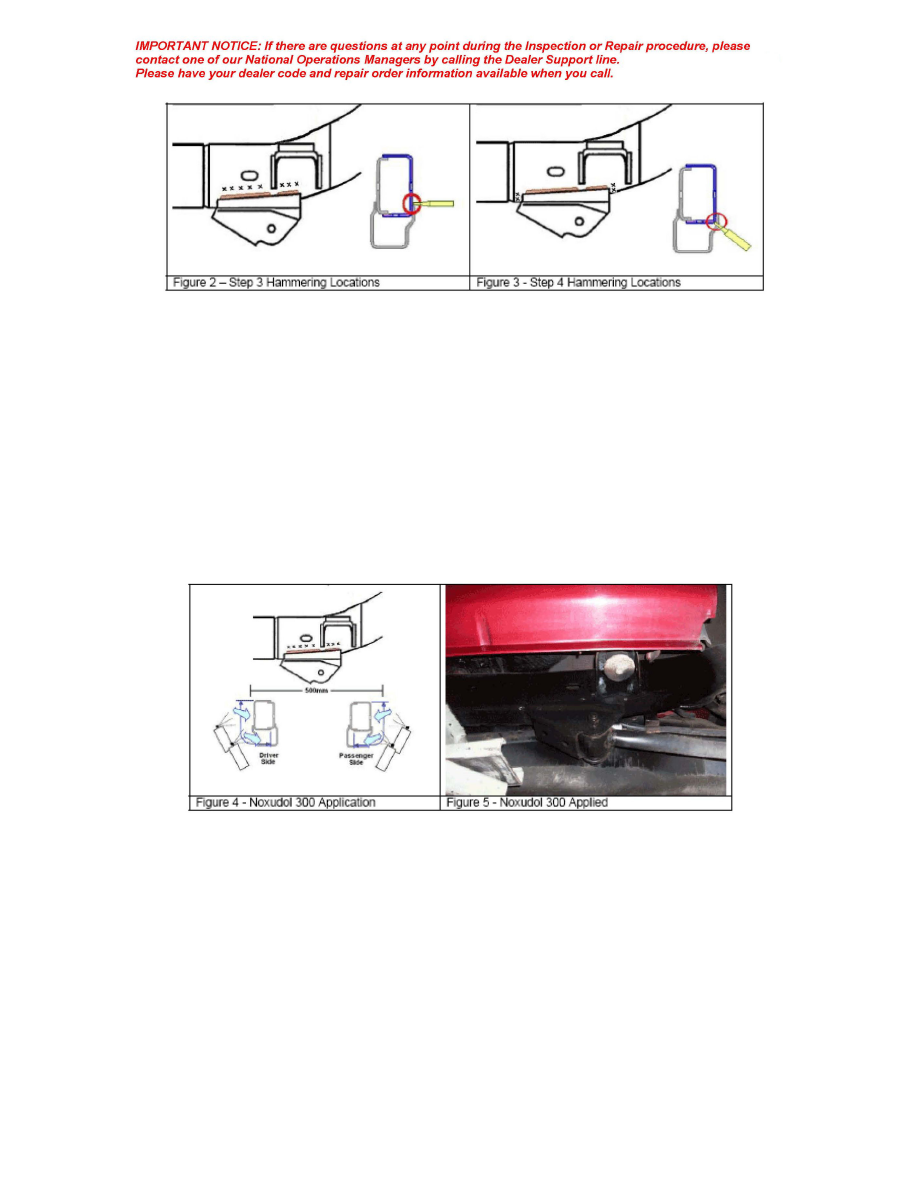
3. Using a 3/16 flat punch and a 12-16 oz. hammer hammer on the locations identified with an "X in Figure 2. Swing the hammer 10 to 12 inches to be
sure enough force is applied to the punch. If no hole is created apply Noxudol 700 and Noxudol 300 (Go to "Condition Two: Apply Noxudol 700
and Noxudol 300 in this bulletin). If however the flat punch creates a hole in any one location go to the next step.
4. Using a 3/16 flat punch and a 12-16 oz. hammer hammer on the locations identified with an "X" in Figure 3.
a. If no hole is created continue to "Condition Three: Reinforcement Bracket Type "A" Installation in this bulletin.
b. If the flat punch creates a hole in any one location continue to "Condition Four: Reinforcement Bracket Type "B" Installation in this bulletin.
Condition One: Apply Noxudol 300
1. Using a wire brush and scraper remove any loose coating material and rust from the outside frame and rear lower trailing link front mounting bracket
area on both driver and passenger sides in the location shown in Figure 4.
2. Using a dry rag remove any remaining dust or debris. If the application area is wet use a blow gun to remove any water.
3. Spray one coat of Noxudol 300 onto both driver and passenger side shown in Figures 4 and 5. Be careful not to overspray onto the exhaust system or
body painted areas. See Figure 4.
4. Apply the campaign label (see "Applying the Campaign Label in this bulletin).
Condition Two: Apply Noxudol 700 and Noxudol 300
1. Remove the side frame hole plug from the driver and passenger side frame rails. See Figure 6. Save these plugs. They may be reinstalled at step 13.
2. Using a hammer knock on the outside of the frame rail in the area indicated in Figure 4 to loosen any rust on the inside of the frame.
3. Using a blow gun through the side frame hole blow any rust debris to the front end and to the rear end of the frame away from the area indicated in
Figure 4.
4. Using a wire brush and scraper remove any loose coating material and rust from the outside frame and rear lower trailing link front mounting bracket
area on both driver and passenger sides.
5. Using a dry rag remove any remaining dust or debris. If the application area is wet use a blow gun to remove any water.