
Rodeo S 2WD L4-2.2L (1999)
8. Remove both Type "A" reinforcement brackets. Save the body mount stud and nut for final installation. Discard the original rear trailing link front
mount mounting nut. A new one is provided in the kit for installation.
9. Drill final holes for Pop-nuts using a 33/64 drill bit. Some 2000MY vehicles frames already have a nut welded into the driver side frame at location 2
in Figure 16. For 2001 and 2002MY vehicles this location is for the fuel tank protector. DO NOT DRILL THIS LOCATION IF A WELDED NUT
IS PRESENT
10. Using a blow gun through the side frame hole blow any rust debris away from this area up and down the inside frame rail.
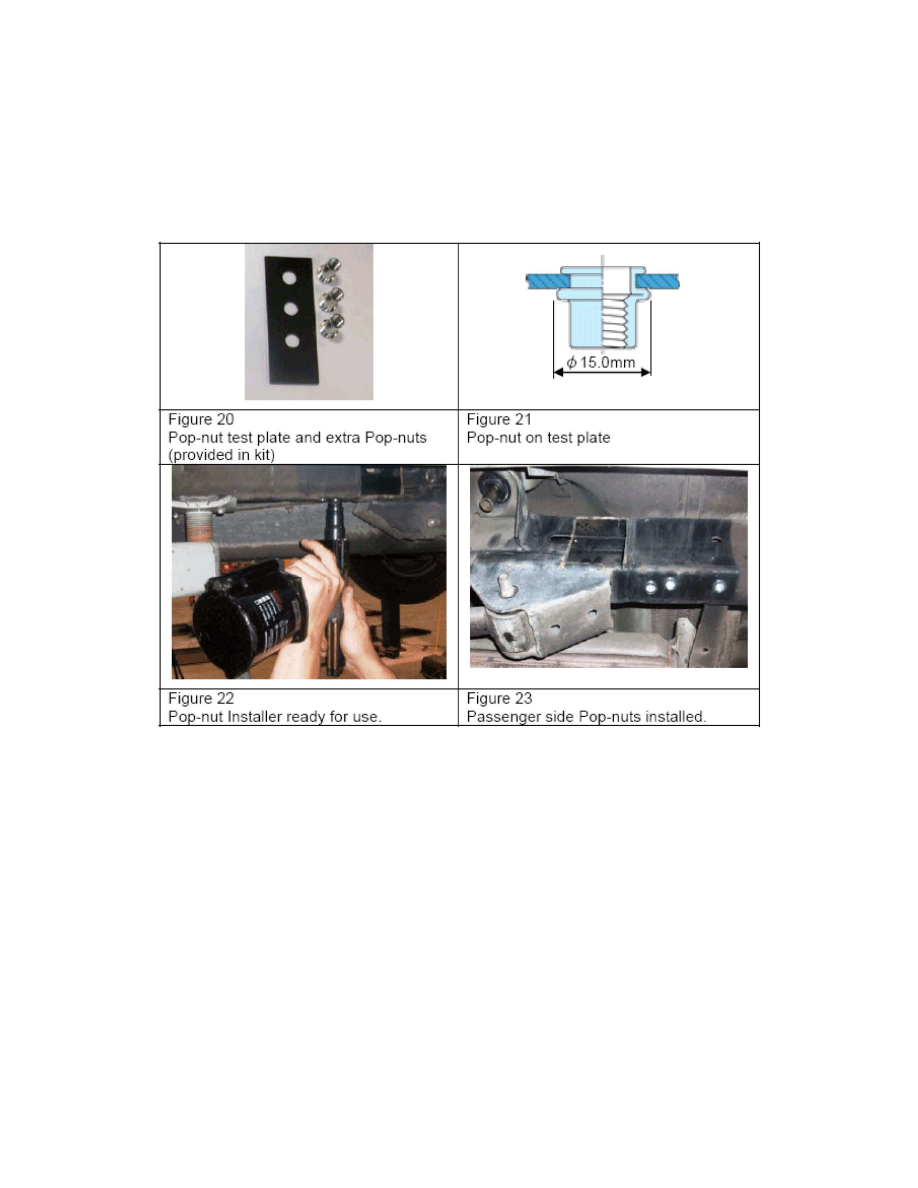
11. Install Pop-nuts. (See tool manual for additional details.)
a. Before installing the Pop-nuts be sure the pressure regulator is adjusted between 72.5 and 87 psi (0.5-0.6MPa I 5-6bar) and using the provided
test pieces test install at least one Pop-nut in the test plate to be sure the nut is seating properly. Measure the installed Pop-nut to confirm it has
expanded to at least 15 mm. See Figures 20 and 21.
b. When Installing Pop-nuts on the vehicle be sure they are completely seated against the frame before pulling the trigger. See Figure 22.
c. After pulling trigger continue to hold it down until the mandrel reverses direction. Once reversed pull back slightly and the mandrel will
unthread from the Pop-nut. See Pop-nut Installer manual for details.