
Rodeo S 2WD L4-2.2L (1999)
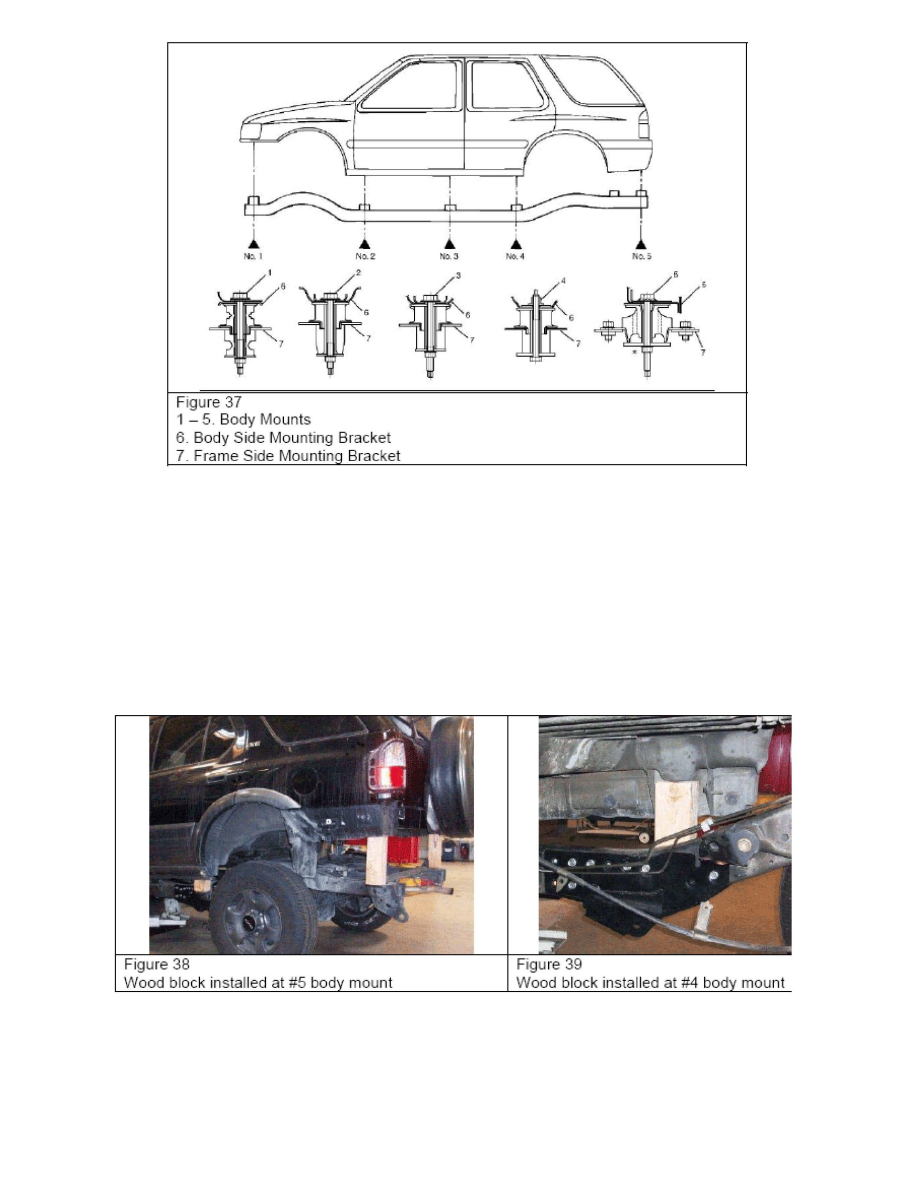
4. Remove body mount mounting nuts and bolt (mounts # 1, # 2, # 4, and # 5 use nuts/ mount # 3 uses a bolt) for body mounts # 1 through # 5. See
Figure 37.
5. Using ratcheting straps lash up the rear axle at the driver and passenger side. Start by placing one end of the strap above the axle at the driver side
inside frame rail route the other end of the strap down underneath the rear axle and then backup above the outside of the driver side frame rail.
Connect both ends of the strap together and remove any slack. Repeat this process for the passenger side.
6. Lower the vehicle to the ground. Raise the rear of the body off of the frame and support.
7. Remove the 2 mounting bolts from the top of body mount number #5 (Right and Left sides) and remove the body mount.
8. Remove the top of body mount number # 4.
9. Using wooden blocks support the body off of the frame at body mount # 5 and # 4. Body mount # 5 should be 10.25 inches (260 mm) above the
frame and body mount #4 should be at least 6.9 inches (175 mm) to allow access for the following steps. See Figures 38 and 39.
10. Remove the rear lower link front mounting bolts on driver and passenger side. Discard mounting bolts and nuts. New hardware is provided in the
bracket kit.
11. Raise the vehicle into the air.