
Trooper LS V6-3.5L (1998)
See TSB SB94-01-003 12-94
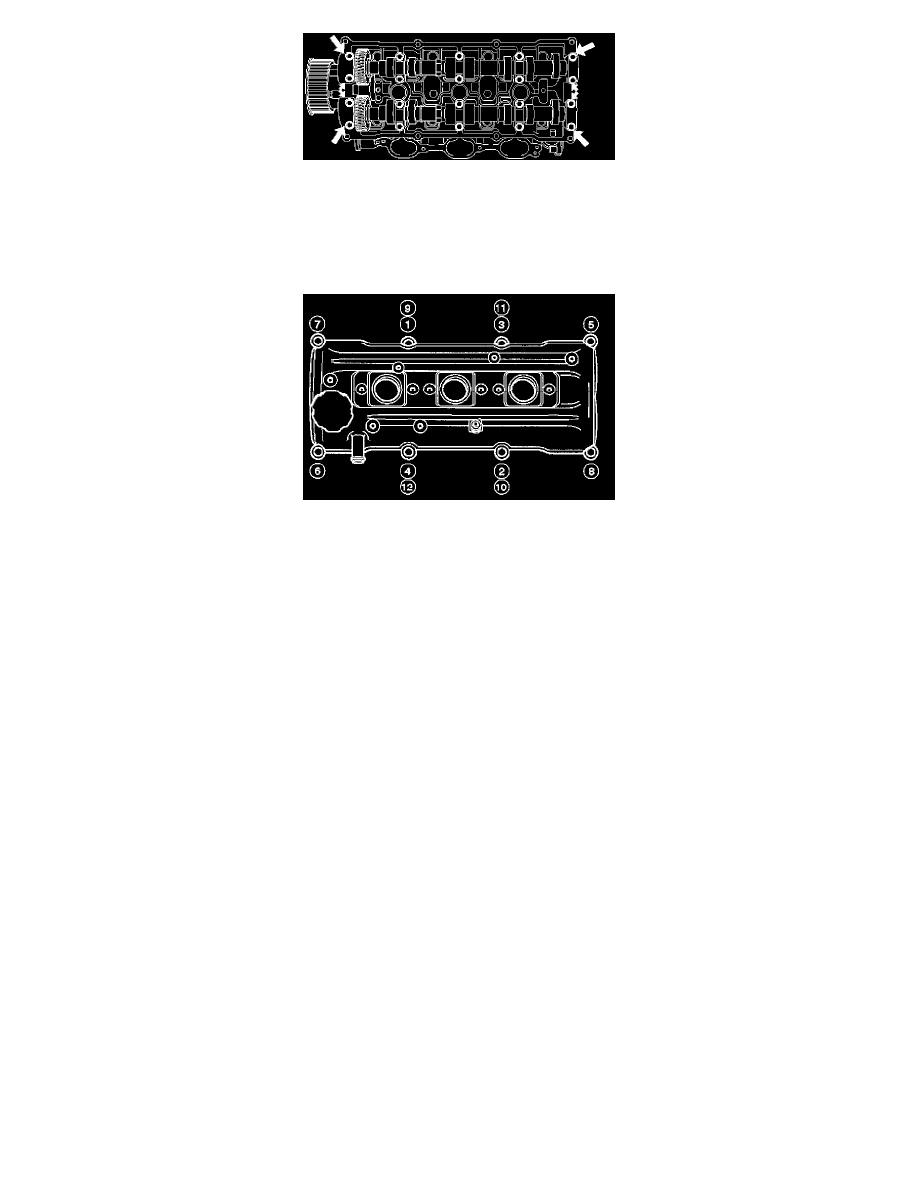
1. Install cylinder head cover.
-
Clean the sealing surface of cylinder head and cylinder head cover to remove oil and sealing materials completely.
-
Apply sealant (TB-1207B or equivalent) of bead diameter 2 - 3 mm at eight place of arched area of camshaft bracket on front and rear sides.
-
The cylinder head cover must be installed within 5 minutes after sealant application before the sealant hardens.
-
Tighten bolts in turn to the specified torque.
Torque: 8.8 Nm (77.9 inch lbs.)
2. Install ignition coil assemblies and tighten the fixing bolts to the specified torque.
Torque: 4 Nm (35.4 inch lbs.)
3. Install timing belt cover and tighten the fixing bolts and nut to the specified torque.
Torque: 19 Nm (14 ft. lbs.)
4. Install crankshaft pulley and tighten the fixing bolt using J-8614-01 crankshaft holder to the specified torque.
Torque: 167 Nm (123 ft. lbs.)
5. Install auto tensioner assembly and tighten the fixing bolts to the specified torque.
Torque:
Shorter Bolt: 20 Nm (14.8 ft. lbs.)
Longer Bolt: 39 Nm (28.8 ft. lbs.)
6. Install idle pulley assembly and tighten the fixing bolt to the specified torque.
Torque: 52 Nm (38.4 ft. lbs.)
7. Install fan pulley and bracket assembly and tighten the fixing bolts and nut to the specified torque.
Torque: 22 Nm (16.2 ft. lbs.)
8. Install drive belt by pushing down the auto tensioner using spanner as shown in the removal step of drive belt.
9. Install cooling fan clutch assembly and tighten the fixing bolts to the specified torque.
Torque: 10 Nm (88.5 inch lbs.)
10. Install upper fan guide and clip both side and tighten the fixing bolts to the specified torque.