
Trooper LS V6-3.5L (1998)
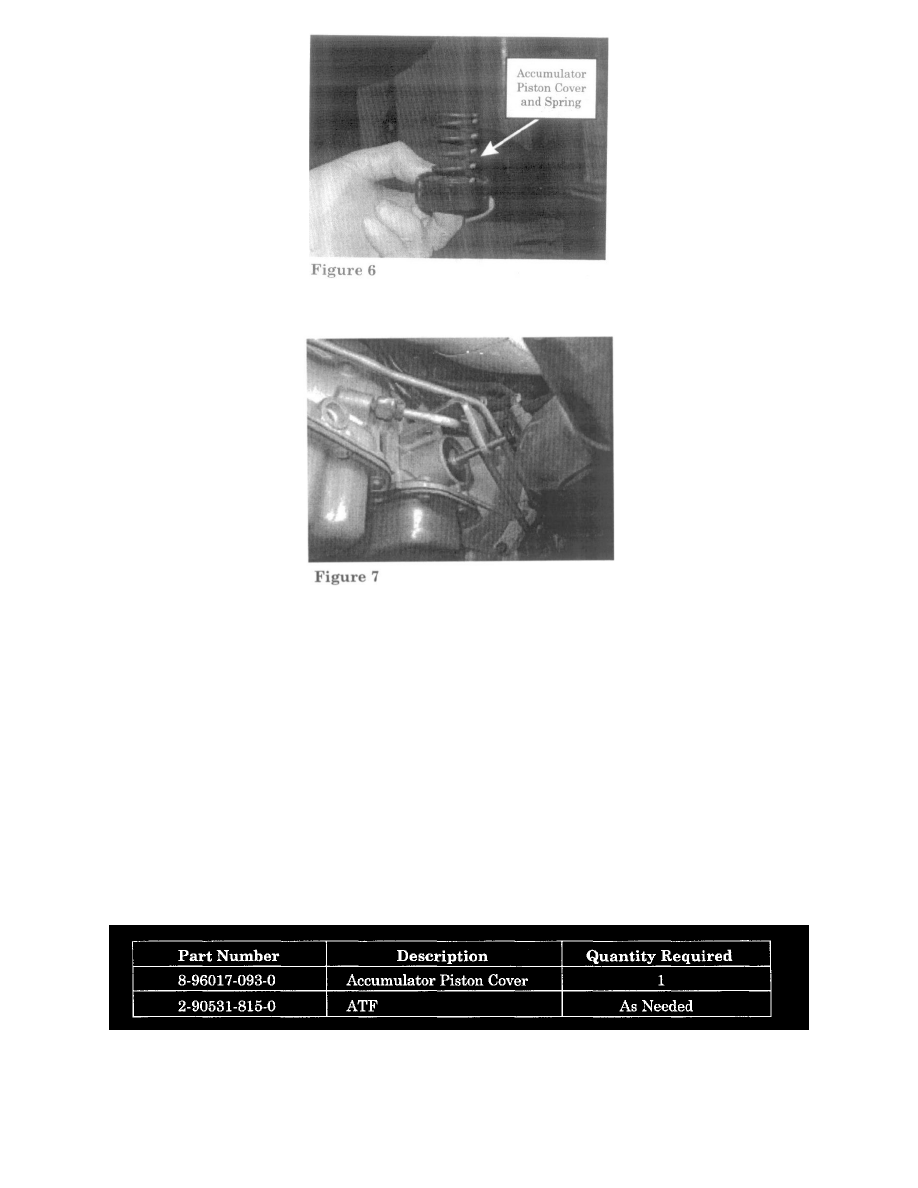
6.
Install the new accumulator piston cover and original spring using special tool J-38559-A (Figure 5 & 6).
7.
Tighten the J-28559-A tool until the new accumulator piston is seated completely (Figure 7). With the tool still in place reinstall the snap ring.
NOTE:
To prevent future leakage or failure the snap ring needs to be installed and secured in the installation groove.
8.
Remove the J-38559-A special tool.
9.
Reinstall the fuel/line harness-mounting bolt, ATF cooler return line bracket and connect the transmission line.
10.
Lower the vehicle and connect the Tech 2. Start the engine and bring up to normal operating temperature.
11.
After the vehicle reaches normal operating temperature raise the vehicle and check for any leaks. Check for correct transmission fluid level using
the procedure in the appropriate workshop manual. Be sure to tighten the overfill screw after the proper level is reached.
NOTE:
If it is necessary to add fluid, USE ONLY DEXTRON III-G or equivalent.
12.
Lower the vehicle and clear and remove the Tech 2.
PARTS INFORMATION
WARRANTY CLAIM INFORMATION