
Rio5 L4-1.6L (2006)
9. After applying the specified fluid and grease to the pinion valve assembly (A), install it in the rack housing assembly.
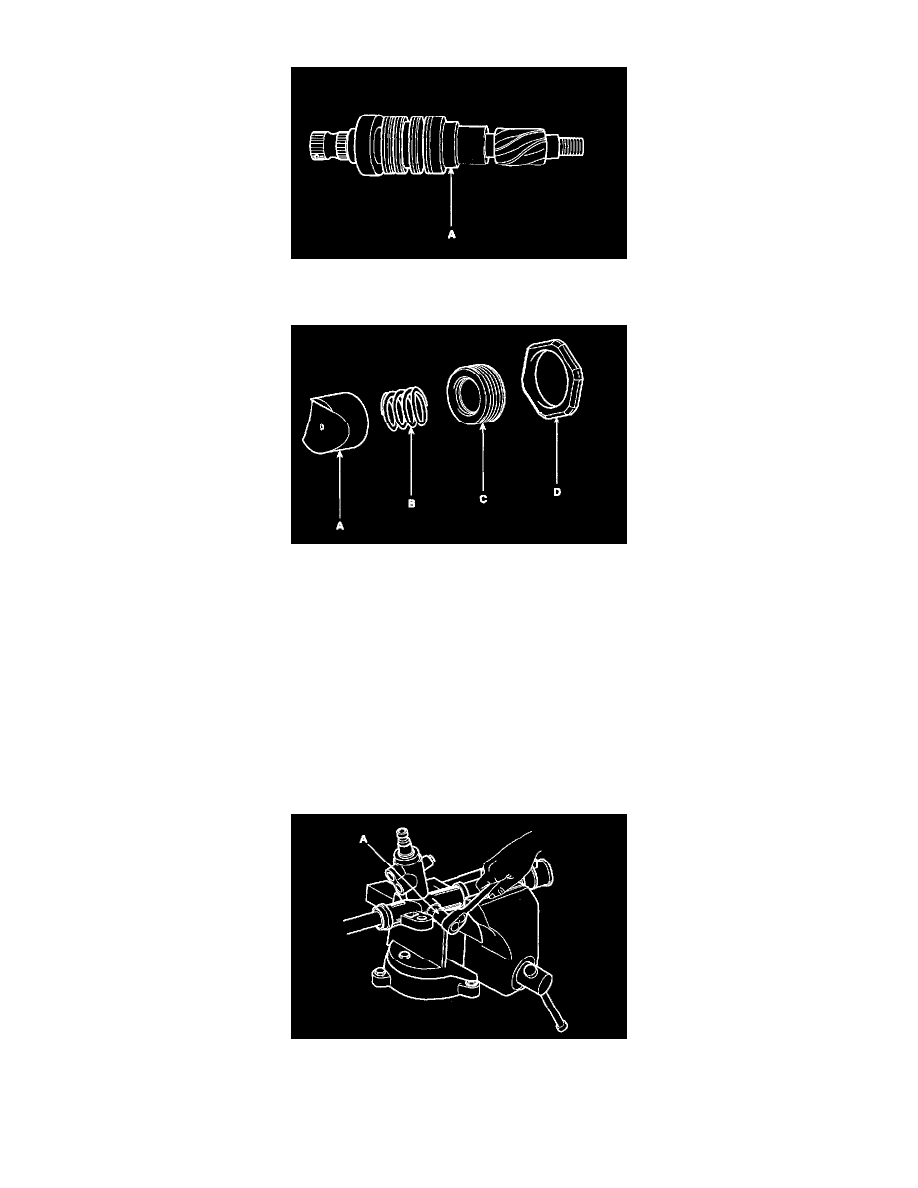
10. Install the rack support yoke (A), rack support spring (B), yoke plug (C) and lock nut (D) in the order shown in the illustration. Apply semi-drying
sealant to the threaded section of the yoke plug before installation.
11. Install the locking nut with a specified torque, after adjusting the rack support yoke as following instruction.
1) Place the rack in the center position.
2) Tighten the yoke plug with a specified torque.
Specified torque Nm (kgf-m, ft. lbs.):
Manual 9 - 11 (0.9 - 1.1, 6.5 - 7.9), Power 20 (2, 14.5)
3) Reciprocate the rack slowly 5 times.
4) Place the rack in the center position again, and then loosen the yoke plug.
5) Tighten the yoke with a specified torque, and turn at a certain degree in reverse.
Specified torque Nm (kgf-m, ft. lbs.):
Manual 4.5 - 6.5 (0.45 - 0.65, 3.25 - 4.70), Power 5 - 6 (0.5 - 0.6, 3.62 - 4.34)
Reverse angle: 25° ± 5° (Manual), 35° (Power)
6) Tighten the yoke lock nut without moving yoke plug.
Specified torque Nm (kgf-m, ft. lbs.)
Manual 40 - 50 (4 - 5, 28.9 - 36.2), Power 50 - 60 (5 - 6, 36.2 - 43.4)
12. Tighten the feed tube (A) to the specified torque and install the mounting rubber using adhesive.
Tightening torque: 25 - 30 Nm (2.5 - 3 kgf-m, 18.0 - 21.7 ft. lbs.)