
Sephia GS Sedan L4-1.8L (1997)
Brake Pad: Service and Repair
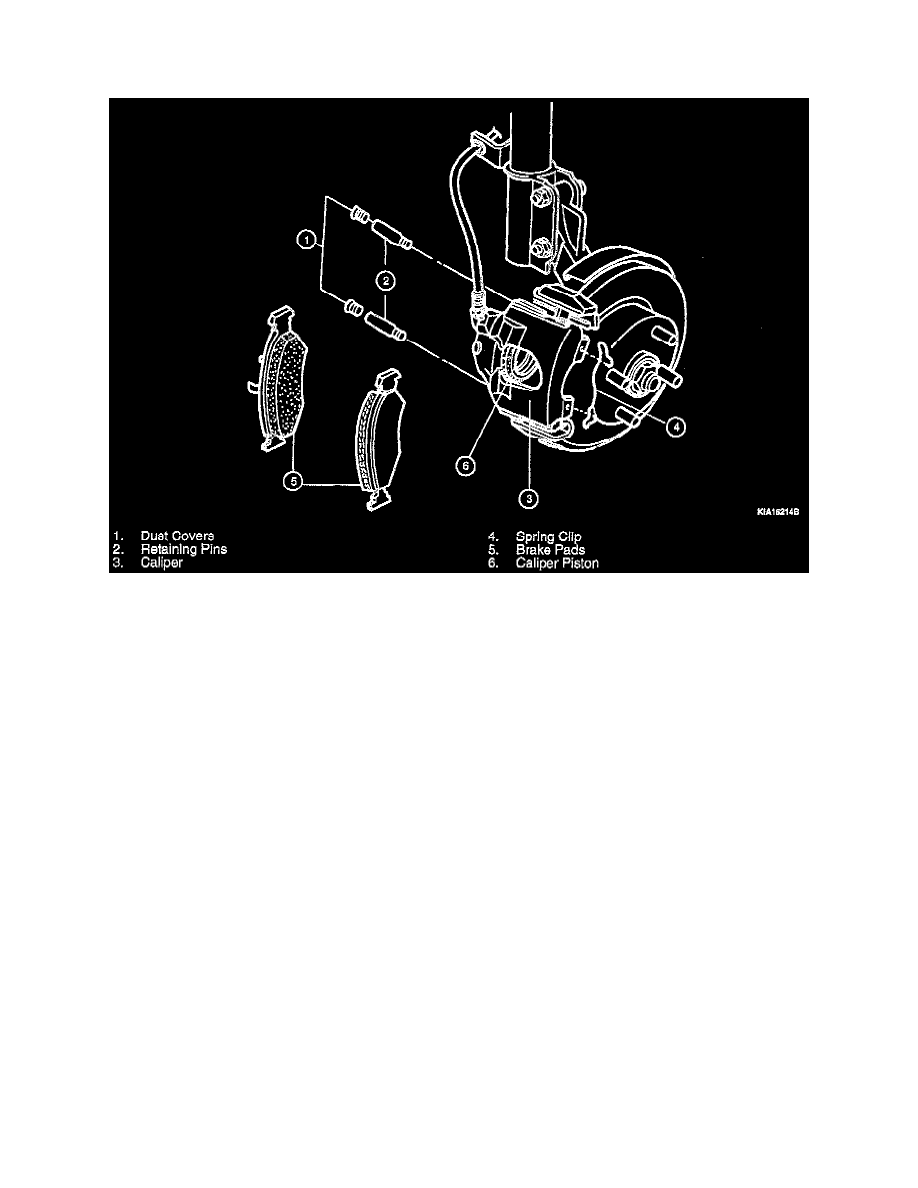
Front
NOTE: Do not disconnect brake hose from the caliper for this procedure.
1. Raise and properly support the front of the vehicle.
2. Remove the front wheels.
3. Remove the two plastic dust covers and unscrew the two caliper retaining pins.
4. Remove the caliper.
5. Remove the spring clip.
6. Remove the brake pads.
7. Compress the caliper piston with a suitable tool. Do not scratch or damage the piston or its cylinder. If the reservoir is filled to the MAX level line,
this procedure may cause fluid to overflow. Be prepared to catch overflowing fluid.
8. To prevent brake hose damage, tie the caliper to the chassis with wire.
9. Install new pads, if necessary.
10. Mount caliper onto the bracket and install the spring clip.
11. Lubricate and install the caliper retaining pins.
-
Tightening torque: 20-28 Nm (15-21 ft. lbs.).
12. Install plastic dust covers.
13. Fill the brake fluid reservoir to the MAX level line with new brake fluid, if required. Use only SAE J1703 DOT-3 or DOT-4.