
Sephia Sedan L4-1.6L SOHC 16V (1993)
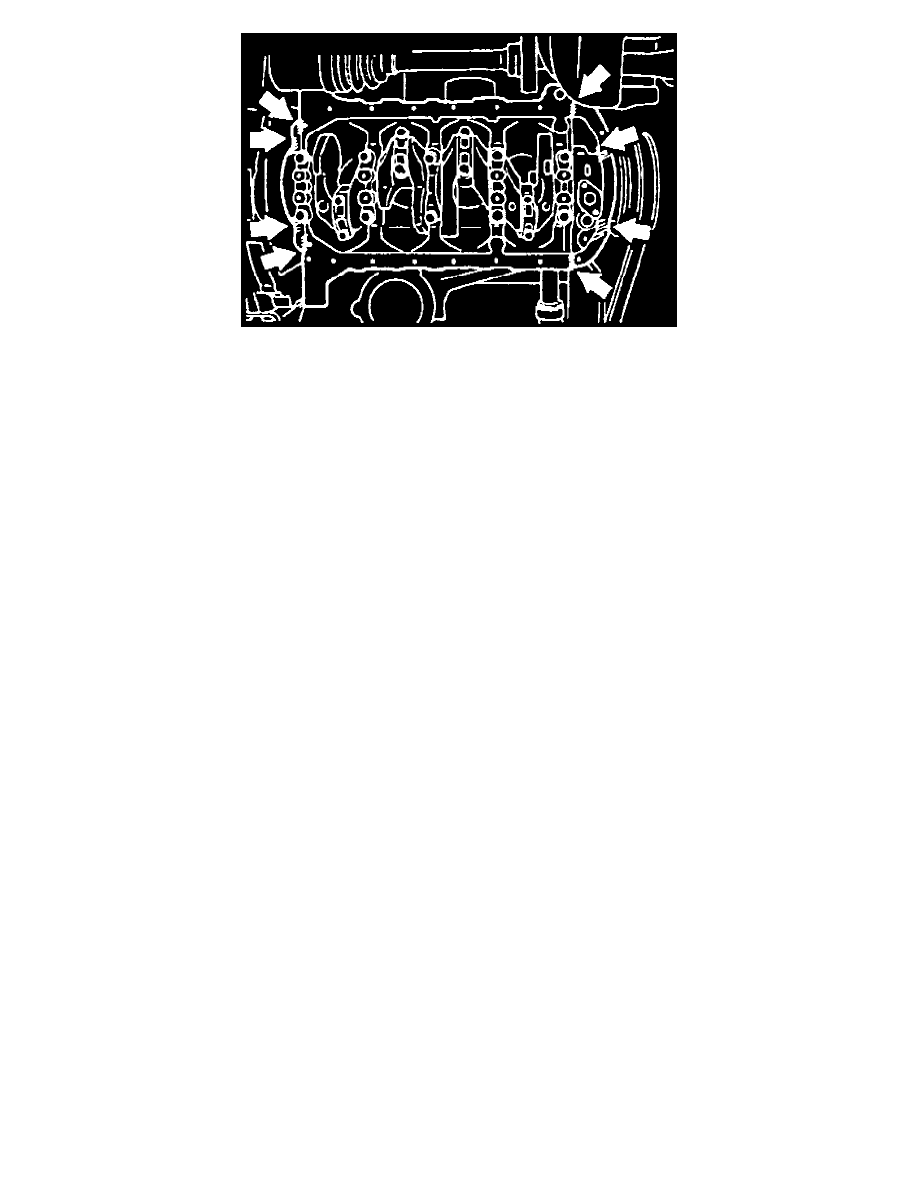
Fig. 25 Oil Pan Prying Locations
3. Remove oil pan bolts in numbered sequence shown in Fig. 24, noting the following:
a. Do not force tools between cylinder block and oil pan. Do not damage contact surfaces when removing old sealant.
b. Insert screwdriver or suitable tool only at the points shown in Fig. 25.
c. Remove main bearing support plate mounting bolt to main bearing cap.
d. Using a suitable screwdriver of pry bar, carefully pry between main bearing support plate and cylinder block. Do not damage or deform the
main bearing support plate or damage contact surfaces.
4. Reverse procedure to install, noting the following:
a. Remove all foreign material from contact surfaces of cylinder and main bearing support plate. Oil pan must be installed with 30 minutes after
sealant is applied.
b. Apply continuous bead of silicone sealant to main bearing support plate along inside of bolt holes.
c. Install main bearing support plate. Tighten to specifications in two or three steps. If bolts are reused, remove old sealant from bolt threads.
d. Remove all foreign material from contact surfaces, then apply silicone sealant to contact surfaces of new oil pan gasket.
e. Install new gaskets onto oil pump body and rear cover.
f.
Apply continuous bead of silicone sealant to oil pan along inside of bolt holes and overlap the ends.
g. Tighten oil pan bolts to specifications and check oil level and add oil if necessary.
5. On models equipped with airbag system, refer to Technician Safety Information for system disarming and arming procedures.