
Sportage 4WD 2Dr L4-2.0L (2002)
Shifter Transfer Case: Service and Repair
TRANSFER LEVER
Removal
1. Remove the rear portion of the console.
a. Remove two screws from rear of console.
b. Raise emergency brake handle.
2. Loosen the locknuts, then unscrew and remove the knobs from the transfer lever and shift change lever.
3. Remove three screws from the front portion of the console and remove the console. Slide the boots up and over the shift change and transfer levers
and remove the console.
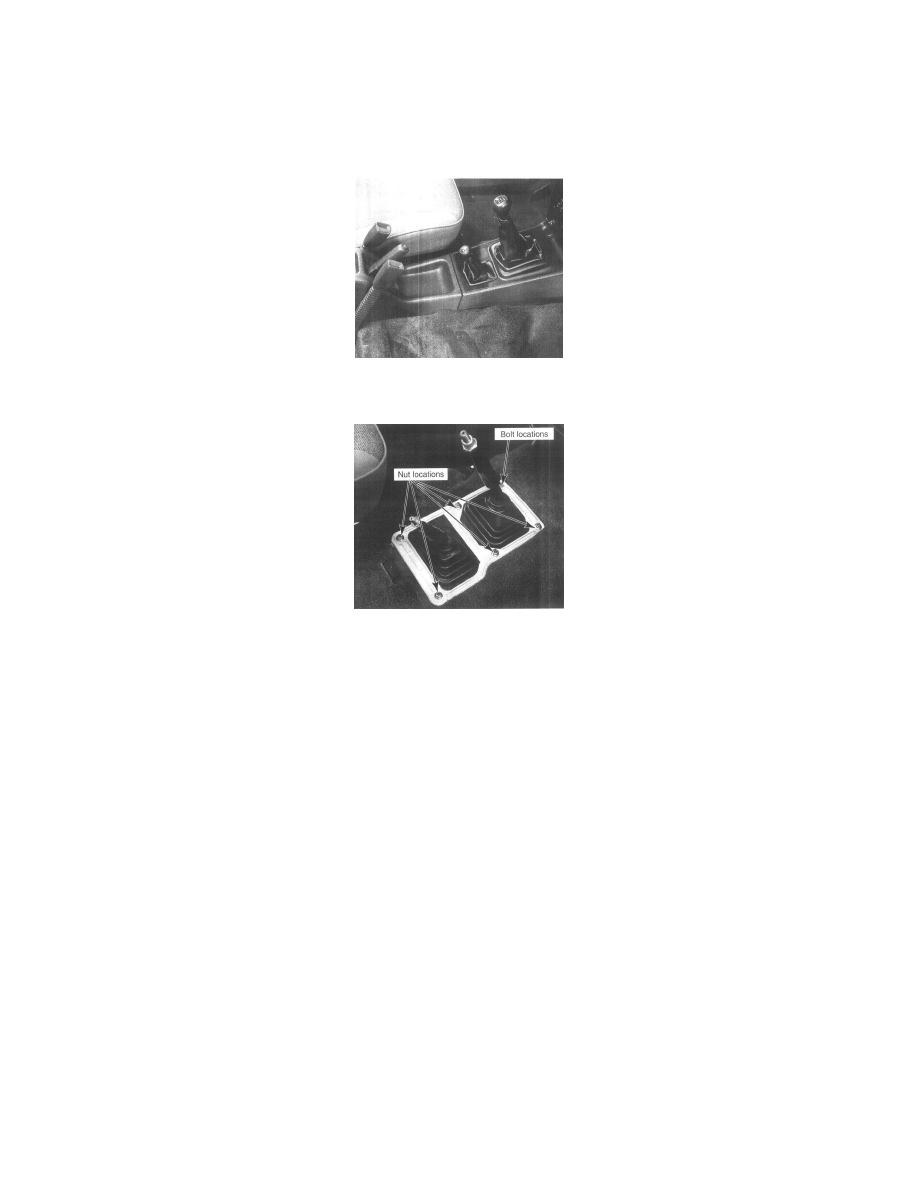
4. Remove the dust cover plate.
a. Remove five nuts and one bolt.
b. Remove the plate.
5. Remove the dust cover over the shift change and transfer levers.
6. Remove the transfer lever.
a. Remove five bolts.
b. Remove the transfer lever.
c. Set aside the clip on the forward bolt.
Inspection
1. Inspect the transfer lever for wear, distortion or damage. Inspect the rod end that goes into the transfer case for excessive wear or damage.
2. Inspect the spring and seal for excessive wear or damage.
3. Inspect the visible portions of the shifter mechanism in the transfer case for excessive wear or damage. If damaged, refer to "Unit Repair".
Installation
1. Apply silicone sealer to the transfer lever assembly base plate and reinstall the transfer lever assembly and the wire harness clip on the forward
bolt.
Tighten the five bolts to 20 ft. lbs. (27 Nm).
2. Reinstall the dust cover over the shift change and transfer levers.
3. Reinstall the dust cover plate.
Tighten the five nuts and one bolt to 15 ft. lbs. (20 Nm).
4. Reinstall the front console and tighten the three screws.
5. Reinstall the rear console and tighten the two screws.
6. Reinstall the shift knob and transfer lever knob.