
300Tdi Defender
ENGINE
21
REPAIR
12. Remove induction manifold.
See MANIFOLD
AND EXHAUST SYSTEM, Repair, Induction
manifold
13. Remove exhaust manifold and turbocharger
assembly.
See MANIFOLD AND EXHAUST SYSTEM,
Repair, Exhaust manifold
14. Disconnect heater hose from water pump and
move heater rail aside.
15. Disconnect heater hose from rear of cylinder
head.
16. Remove bolt securing air cleaner mounting
bracket to support strut.
17. Remove bolt securing harness bracket to
cylinder head.
18. Remove rear engine lifting bracket. This will also
release clips securing transmission and engine
breather pipes and multi-plug. Note loose spacer
beneath inner clip.
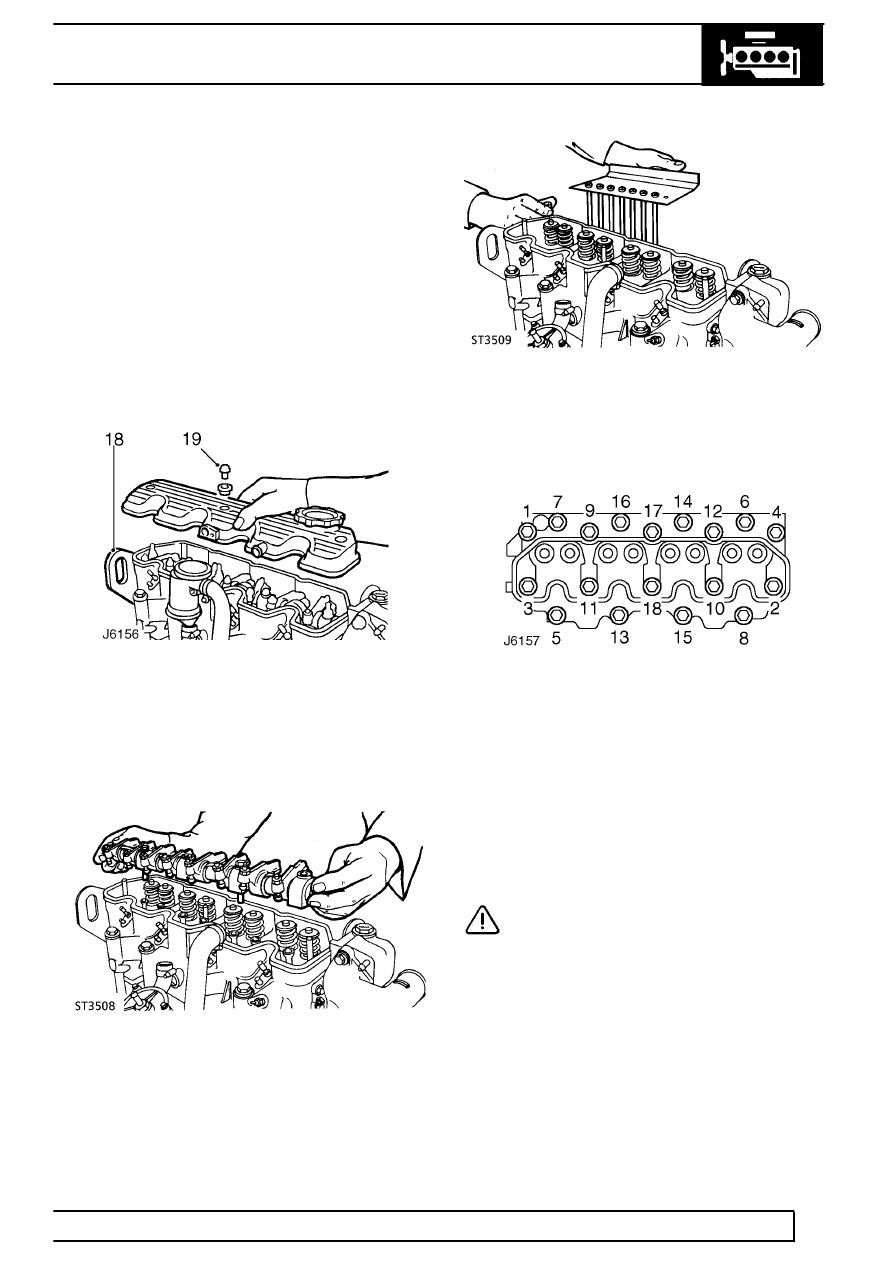
19. Unscrew 3 bolts, with sealing washers and
remove rocker cover.
20. Remove 3 nuts and 2 bolts and lift rocker shaft
assembly from cylinder head.
21. Remove push rods and store as an identified set
to allow refitment to same location.
22. Remove valve stem caps.
23. Evenly slacken and then remove cylinder head
to block retaining bolts in the sequence shown in
J6157. Two of the bolts also secure the air
cleaner mounting bracket.
24. Lift off cylinder head and remove gasket.
Refit
25. Thoroughly clean mating faces of cylinder block
and head.
26. Select new gasket of correct thickness.
CAUTION: Three gaskets, of different
thicknesses, are available and can be
identified by the number of small holes
punched in the RH side of the gasket. One hole
identifies the thinnest gasket, two holes the
middle thickness and three holes the thickest.
When renewing a gasket it must be of the same
thickness as the one removed.
27. Position gasket on cylinder block with
identification holes on RH side and TOP
identification mark uppermost.