
300Tdi Defender Rear Axle and Final Drive Assembly 329
REAR AXLE AND FINAL DRIVE
9
OVERHAUL
Differential backlash checks
96. Pick up differential unit as left after instruction
52.
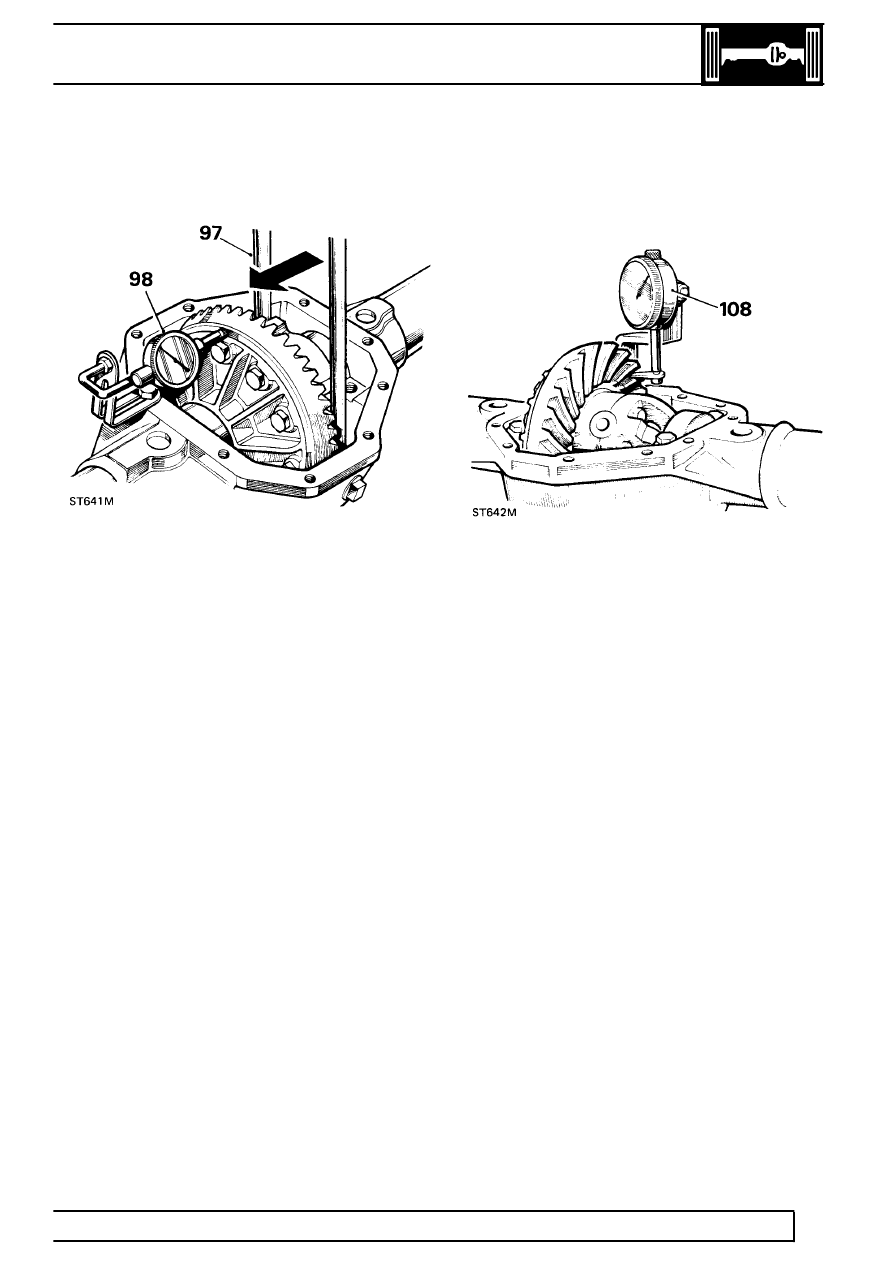
97. Fit differential unit and lever unit away from drive
pinion until opposite bearing cup is seated
against housing. Do not tilt unit.
98. Install a dial gauge on casing with its stylus
resting on back face of crown wheel. Zero the
gauge.
99. Lever differential unit to engage crown wheel
teeth in full mesh with drive pinion teeth. Do not
tilt unit.
100. Note total reading obtained on dial gauge.
101. From this figure subtract 0,25 mm to obtain
correct crown wheel backlash when fitted. The
result indicates value of shimming to be fitted
between differential case and bearing cone at
crown wheel side of differential.
102. Fit shim value determined in instruction 101,
taking shims from pack previously determined
during ’Differential bearing adjustment’ checks,
instructions 57 to 62 LRT-51-500 details 1 and 2,
press LRT-99-002, and LRT-51-504.
103. Fit remaining shims from instruction 101 to
opposite side of differential. LRT-51-501 details
1 and 2, press LRT-99-002, and LRT-51-504.
104. Fit differential unit with shims and bearings to
axle casing, using axle spreader LRT-51-503
with pegs 18G131F.
105. Remove axle spreader.
106. Fit bearing caps in their correct position,
referring to relationship markings on caps and on
axle casing.
107. Tighten bearing caps fixings to
135 Nm (100
lbf/ft).
108. Mount a dial gauge on axle casing with stylus
resting on a crown wheel tooth.
109. Prevent drive pinion from rotating and check
crown wheel backlash which must be 0,15 to
0,27 mm. If backlash is not within specified
limits, repeat differential backlash checks,
instructions 96 to 102 looking for possible errors.
110. Fit differential cover and new gasket, coating
both sides of gasket with Hylomar PL 32M or an
equivalent non-setting sealant. Torque load for
fixings is
30 Nm (22 lbf/ft).
111. Reverse instructions 3 to 5 and coat threads of
hub driving member bolts with Loctite ’Studlock’
grade CVX and fit and tighten bolts evenly to
correct torque.
112. Fit rear axle assembly to vehicle
See Repair,
Rear axle .
113. Replenish differential with recommended
lubricant
See LUBRICANTS, FLUIDS AND
CAPACITIES, Information, Recommended
lubricants and fluids . After initial axle run,
check oil level and replenish as necessary to
filler/level plug hole.
114. Where major running parts have been replaced
during servicing, it is a recommended practice to
allow axle assembly to ’run in’ by avoiding,
where possible, heavy loads and high speeds
during initial running.