
TD5 Defender
TRANSFER GEARBOX
1
REPAIR
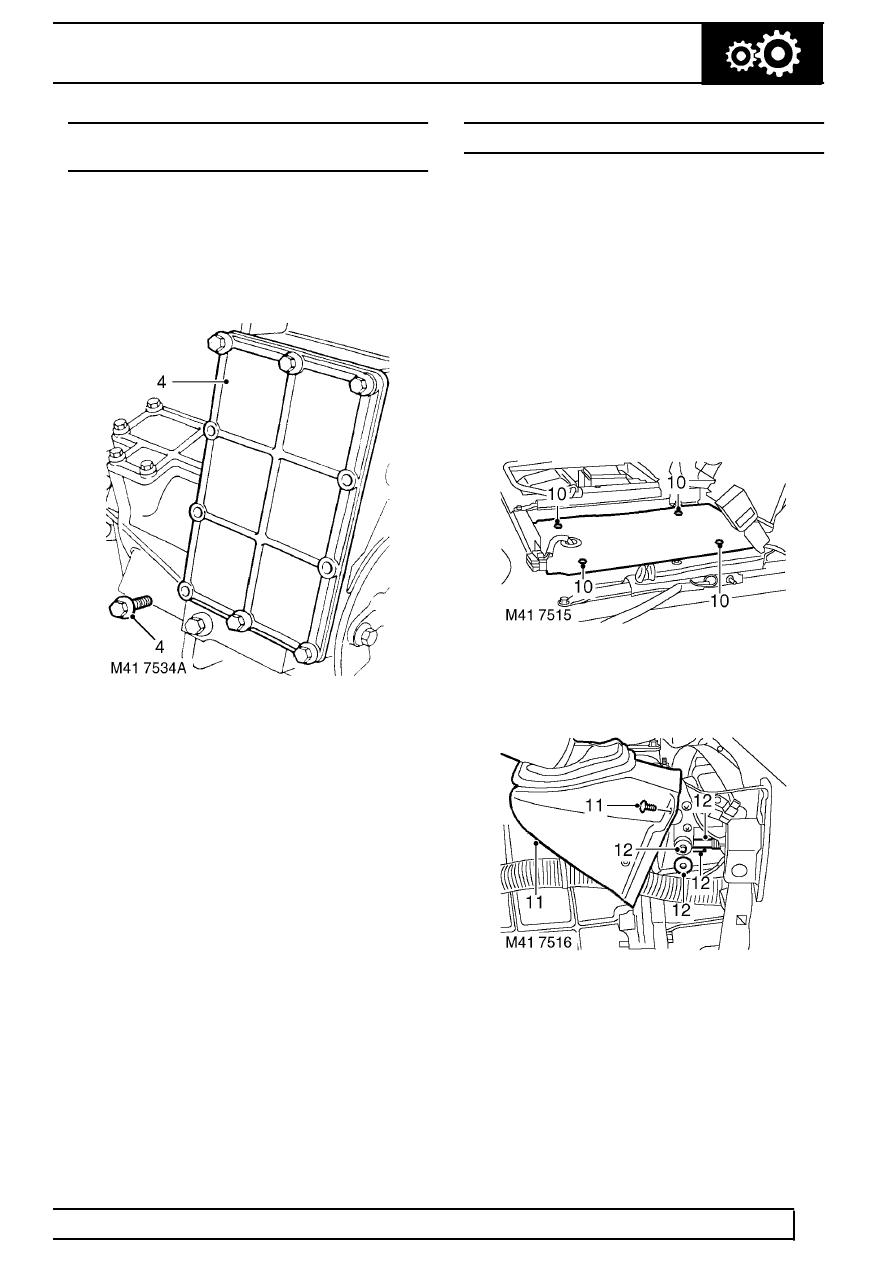
BOTTOM COVER - TRANSFER GEARBOX -
RESEAL
Service repair no - 41.20.06
1. Raise vehicle on ramp.
2. Remove 6 bolts securing rear underbelly panel
and remove panel.
3. Drain transfer gearbox oil.
4. Remove 10 bolts securing bottom cover to
transfer gearbox and remove cover.
Refit
5. Clean bottom cover and mating face on transfer
gearbox.
6. Clean bolt threads.
7. Apply Loctite 290 to bolt threads.
8. Apply Hylosil RTV sealant to bottom cover
sealing face.
9. Position bottom cover, fit bolts and tighten to 25
Nm (18 lbf.ft).
10. Fill transfer gearbox with oil.
11. Fit rear underbelly panel and tighten bolts.
12. Lower vehicle on ramp.
TRANSFER GEARBOX
Service repair no - 41.20.25.99
Remove
1. Position vehicle on a ’4 post’ ramp
2. Remove battery cover.
3. Disconnect battery negative lead.
4. Select low range gear and leave vehicle in
neutral.
5. Remove gear lever knobs.
6. Remove gearbox tunnel carpet.
7. Remove gear lever cover.
8. Release and remove insulation pad.
9. Remove cubby box. See CHASSIS AND
BODY, Repair.
10. Remove 4 screws securing access panel,
diagnostic plug mounting bracket and place
aside.
11. Remove trim stud and lift up handbrake gaiter for
access to clevis pin.
12. Remove split pin, washer, clevis pin and
disconnect cable from handbrake lever.