
Discovery II
HEATING AND VENTILATION
REPAIRS
80-25
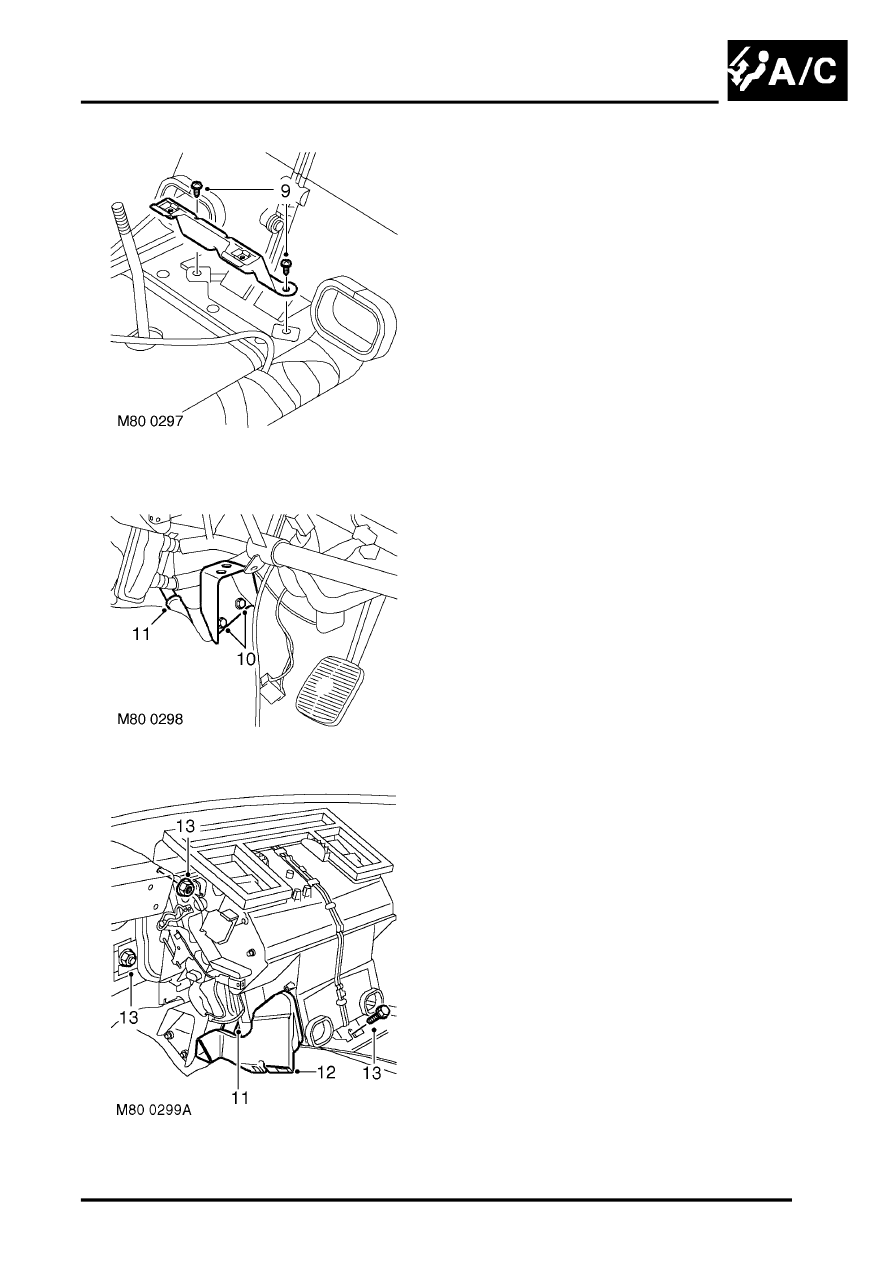
9. Remove 2 screws securing centre console
support bracket and remove bracket.
10. Remove 2 nuts securing RH fascia support
bracket and remove bracket.
11. Disconnect both evaporator drain hoses.
12. Remove front heater ducting.
13. Remove 4 nuts and bolt securing heater
assembly, release heater assembly from
bulkhead grommet and remove from vehicle.
Refit
1. Position heater assembly to bulkhead, locate
heater in bulkhead grommet.
2. Fit nuts and bolt securing heater and tighten to
16 Nm (12 lbf.ft).
3. Position RH fascia support bracket, fit and
tighten nuts.
4. Fit front heater ducting.
5. Position centre console support bracket, fit and
tighten screws.
6. Connect evaporator drain hoses.
7. Position heater motor to heater casing, fit nuts
and bolt and tighten to 19 Nm (14 lbf.ft).
8. Connect multiplug heater motor.
9. Position rear heater ducting and secure with
screws.
10. Fit fascia.
11. Using new 'O' rings, position air conditioning
pipes to evaporator fit bolts and tighten to 5 Nm
(3.7 lbf.ft).
12. Position heater hoses and secure hose clips.
13. Recharge air conditioning system.
RECOVERY, RECYCLING AND
RECHARGING, Refrigerant recovery,
recycling and recharging.
14. Refill cooling system.
l
ADJUSTMENTS, Drain and refill.
l