
Discovery II
PANEL REPAIRS
REPAIRS 77-2-33
Front valance assembly - RH
Remove
1. Disconnect battery eath lead.
2. Remove front bulkhead assembly.
3. Remove engine compartment fusebox and
related wiring.
4. Remove radiator expansion tank from
mountings and position aside.
5. Petrol models: Remove cruise control
actuator mounting bracket.
6. Diesel models: Remove EGR modulator
mounting bracket.
7. RHD models: Remove brake servo.
BRAKES, REPAIRS, Servo - brake.
8. Remove brake pipes from valance assembly.
9. Remove RH road wheel.
10. Remove RH front mud flap.
11. Remove insulation pad from engine bulkhead.
12. Remove windscreen side finisher.
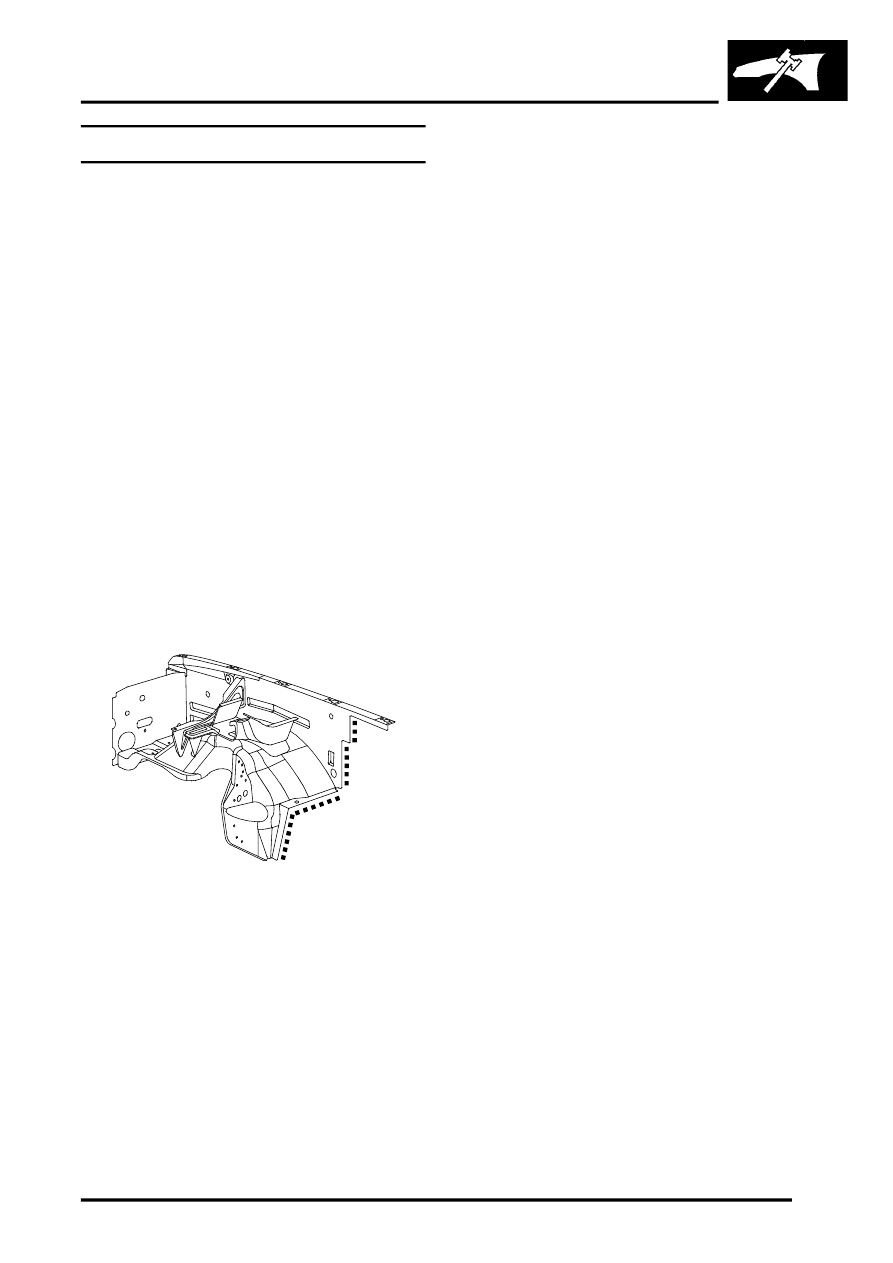
Repair
1. Remove existing panel(s), prepare panel joint
faces and install new panel(s) in accordance
with Panel Replacement Procedure. Punch or
drill holes in new panel for plug welding as
shown.
Refit
1. Fit windscreen side finisher.
2. Fit insulation pad to engine bulkhead.
3. Fit front mud flap.
4. Fit road wheel and tighten nuts to 140 Nm (103
lbf.ft).
5. Fit brake pipes to valance assembly.
6. RHD models: Fit brake servo.
7. Diesel models: Fit EGR modulator mounting
bracket.
8. Petrol models: Fit cruise control actuator
mounting bracket.
9. Fit radiator expansion tank.
10. Fit fusebox and secure wiring.
11. Fit front bulkhead assembly.
12. Connect battery leads, negative lead last.
M77 1694A