Discovery II

SCREENS
REPAIRS
76-4-5
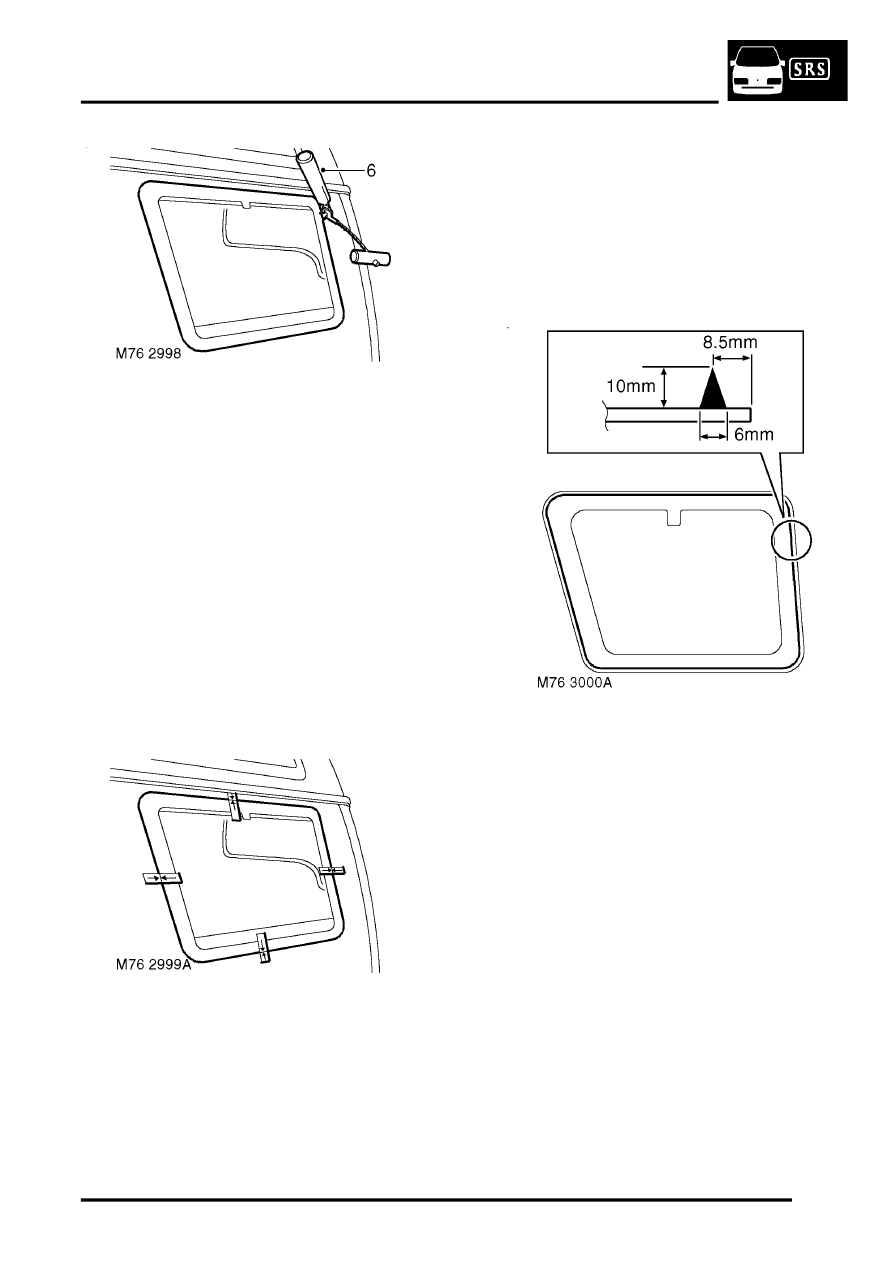
6. From outside of vehicle, use a Kent knife and
carefully cut through sealant to release glass
from body. Any remaining sealant not
accessible with Kent knife can be severed
using cutting wire or knife.
CAUTION: Hold the cutting wire as close to
the glass as possible to prevent damage to
the body and surrounding trim.
7. Remove glass.
CAUTION: Lay glass on felt covered
supports and be careful not to damage the
obscuration band. Do not stand on edge as
this can cause chips which subsequently
develop into cracks.
Refit
1. Carefully remove sealant from body to leave a
smooth surface.
2. With assistance, fit glass without sealant to
body and apply masking tape to establish
reference marks as an alignment aid.
3. Remove glass and place aside.
4. Clean body and sealant face on glass with
solvent.
CAUTION: Do not touch cleaned or primed
surfaces with fingers.
5. Apply etch primer to any bare metal on body.
6. Apply glass primer to sealant face on glass and
allow to cure.
7. Apply primer over etch primer on body.
8. Apply activator over old sealant on body.
9. Allow activator to cure.
10. Fit pre-cut nozzle to sealant cartridge, remove
lid, shake out crystals, and fit cartridge to
applicator gun. If necessary modify the nozzle
to achieve required bead section.
11. Apply a continuous bead of sealant to sealant
face on glass as shown.
12. Position glass to body and align to reference
tape.
13. Lightly press glass to ensure correct profile.
14. Secure glass with tape until sealer has cured.
15. Remove protective covers and tape.
16. If applicable, connect coaxial cable to terminal
on glass
17. Test sealer for leaks, apply additional sealer if
necessary. If water is used, allow sealer to dry
before testing. Spray water around glass and
check for leaks. Mark any area that leaks. Dry
glass and sealer then apply additional sealer.
CAUTION: A curing time of 6 hours is
desirable. During this time leave a window
open to ventilate the vehicle interior. If the
vehicle must be used before the curing time
has elapsed, do not drive at speed or slam
the doors with the windows closed.
