300Tdi Discovery

12
ENGINE
6
REPAIR
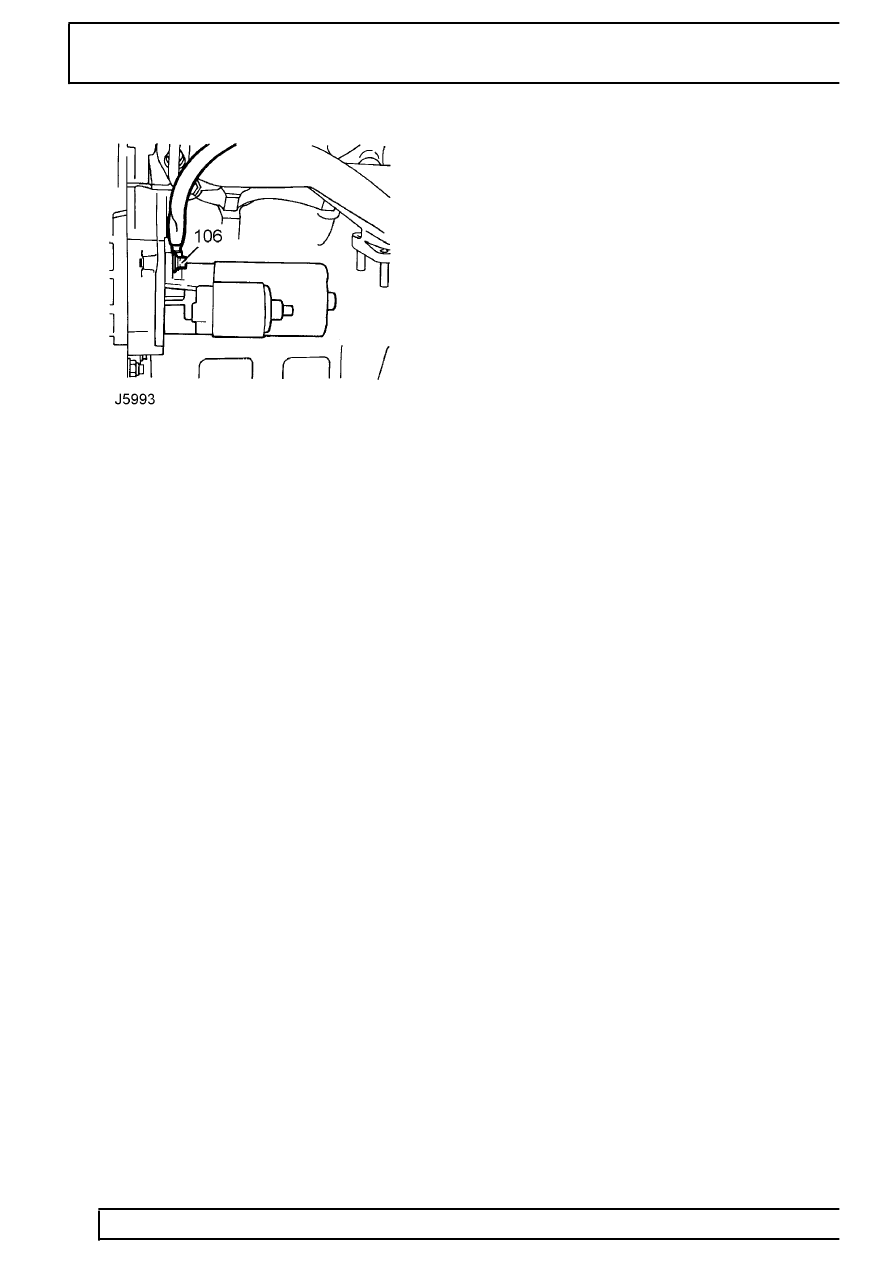
106. Remove top starter bolt securing engine earth
cable.
107. Remove nut securing kick-down cable clip to LH
cylinder head.
108. With assistance, raise engine, move aside all
pipes and wires. Move engine clear of vehicle.
109. Lower engine onto bench.
Refit
110. Clean engine and gearbox mating faces.
111. Clean dowel and dowel holes.
112. With assistance raise engine off bench. Lower
and guide engine into engine compartment
ensuring no wires or pipes become trapped.
113. Position clip securing kick-down cable to LH
cylinder head.
114. Fit and tighten nut.
115. Position engine earth cable and secure to starter
with top bolt. Tighten to
45 Nm.
116. Lower engine.
117. With assistance, engage engine with gearbox.
118. Fit 3 bottom bell housing bolts. Tighten to
46
Nm.
119. Lower jack supporting gearbox.
120. Lower engine onto mounting brackets.
121. Fit centre RH bell housing bolt.
122. Fit centre LH bell housing bolt.
123. Fit harness brackets to 2 top bell housing bolts.
124. Fit bolts. Tighten to
46 Nm.
125. Remove plugs from tranmission and oil cooler
pipe.
126. Clean pipe, lubricate NEW ’O’ ring and fit to
pipe.
127. Connect pipe to transmission and secure with
union. Tighten to
30 Nm.
128. Align pipe bracket to sump, position spacer and
fit bolt. Tighten to
18 Nm.
129. Fit heatshield and secure with nut.
130. Secure transducer lead to clip on heatshield.
131. Slacken bell housing access plate bolt.
132. Move plate aside.
133. Remove block.
134. Align drive plate and torque converter.
135. Fit 2 torque converter bolts.
136. Rotate engine and fit second 2 bolts. Tighten to
45 Nm.
137. Rotate engine and tighten first 2 bolts to Tighten
to
45 Nm.
138. Clean cover plate and mating face.
139. Position cover plate and fit bolts. Tighten to
45
Nm.
140. Position access plate.
141. Fit 2 remaining bolts and tighten all bolts to
Tighten to
9 Nm.
142. Position engine harness around engine.
143. Connect knock sensor multiplug.
144. Connect starter solenoid Lucar.
145. Position starter motor heatshield and secure clip
to solenoid.
146. Align shield bracket to engine mounting bracket
and fit bolt. Tighten to
9 Nm.
147. Clean crankshaft sensor mating faces.
148. Position sensor and connect multiplug.
149. Position/align sensor and shield to backplate. Fit
bolts. Tighten to
6 Nm.
150. Fit tie bar, align to transmission and fit bolts.
Tighten to
25 Nm.
151. Fit tie bar securing nut. Tighten to
45 Nm.
152. Fit catalytic converter/front pipe assembly.
See
EMISSION CONTROL, Repair, Catalytic
Converter/Front Pipe - 4.0 V8
153. Raise engine.
154. Fit RH mounting rubber.
155. Move engine over.
156. Fit LH mounting rubber.
157. Lower engine.
158. Disconnect hoist.
159. Fit engine mounting nuts. Tighten to
55 Nm.
160. Remove plugs from steering pump and steering
box.
161. Clean PAS hose unions.
162. Lubricate ’O’ rings and fit to hose unions.
163. Position hose.
164. Align unions to pump and steering box. Tighten
14mm thread to
15 Nm , 16mm thread to
Tighten to
20 Nm.
165. Remove plugs from feed hose and PAS pump.
166. Connect hose to pump and tighten clip.
167. Untie compressor and position to engine
bracket.
168. Position heatshield and fit bolts. Tighten to
25
Nm.
169. Connect compressor multiplug.
170. Position drive belt.
