
300Tdi Discovery
BRAKES
19
REPAIR
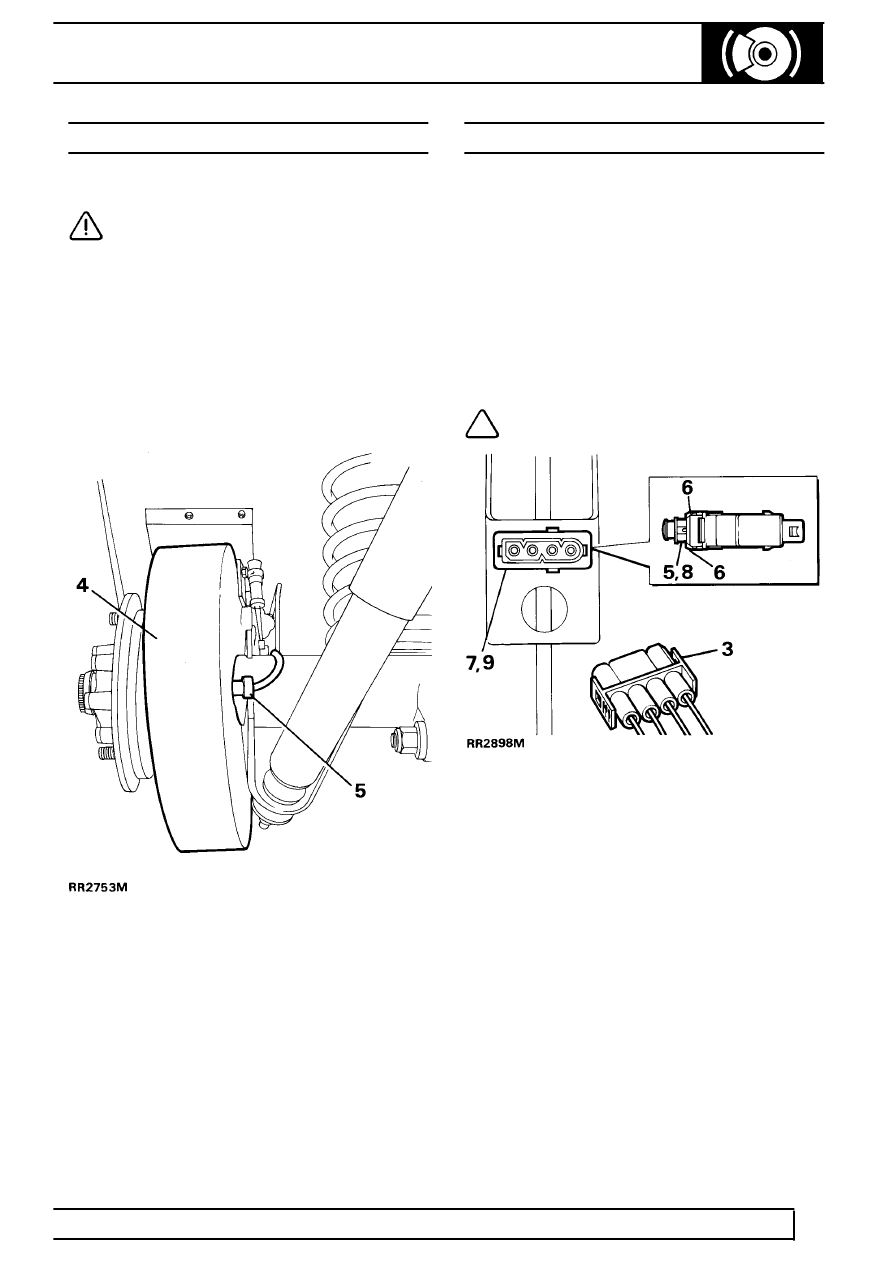
SENSORS - REAR
Service repair no - 70.65.31
CAUTION: If a sensor is removed for any
reason, a NEW sensor bush must be fitted.
Remove
1. Disconnect battery negative lead.
2. Disconnect sensor electrical connections,
located above rear axle.
3. Remove sensor from its locating clip.
4. Remove bolts securing mudshield.
5. Using a suitable lever, pry sensor from mounting
bush.
6. Release harness cable ties, remove sensor lead
from vehicle.
7. Remove sensor bush.
Refit
8. Fit new sensor bush.
9. Lightly grease new sensor using silicone grease.
See LUBRICANTS, FLUIDS AND
CAPACITIES, Information, Recommended
Lubricants and Fluids
10. Push sensor through bush until it touches exciter
ring. Sensor will be ’knocked back’ to correct
position when vehicle is driven.
11. Secure harness in position.
12. Reconnect sensor electrical connection.
13. Drive vehicle to ensure ABS warning light is
extinguished.
STOP LIGHT SWITCH ABS
Service repair no - 86.65.51
Remove
1. Turn ignition off. Disconnect battery negative
lead.
2. Remove lower trim panel.
3. Disconnect multiplug to switch.
4. Depress brake pedal access front of switch.
5. Pull sleeve and plunger of switch FULLY
forward.
6. Remove switch rearwards
NOTE: If switch is difficult to release,
check sleeve is FULLY forward.
Refit
7. Pull sleeve and plunger of switch fully forward.
8. Depress brake pedal, fit switch. Ensure retaining
clips are FULLY located.
9. Hold switch firmly in place, pull brake pedal back
fully to set switch.
10. Reconnect battery and turn ignition on.
11. Check switch operation by slowly depressing
brake pedal and checking that the switch clicks
twice.
12. Check stop lamps go off when pedal is released.
13. Recheck switch is securely fitted.
14. Operation may be checked using Testbook.