
300Tdi Discovery
76
CHASSIS AND BODY
48
REPAIR
20. Note position of levers, disconnect heater control
cables from levers and outer cable from retaining
clips.
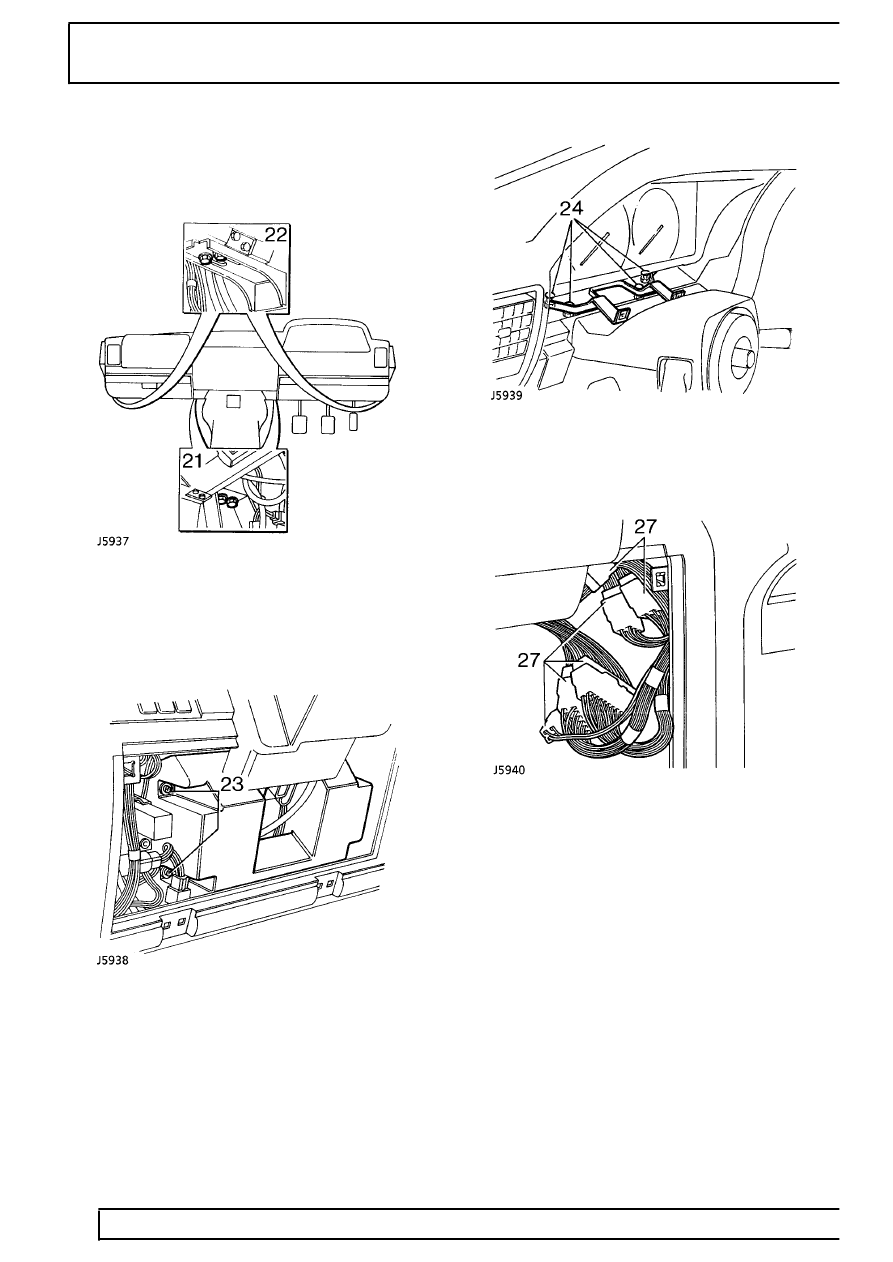
21. Remove 4 bolts securing dash panel to centre
lower mounting brackets.
22. Remove 4 bolts securing dash panel to side
lower mounting brackets.
23. Undo 4 screws and remove 2 driver’s knee
bolster pads from below steering column.
24. Remove 4 nuts securing instrument mounting
bracket to dash panel.
25. With assistance: Manoeuvre dash panel
partially rearward.
26. Driver’s side: Disconnect 6 multiplugs
connecting dash harness to main harness.
27. Disconnect 3 multiplugs connecting dash
harness to fusebox.
28. With assistance: Lift dash panel rearward to
clear fixings and remove from vehicle.