
300Tdi Discovery
76
CHASSIS AND BODY
50
REPAIR
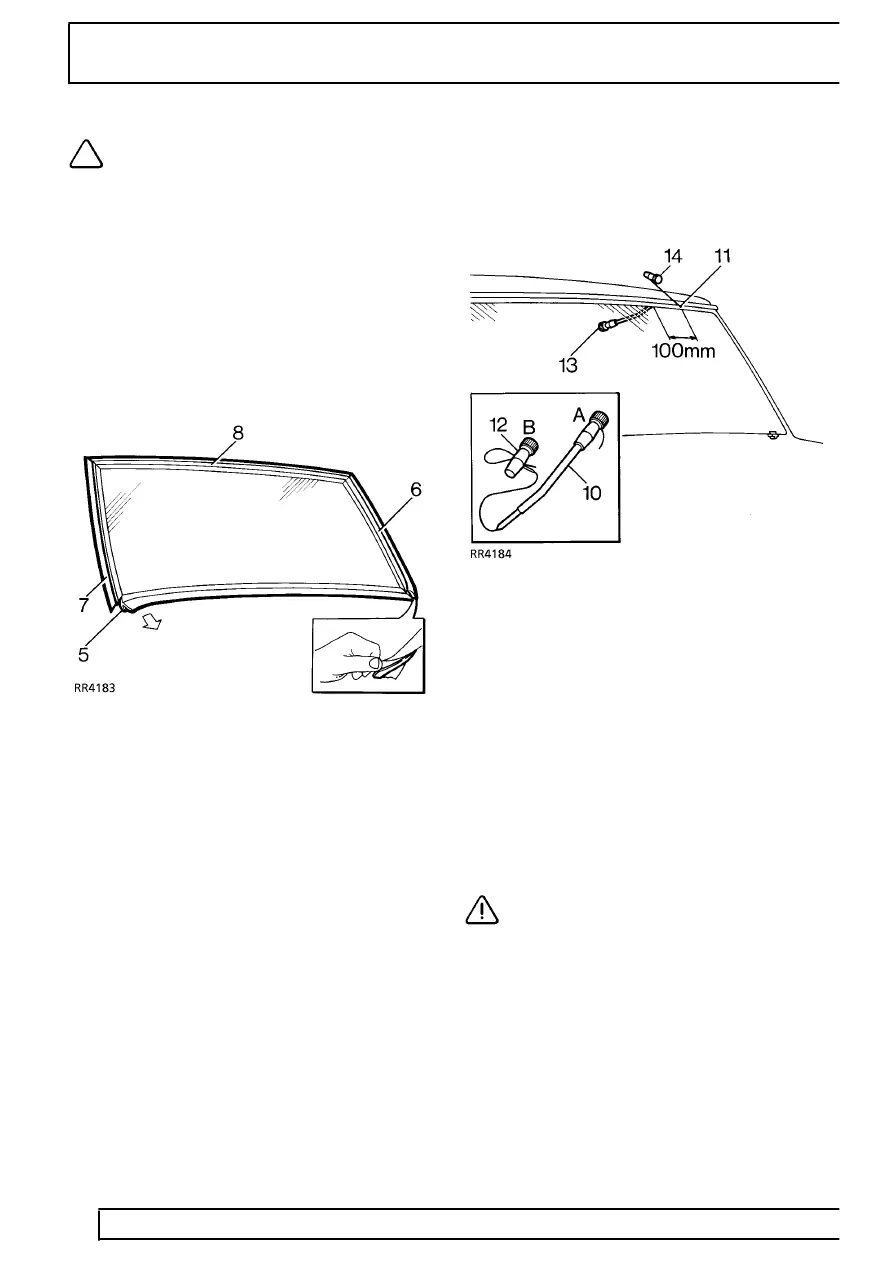
NOTE: If heated front screen: 2 electrical
multiplug connectors are located under
the decker [cowl] panel. To access release
decker panel.
Remove
1. Remove windscreen wiper arms.
See WIPERS
AND WASHERS, Repair, wiper arms -
windscreen.
2. Remove rear view mirror and stickers from
glass.
3. Remove ’A’ post finishers.
4. Fit protective cover over dash panel and apply
masking tape to protect ’A’ posts.
5. Ease one end of bottom finisher away from
glass, pull to disengage finisher flange and
remove.
6. Lift lip of LH ’A’ post finisher and release sealing
strip along its length, pull to disengage finisher
flange from glass and remove.
7. Remove RH ’A’ post finisher.
8. Remove header finisher.
9. Apply masking tape to protect paint finish around
glass.
10. Prepare cutting wire in handle ’A’. Bend end of
wire to handle and tape over end.
11. Force cutting wire through sealer from inside and
100mm (3 7/8 in) from a top corner. Use a
needle if necessary to make a pilot hole.
12. Attach handle ’B’. Allow 200mm (7 7/8 in) of wire
between handles, tape over end of wire.
13. With an assistant on the inside: Wedge the
tube of the handle ’A’ between glass and body
flange 100mm (3 7/8 in) ahead of hole in sealer.
14. From the outside: Carefully cut sealer from
flange using a straight pull away from the glass.
Continue in 100mm (3 7/8 in) steps around the
glass, use a sawing action at the corners.
CAUTION: Along the bottom edge, great
care must be taken to cut up to the 2
supports, positions indicated on the
obscuration band (See item 18).
15. Remove handle ’B’, withdraw the cutting wire
and insert it through the sealer between the
supports. Refit handle ’B’.