
300Tdi Discovery
CHASSIS AND BODY
51
REPAIR
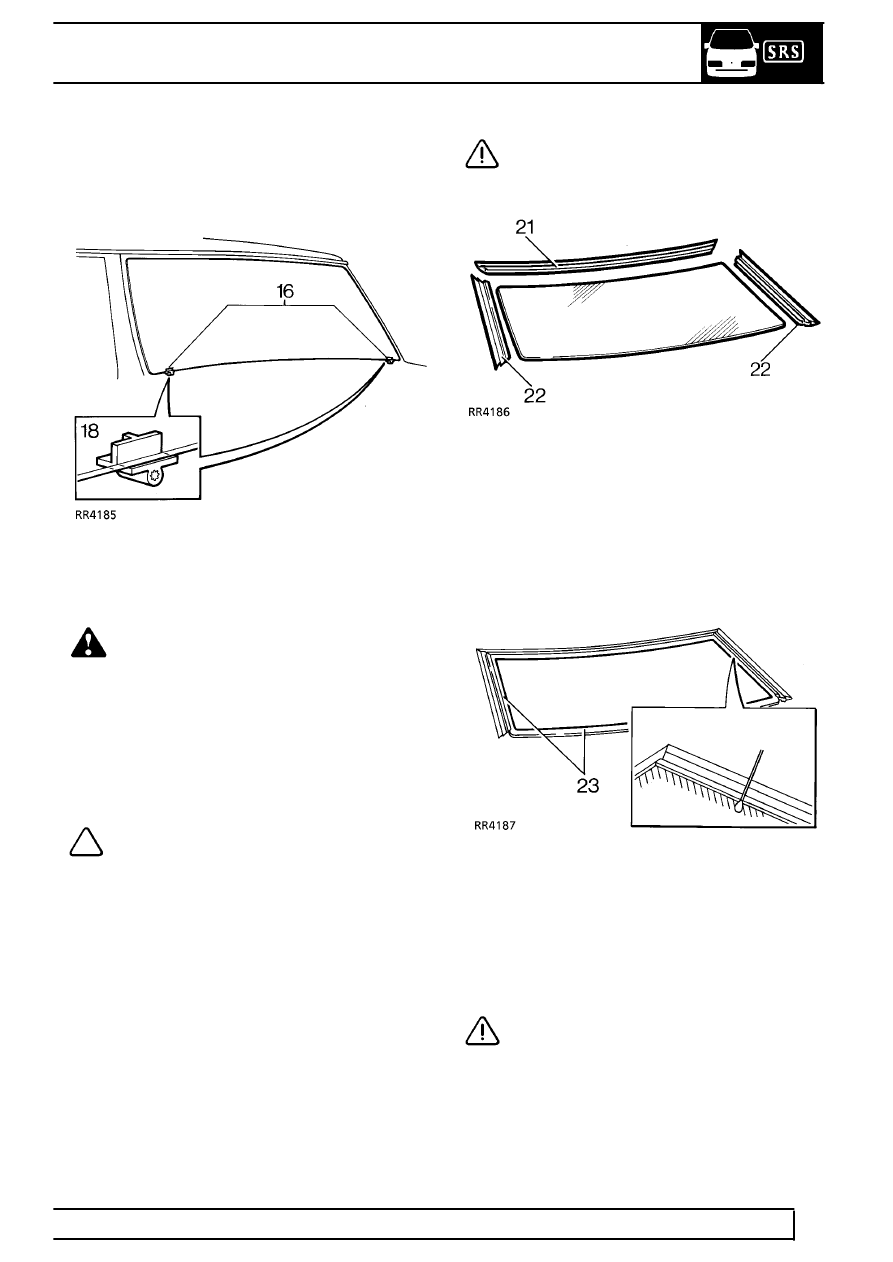
16. Cut through sealer between the supports.
If heated front screen: Cut through the 2 wires
each side of the supports. Tape cut wires and
panels to prevent damage to bodywork when
screen is removed.
17. Attach suction cups to glass and lift glass from
body flange, cut sealer free around supports as
necessary.
WARNING: If glass has splintered: Protect
eyes and operate demister blower at
maximum speed to remove any glass from
ducts. Use a vacuum cleaner to remove glass
particles from inside the vehicle.
Refit
18. Check condition of supports, renew if necessary.
Locating studs must be at right angle to flange.
NOTE: The supports were fitted to early
vehicles and now replaced with nylon
sheaths.
19. Carefully cut back old sealant around body
flange to obtain a smooth surface 2mm (1/10in)
thick. DO NOT cut down to flange.
20. If refitting original glass: It must be free from
chips or cracks. Cut back old sealant around
glass to obtain a smooth surface 2mm (1/10 in)
thick. DO NOT cut down to glass surface.
CAUTION: Lay glass on felt covered
supports, do not stand on edge. Any
chipping of glass edge may develop into
cracks.
21. Align header finisher on top edge of glass, push
flange fully onto glass and use a wooden block
and mallet to ensure fit.
22. Carefully align each side finisher on edge of
glass, push flange fully onto glass and use a
wooden block and mallet to ensure fit.
23. Using a cotton bud, apply glass cleaning solvent
(yellow cap) to inside face of glass, 20mm (13/16
in) strip around inside of finishers and 30mm (1
1/8 in) wide along bottom edge. Immediately
wipe off solvent with a clean cloth.
CAUTION: Do not touch cleaned or primed
surfaces with fingers.