Freelander Service Procedures

AUTOMATIC GEARBOX - JATCO
REPAIRS
44-17
21. Position access plate, fit bolts and tighten to 9
Nm (7 lbf.ft).
22. Clean mating faces of IRD and gearbox.
23. Lubricate and fit new 'O' ring.
24. With assistance, fit IRD.
25. Fit bolts securing IRD to gearbox and tighten
sufficiently only to pull mating faces of IRD and
gearbox together at this stage.
26. Fit IRD support bracket and tighten bolts
sufficiently only to pull mating faces together.
27. Final tighten bolts securing IRD to gearbox to
80 Nm (59 lbf.ft).
28. Final tighten bolts securing IRD support
bracket in following sequence:5 bolts securing
support bracket to IRD 50 Nm (37 lbf.ft), 2 bolts
securing support bracket to engine front
mounting bracket 50 Nm (37 lbf.ft), 3 bolts
securing support bracket to sump 45 Nm (33
lbf.ft).
29. Position lower engine steady, 'TOP' mark
uppermost. Fit bolt but do not tighten at this
stage.
30. Connect coolant hoses and secure with clips.
31. Connect breather hose to IRD housing.
32. Fit manifold heat shield and fit nut securing
heat shield to pinion housing finger tight.
33. Fit bolts securing manifold heat shield to IRD
support bracket and tighten to 9 Nm (7 lbf.ft).
34. Fit nut securing heat shield to IRD and tighten
to 45 Nm (33 lbf.ft).
35. Final tighten nut securing manifold heat shield
to IRD pinion housing to 25 Nm (18 lbf.ft).
36. Clean exhaust manifold and mating face on
cylinder head.
37. Fit exhaust manifold gasket.
38. Position exhaust manifold, fit nuts and
progressively tighten, from centre outwards to
45 Nm (33 lbf.ft).
39. Connect HO2S multiplug and secure to support
bracket.
Gearbox - KV6
$% 44.20.02.99
Remove
1. Tie bonnet back in upright position.
2. Disconnect battery earth lead.
3. Remove engine acoustic cover.
ENGINE - K SERIES KV6, REPAIRS,
4. Remove IRD.
DRIVE, REPAIRS, Intermediate reduction
drive (IRD) unit - KV6.
DRIVE, REPAIRS, Intermediate reduction
drive (IRD) unit - KV6.
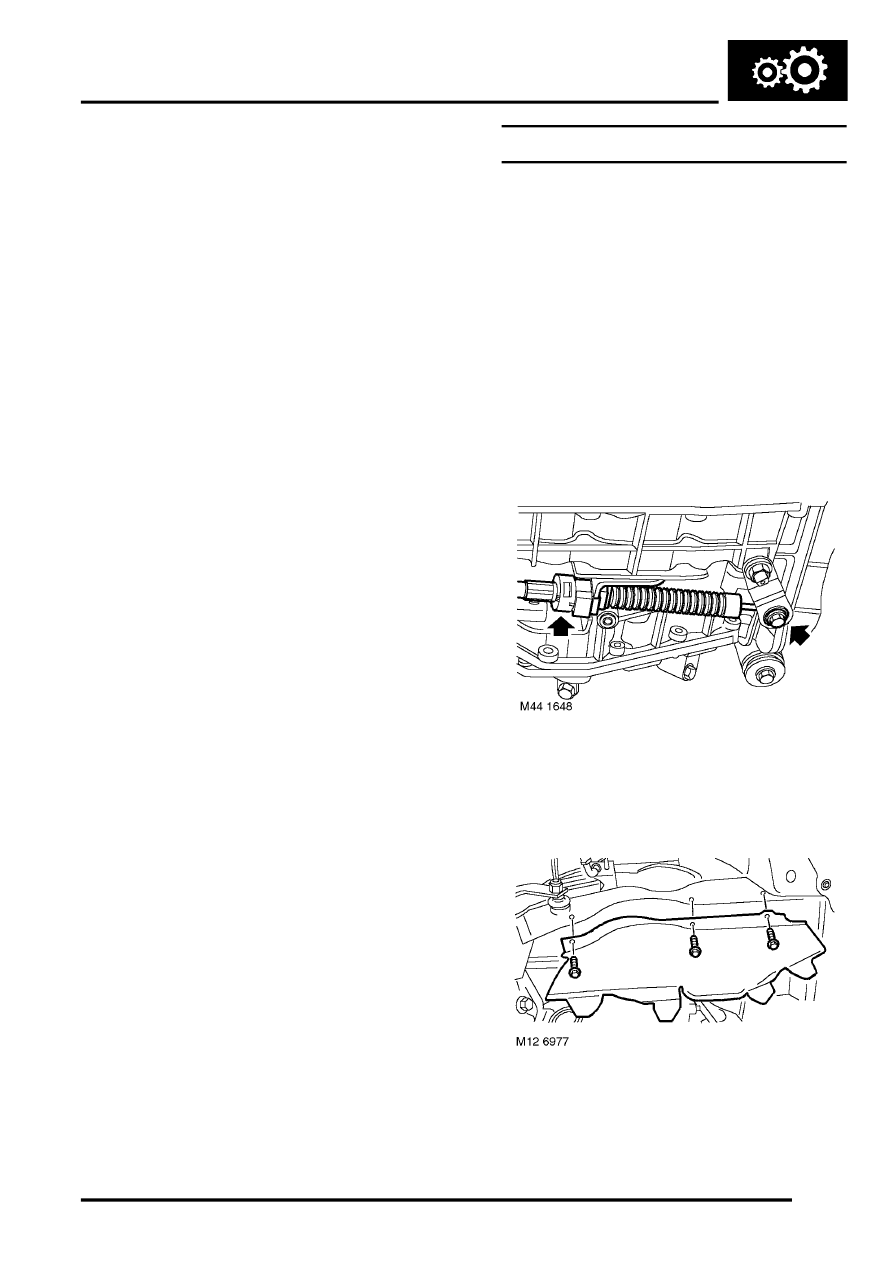
5. Loosen selector cable trunnion nut.
6. Release clip securing selector cable to gearbox
bracket, remove selector cable and collect
trunnion from selector lever.
7. Remove 3 screws securing LH splash shield
and remove shield.
