
Freelander Service Procedures
DOORS
76-1-18 REPAIRS
Refit
1. Fit door pull to trim casing and secure with
screws and locking ring.
2. Fit sill button guide to trim casing and secure
with retainer.
3. Fit foam pad to sill button guide.
4. Fit door pocket to trim casing and secure with
Torx screws.
5. Fit trim studs to casing.
6. Fit trim casing to door and secure trim studs.
7. Fit screws securing door pull and fit screw
cover.
8. Fit door release handle escutcheon and secure
with screw.
9. Fit screws securing door pocket and fit screw
cover.
10. Position switch pack, connect multiplugs and
secure switch pack to trim casing.
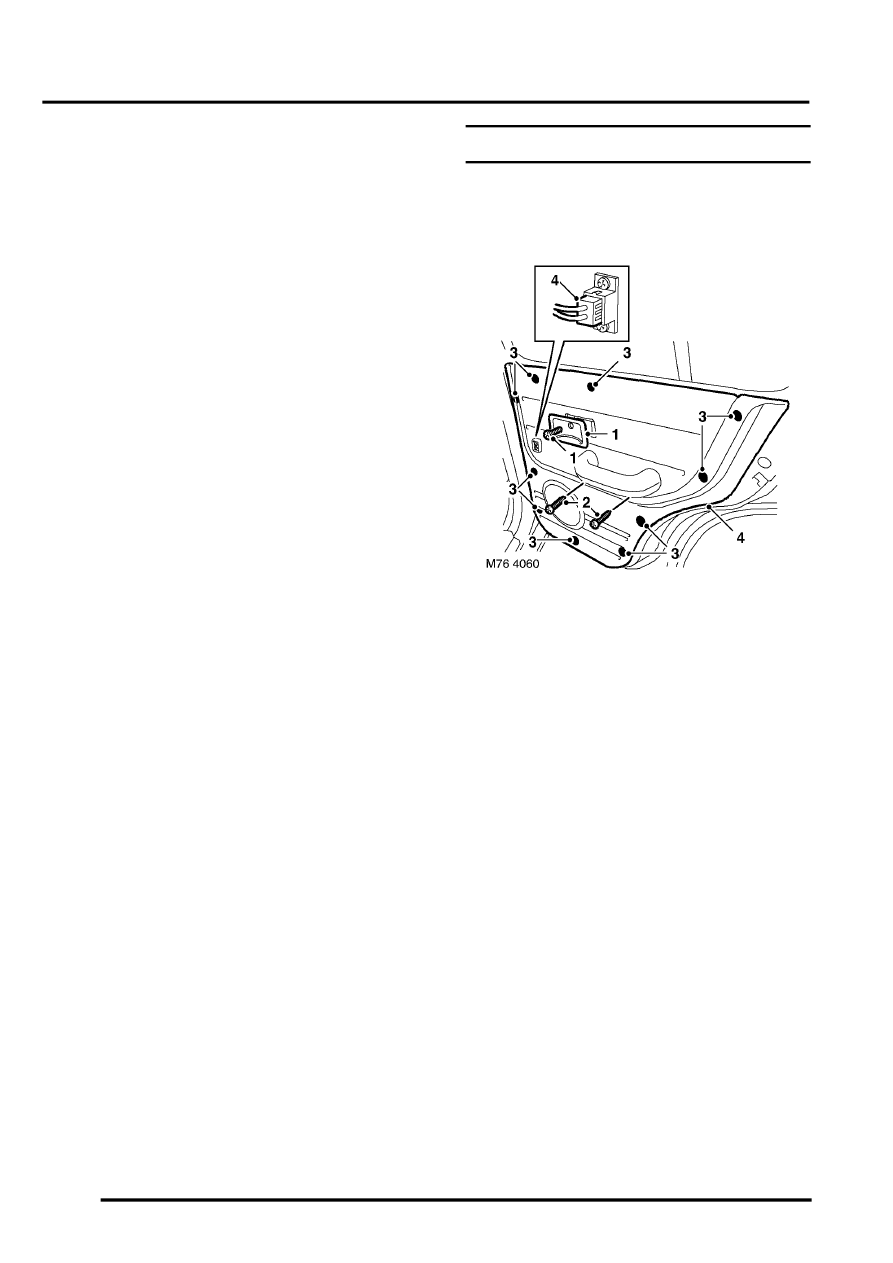
Trim casing - rear door - up to 04MY
$% 76.34.04
Remove
1. Remove screw securing door release
escutcheon and remove escutcheon.
2. Remove 2 screws from door pull.
3. Release 10 trim studs securing trim casing to
door.
4. Disconnect multiplug and remove door trim
casing.
NOTE: Do not carry out further dismantling if
component is removed for access only.