Freelander Service Procedures

DRIVESHAFTS
47-4
REPAIRS
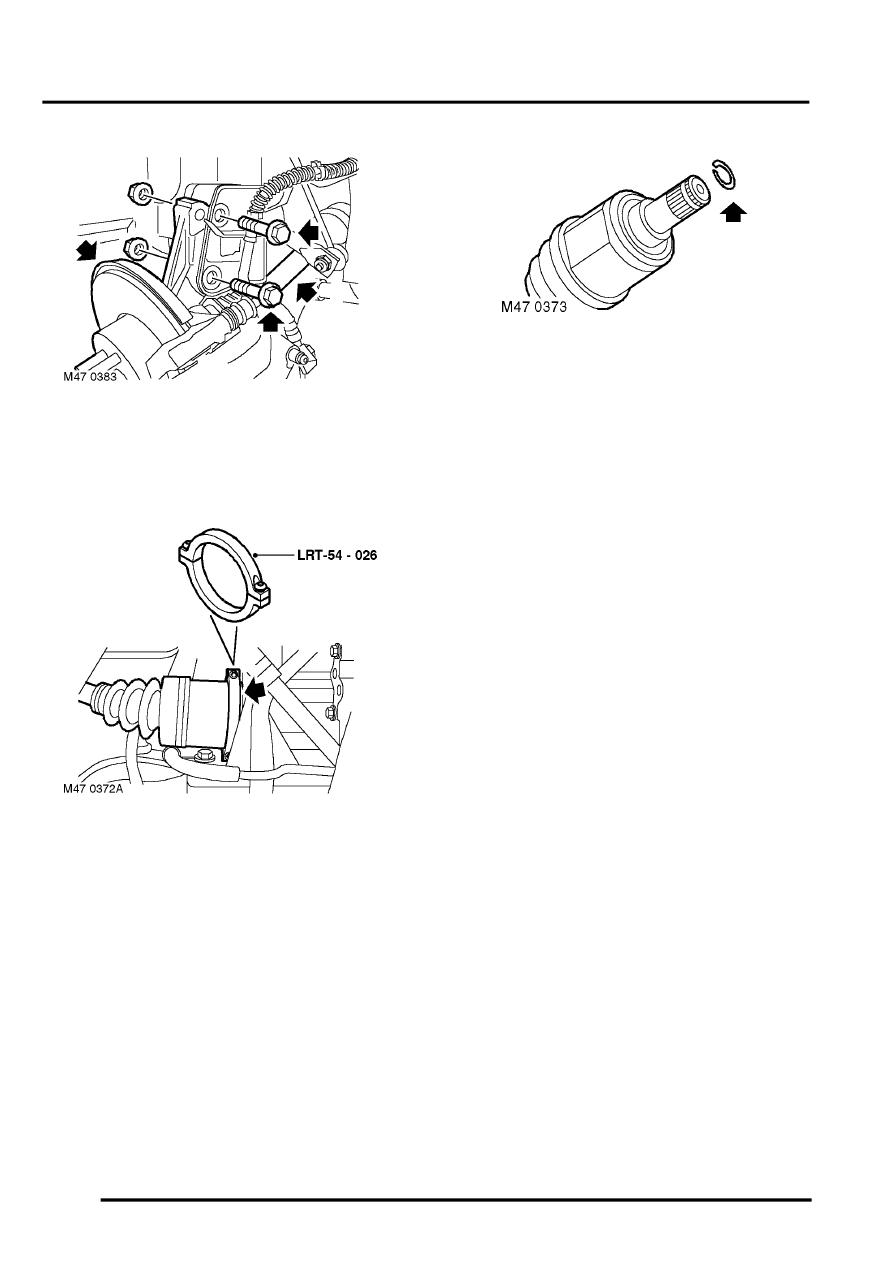
12. Remove 2 bolts securing damper to hub.
13. Release hub from damper.
14. Release drive shaft from hub.
15. Position container to catch oil spillage.
16. Secure LRT-54-026 to drive shaft inboard joint.
Using a lever, release drive shaft from gearbox.
17. Remove drive shaft.
CAUTION: Care must be taken not to
damage oil seal when removing drive shaft
from gearbox
18. Remove and discard circlip from drive shaft.
Refit
1. Inspect gearbox seal for signs of wear or
damage.
2. Wipe drive shaft ends, gearbox oil seal and
hub.
3. Lubricate oil seal running surfaces.
4. Fit new circlip to drive shaft.
5. Fit drive shaft ensuring circlip is fully engaged.
CAUTION: Drive shaft must be fitted with
care to prevent damage to gearbox oil seal.
6. Position drive shaft in hub.
7. Fit new hub nut but do not tighten at this stage.
8. Fit hub to damper, fit nuts and bolts and tighten
to 205 Nm (150 lbf.ft).
9. Position caliper to brake disc fit bolts and
tighten to 100 Nm (74 lbf.ft).
10. Clean ABS sensor and mating face.
11. Lubricate ABS sensor with anti-seize grease.
12. Fit ABS sensor .
CAUTION: Ensure ABS sensor is fully
located into hub, so that sensor touches
reluctor ring.
13. Position ABS harness and brake hose in
bracket and secure with clip.
14. Fit splash shield and secure with bolts.
15. Tighten front hub nut to 400 Nm (295 lbf.ft).
16. Stake front hub nut.
17. Fit road wheel(s) and tighten nuts to 115 Nm
(85 lbf.ft).
18. Check and top up oil level as required.
Intermediate Reduction Drive - Non NAS
models.
19. Fit underbelly panel.
20. Remove stands and lower vehicle.
21. Connect battery earth lead.
