
Freelander Service Procedures
INTERIOR TRIM COMPONENTS
76-3-26 REPAIRS
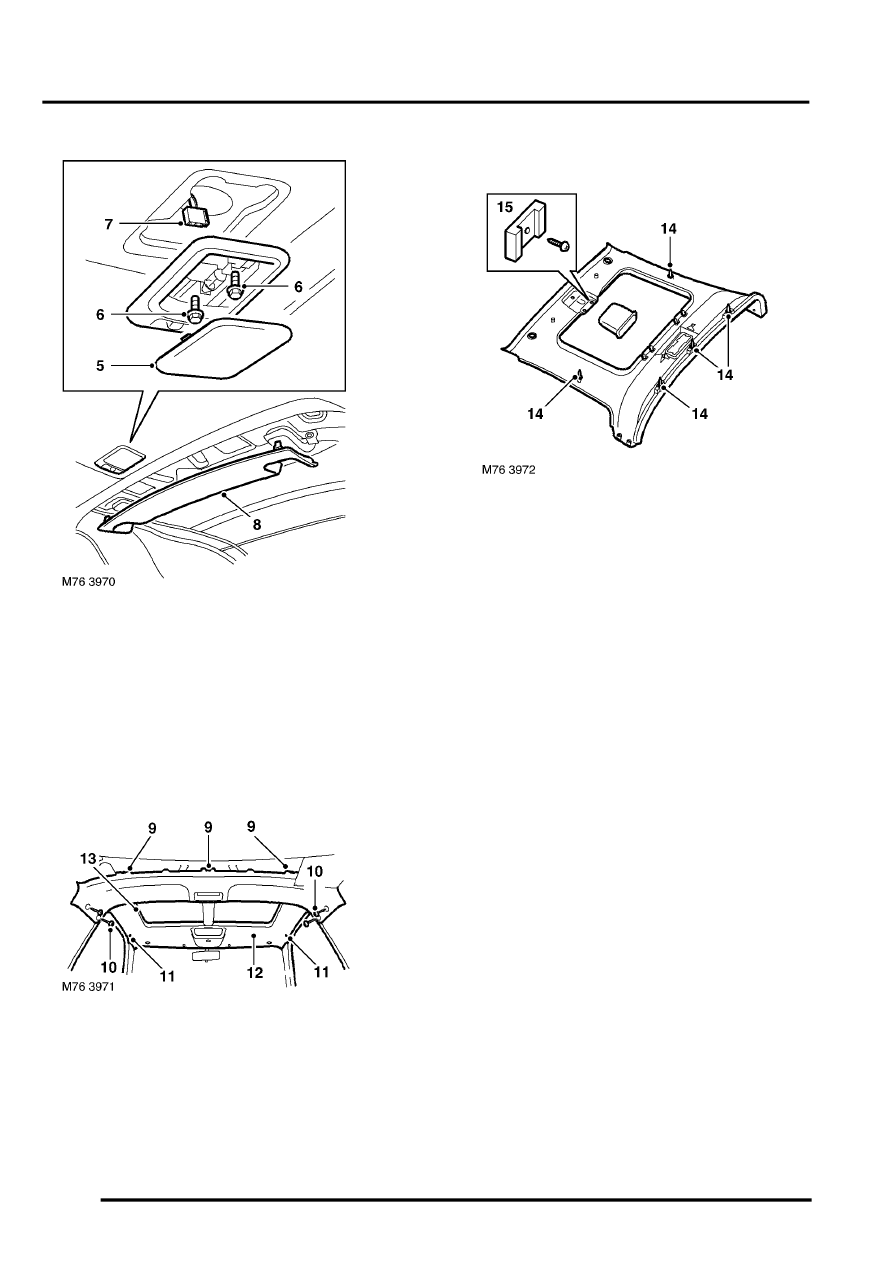
5. Remove roof lamp lens.
6. Remove 2 screws securing roof lamp to body.
7. Disconnect multiplug from roof lamp and
remove lamp.
8. Release clips securing headlining rear finisher
to body and remove finisher.
9. Release 3 studs securing rear edge of
headlining to roof panel.
10. Remove 4 screws securing headlining to 'B'
posts.
11. Release 2 studs securing sides of headlining to
body.
12. Lower front edge of headlining.
13. Release headlining from sun roof seal and
remove headlining.
14. Remove studs from headlining.
15. Remove 3 screws and remove pocket from
headlining.
Refit
1. Fit pocket to headlining and secure with
screws.
2. Fit studs to headlining.
3. Position headlining and secure studs to roof
panel.
4. Position headlining to 'B' posts and secure with
screws.
5. Secure headlining behind rear vent rubbers.
6. Fit headlining rear finisher and secure clips.
7. Fit headlining to sun roof seal.
8. Position roof lamp and connect multiplug.
9. Fit roof lamp and secure with screws.
10. Fit lens to roof lamp.
11. Fit both sun visors.
12. Fit 'A' post upper finishers.
REPAIRS, Trim finisher - 'A' post - upper -
renew.
13. Reposition front seat squabs.