
L322 Range Rover Service Procedures
AUTOMATIC TRANSMISSION - ZF 5HP24
REPAIRS 44-2-13
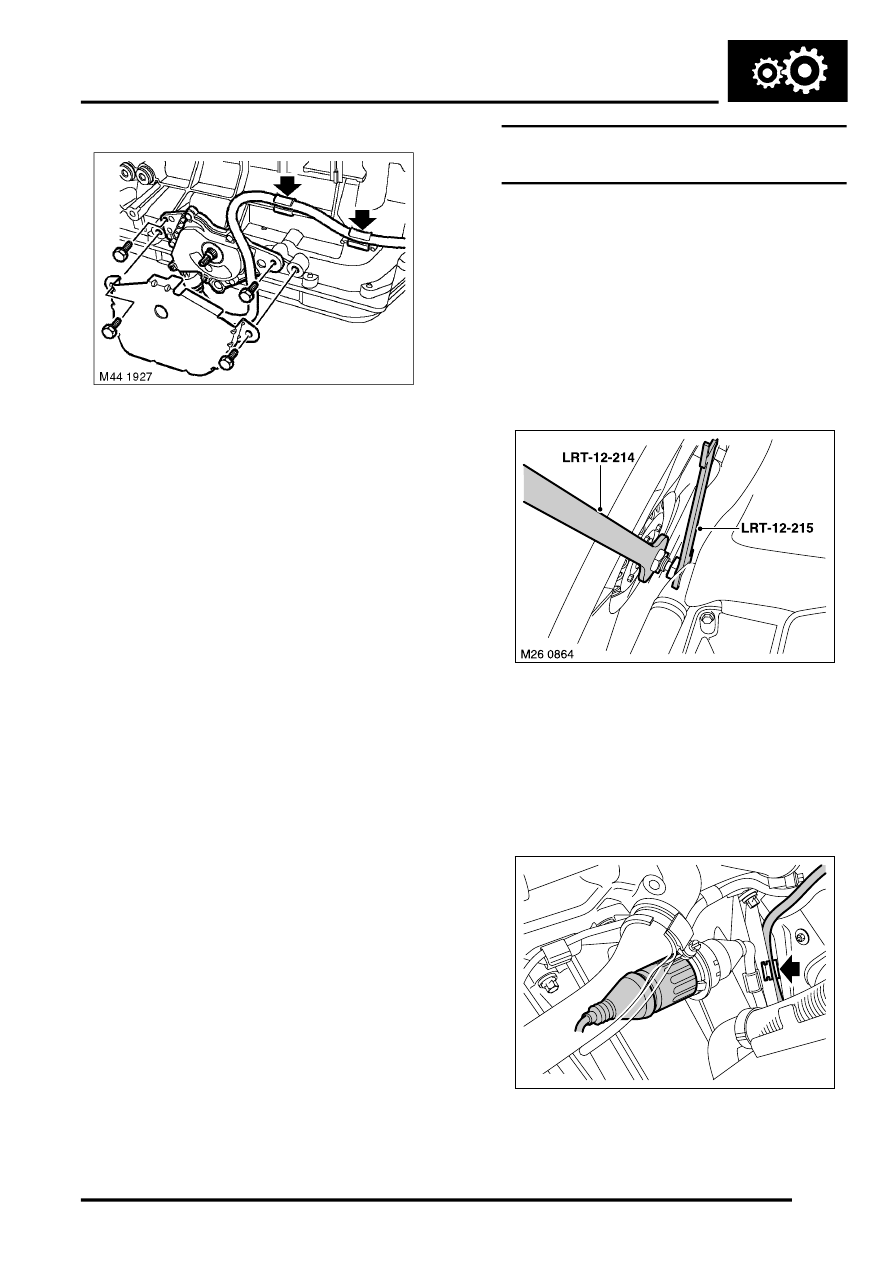
7. Remove 2 bolts securing inhibitor switch guard
and remove guard.
8. Remove 2 bolts securing inhibitor switch to
gearbox and remove inhibitor switch.
Refit
1. Clean inhibitor switch and mating face on
gearbox.
2. Fit inhibitor switch onto dowel, fit bolts and
tighten to 10 Nm (7 lbf.ft)
3. Fit inhibitor switch guard, fit and tighten bolts to
10 Nm (7 lbf.ft)
4. Fit inhibitor switch harness to gearbox and
tighten multiplug bracket bolt to 10 Nm (7 lbf.ft).
5. Clean transfer gearbox and mating face dowels
and dowel holes.
6. Align transfer gearbox to automatic gearbox, fit
Torx bolts and tighten to43 Nm (32 lbf.ft).
7. Connect breather hose to gearbox.
8. Secure transfer gearbox breather pipe to
automatic gearbox casing.
9. Remove gearbox assembly from bench and
secure on transmission jack.
10. Fit transmission assembly.
5HP24, REPAIRS, Gearbox/converter &
transfer gearbox assembly - remove for
access and refit.
Gearbox/converter & transfer gearbox
assembly - remove for access and refit
$% 44.20.04.99
Before disconnecting the battery, ensure all text and
cautions in the battery disconnection section are
observed.
GENERAL INFORMATION, Electrical
Remove
1. Position vehicle on lift.
2. Disconnect battery earth lead.
3. Use LRT-12-214 and LRT-12-215 to loosen
viscous coupling lock nut and remove fan
assembly from coolant pump.
NOTE: Thread is left handed.
4. Remove air intake plenum.
5. Disconnect multiplug from inhibitor switch
harness.
M44 1860