L322 Range Rover Service Procedures

EXTERIOR FITTINGS
76-2-10 REPAIRS
8. Remove stud and turn buckle securing lower
rear quarter trim on LH and RH side of vehicle.
9. Remove warning triangle.
10. Release clip and remove wheel chock and tool
roll.
11. Remove RH bin from loadspace carrier.
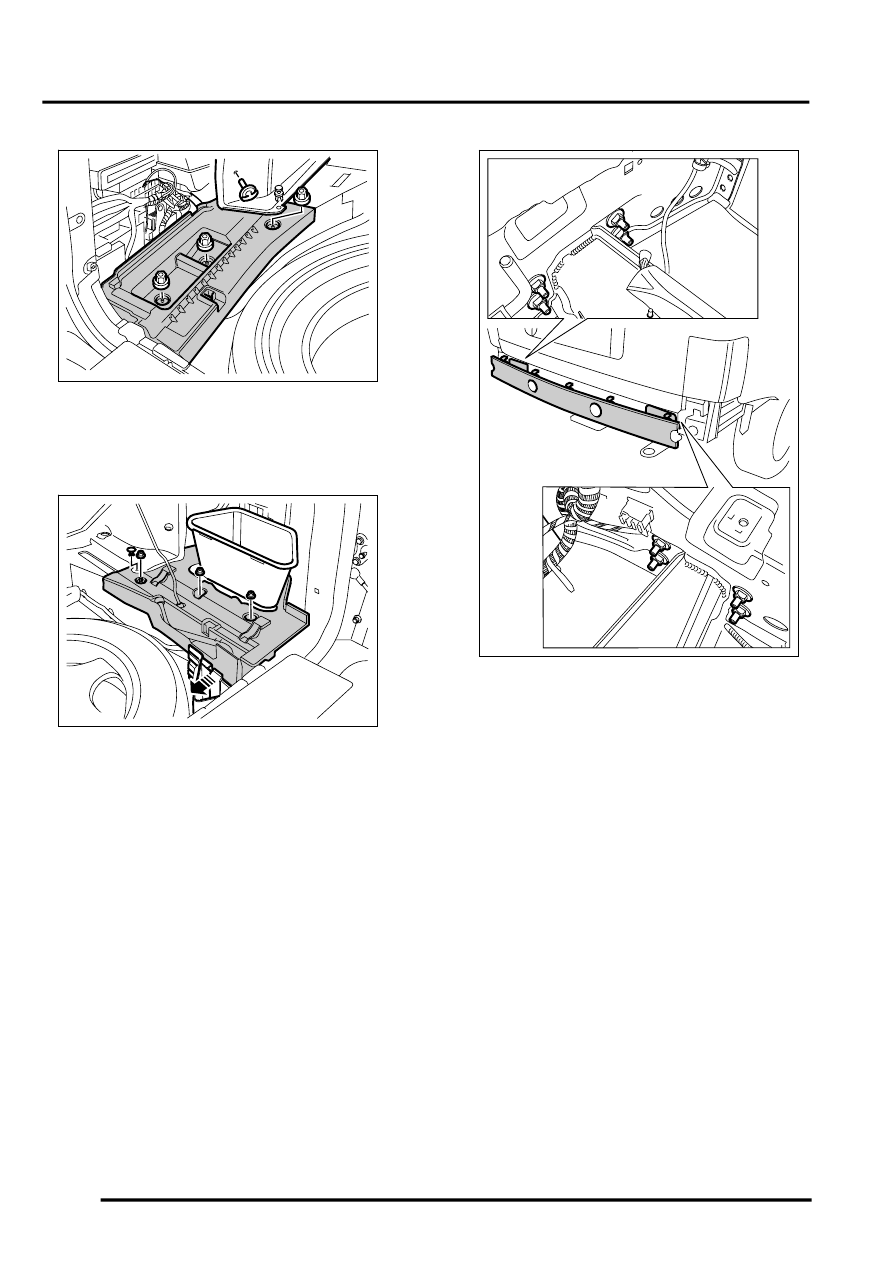
12. Remove 3 plastic nuts and release 2 studs
securing RH bin carrier, remove carrier.
13. Remove 3 plastic nuts securing LH carrier and
remove carrier.
14. Remove 8 nuts securing rear armature and
remove.
NOTE: Do not carry out further dismantling if
component is removed for access only.
15. Release 8 clips from armature
Refit
1. Fit 8 clips to armature.
2. Position armature fit and tighten nuts to (45 Nm
33 lbf.ft).
3. Position LH carrier and secure with plastic nuts.
4. Position RH bin carrier and secure 2 studs and
3 plastic nuts.
5. Fit bin to loadspace carrier.
6. Fit wheel chock and tool roll.
7. Fit and secure warning triangle.
8. Fit rear quarter trim to LH and RH side, secure
with turn buckles.
9. Position luggage space securing ring to body,
locate peg. Fit and tighten bolt to25 Nm (18
lbf.ft).
10. Position and fit cover.
11. Fit LH and RH rear quarter trim access panels.
12. Close spare wheel access cover and fit parcel
shelf.
M86 5827
M76 4566
M76 4540
