
L322 Range Rover Service Procedures
EXTERIOR FITTINGS
76-2-12 REPAIRS
6. Remove 4 screws securing bumper to armature
extension.
7. With assistance carefully lift and pull forward
each side of bumper to release bumper side
mounts and clips.
CAUTION: Always protect paintwork when
removing or refitting any body trims or
bumpers.
8. Disconnect multiplugs from fog lamps.
9. Vehicles fitted with parking sensors:
Disconnect 4 multiplugs.
10. Remove front bumper.
NOTE: Do not carry out further dismantling if
component is removed for access only.
11. Remove front number plate.
12. Remove 4 screws securing number plate
mounting to bumper and collect mounting.
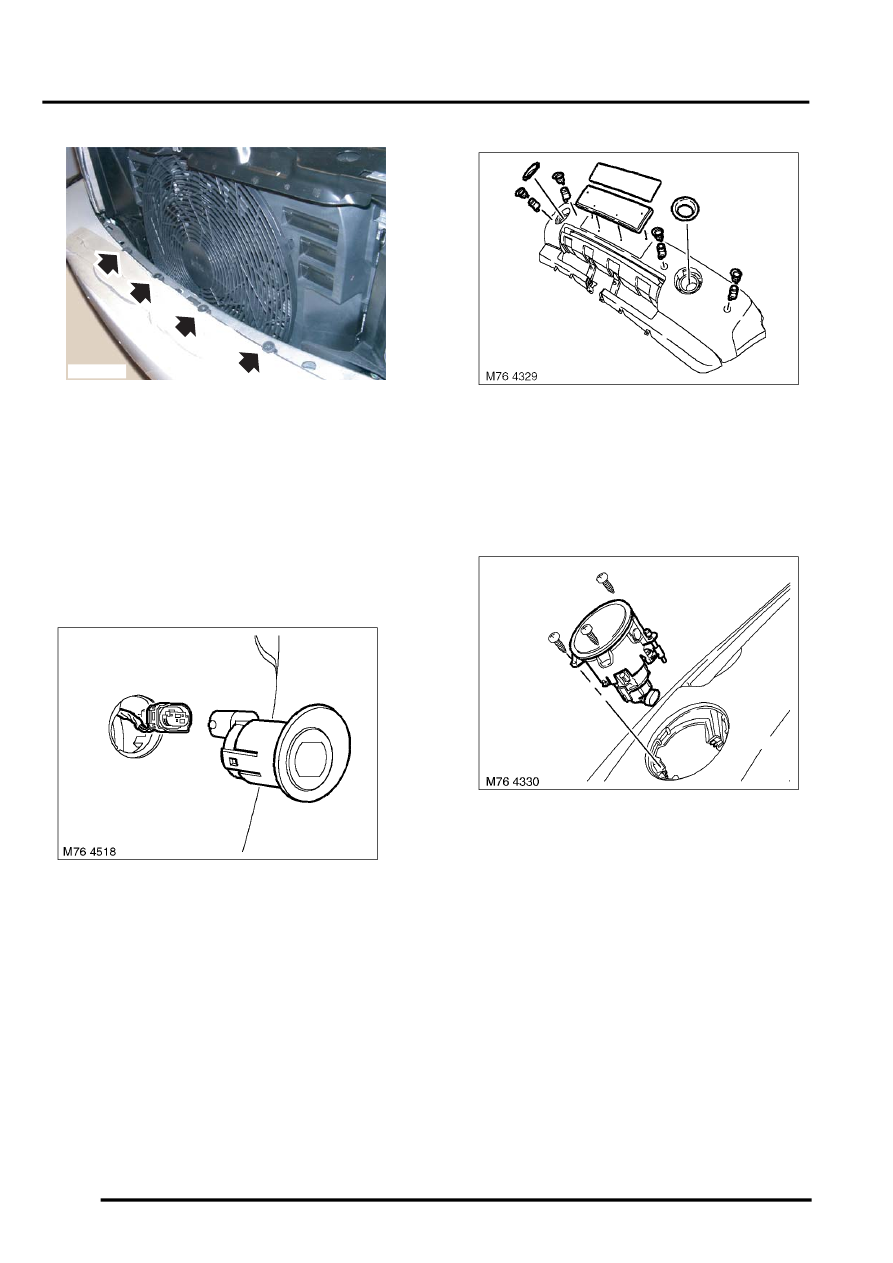
13. Remove both spot lamp finishers from bumper.
14. Remove parking sensors from bumper, release
clips and remove finishers from sensors.
15. Remove 3 screws securing RH spot lamp to
bumper. Repeat operation and remove LH spot
lamp.
16. Remove 2 screws securing bumper extensions,
release clips and remove extensions.
Refit
1. Fit parking sensors to finishers, align sensors to
bumper and secure clips.
2. Fit bumper extensions and secure with screws.
3. Fit and secure spot lamps and finishers.
4. Fit number plate mounting to bumper and
secure with screws.
5. Fit number plate.
6. With assistance position bumper to body.
7. Vehicles fitted with parking sensors:
Connect multiplugs.
8. Connect multiplugs to spotlamps.
9. With assistance, fit bumper assembly to body.
M76 4328