
L322 Range Rover Service Procedures
PANEL REPAIRS
REPAIRS
-33
Repair
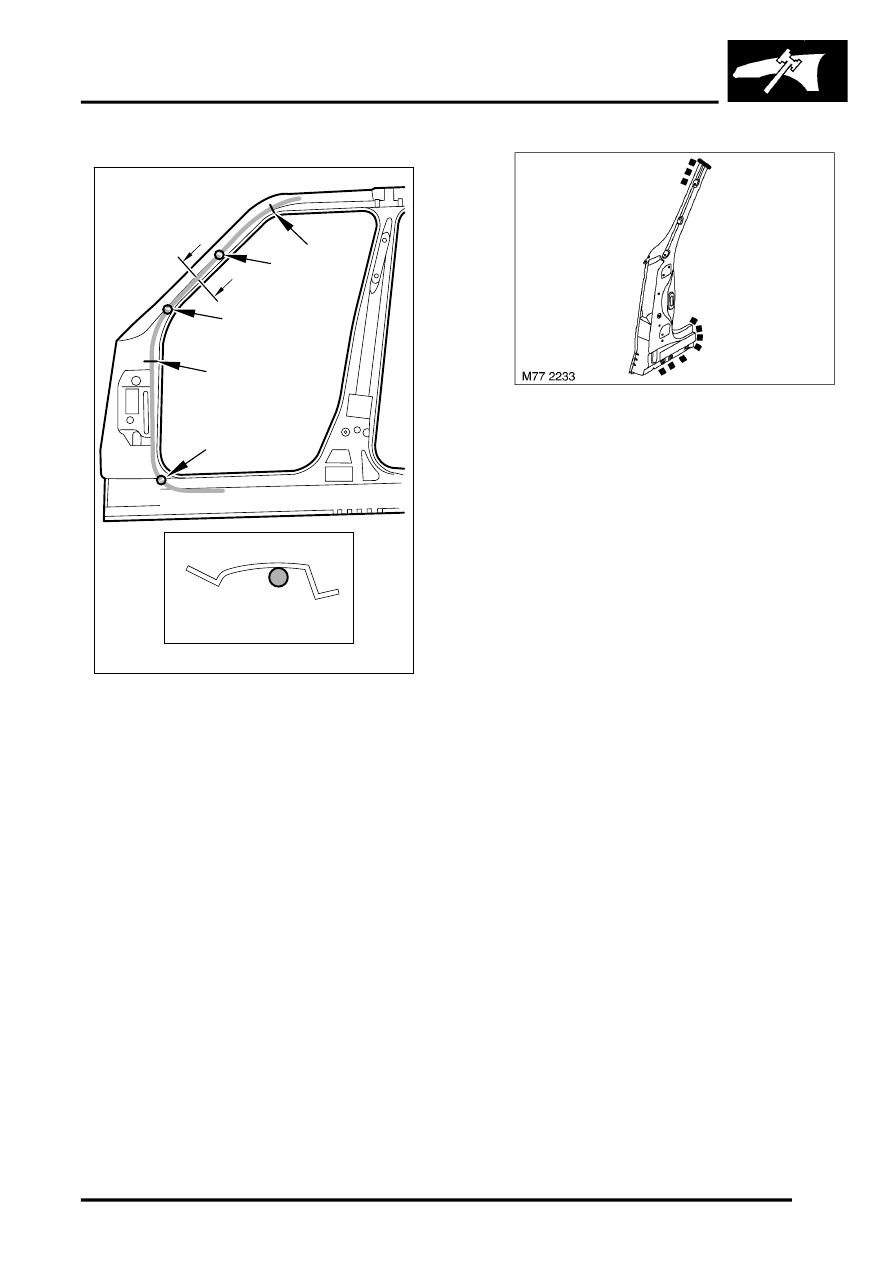
1. Before removing the 'A' post reinforcement,
observe the following precautions.
CAUTION: When cutting the 'A' post upper
section, extreme caution must be taken as a
rubber drain tube is located behind it. The
approximate position of the drain tube is
shown in the illustration.
NOTE: Arrows 'A' and 'B' shown in the
illustration, indicate the approximate position of
the drain tube fixings.
2. Remove existing panel(s), prepare panel joint
faces and install new panel(s) in accordance
with Panel Replacement Procedure. Punch or
drill holes in new panel for plug welding as
shown.
CAUTION: Before welding the top of the 'A'
post reinforcement, tack weld a small plate
over the drain tube to protect it from
excessive heat.
Refit
1. Fit 'A' post body side panel.
, , Body side panel - 'A' post.
2. Connect alternator.
3. Connect battery earth lead.
M77 2234
A - A
A
A
A
A
B
B
B