L322 Range Rover Service Procedures

PANEL REPAIRS
-38
REPAIRS
Body side panel - rear section
In this procedure, the rear outer body side panel is
replaced in conjunction with the complete rear
quarter.
Remove
1. Disconnect battery earth lead.
2. Disconnect alternator.
3. Remove rear road wheel.
4. Remove rear door.
5. Remove rear door and tail door aperture seals.
6. Remove rear door and tail door strikers.
7. Remove sill finisher.
Extension - spoiler - front bumper.
8. Remove rear bumper armature.
9. Remove rear wheel arch liner.
10. Remove exhaust assembly.
- Td6, REPAIR, Exhaust system and
mountings.
11. Remove 'E' post external finisher.
12. Remove rear quarter light glass.
13. Remove tail lamp assembly.
14. RH side: Drain fuel tank.
15. RH side: Remove fuel filler neck.
16. RH side: Remove fuel flap and fuel flap release
mechanism.
17. Remove air suspension cross link valve.
18. Remove rear seat belt.
19. Remove 'E' post internal finisher.
20. Remove lower rear quarter trim casing.
Trim casing - rear quarter - lower.
21. Remove all navigation and in car entertainment
components from rear quarter area.
ENTERTAINMENT, REPAIRS, Power
amplifier.
22. Release rear carpet and position aside.
23. Remove luggage compartment carpet.
24. Remove insulation from rear quarter area.
25. Release vehicle harness from 'D' post and rear
quarter area.
Repair
1. Before removing the 'A' post reinforcement,
observe the following caution.
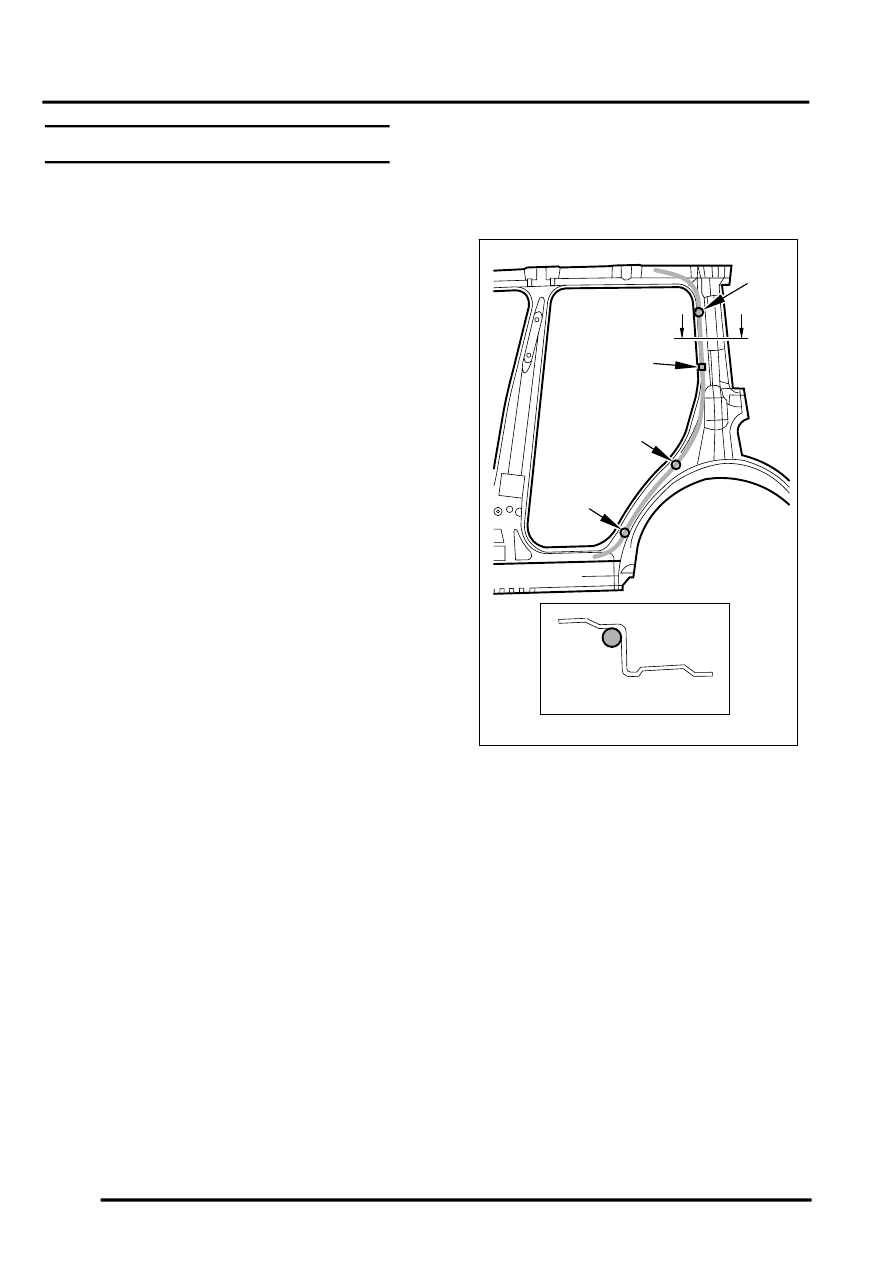
CAUTION: When cutting out the body side
panel, do not cut through the reinforcement
panel as a rubber drain tube is located
behind it. The approximate position of the
drain tube is shown in the illustration.
M77 2235
B - B
B
B
B
B
C
B
