L322 Range Rover Service Procedures

STEERING
REPAIRS
57-35
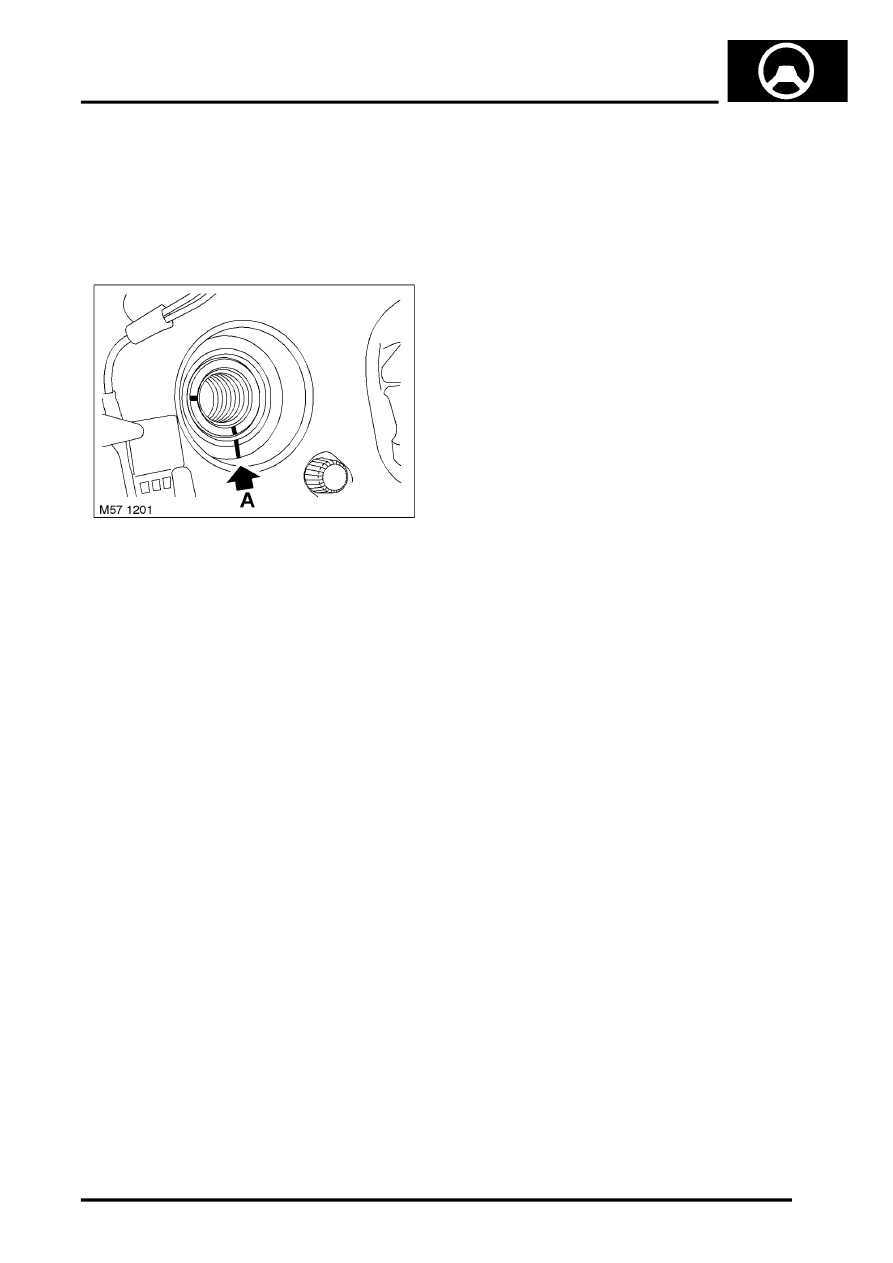
4. RHD vehicles:With the wheels in the straight
ahead position, the bottom timing mark on the
steering column must be aligned with the
steering wheel mark, see illustration above.
NOTE: The steering column timing marks are
105
°
apart.
LHD vehicles
5. LHD vehicles:With the wheels in the straight
ahead position, the bottom timing mark on the
steering column must be aligned with the
steering wheel mark, see illustration above.
NOTE: The steering column timing marks are
105
°
apart.
6. Note wheel to column alignment marks and
remove steering wheel.
NOTE: Do not carry out further dismantling if
component is removed for access only.
7. Models with heated steering wheel: Release
multiplugs from clips on steering wheel and
ECU, disconnect multiplug and remove the
heated steering wheel ECU.
8. Remove 4 screws securing steering wheel trim
and remove trim pieces.
9. Remove airbag retainers.
Refit
1. Fit airbag retainers.
2. Fit trim and secure with screws.
3. Models with heated steering wheel: Position
heated steering wheel ECU, connect multiplug
and fit ECU into location. Fit multiplugs into
clips.
4. Ensure road wheels are straight ahead and
rotary coupler is locked in correct position.
5. Carefully fit steering wheel, engage coupler
and align to column.
6. Fit steering wheel retaining bolt and tighten to
63 Nm (46 lbf.ft).
7. Models with heated steering wheel: Connect
multiplug to rotary coupler.
8. Fit drivers airbag.
