
LR3/Disco 3
7 .
Install the cylinder head LH assembly.
Install the knock sensor bracket.
Tighten the bolt to 10 Nm (7 lb.ft).
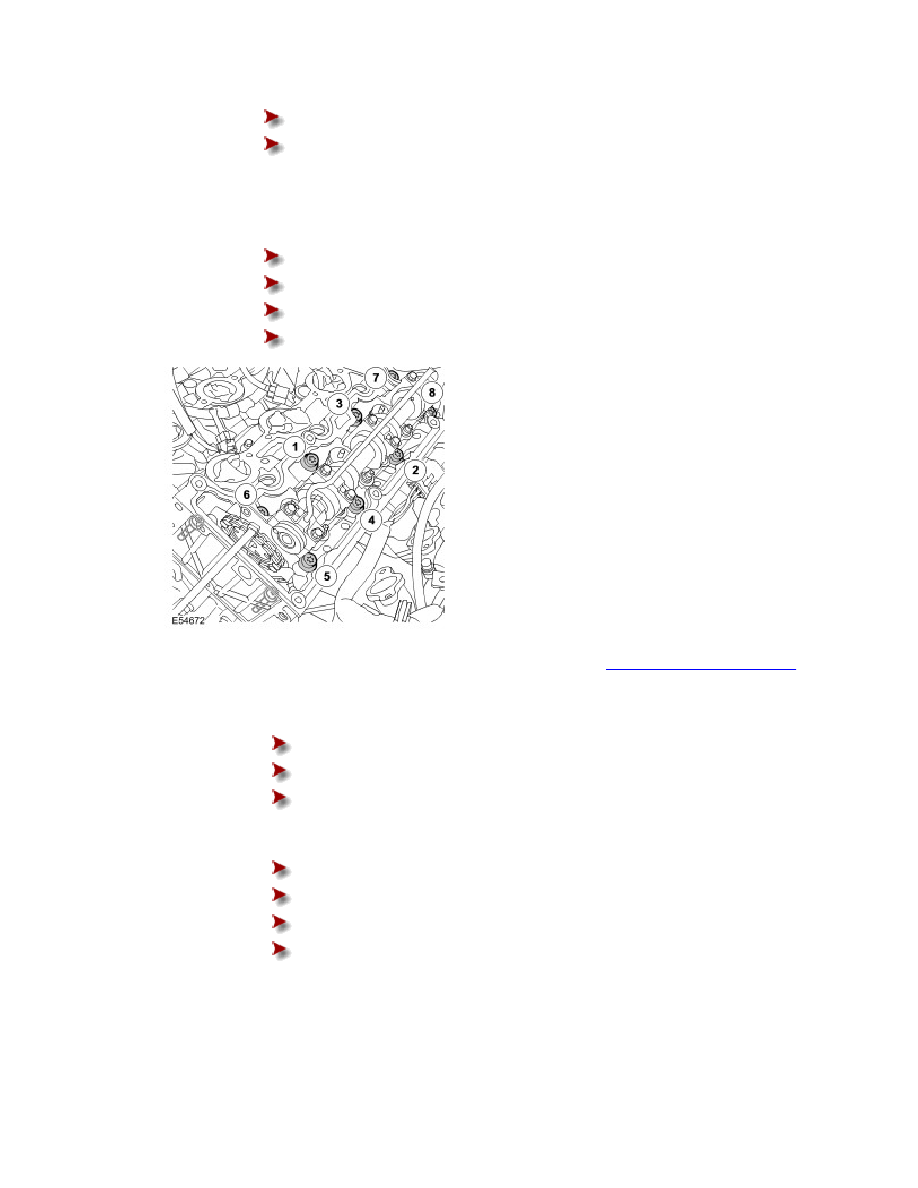
8 .
NOTE :
Tighten the bolts 1 to 8 in the sequence shown. The M12 bolts are tightened in 3 stages.
Install the cylinder head bolts.
Lubricate the new cylinder head bolt threads with clean engine oil.
Tighten the M12 bolts to 30 Nm (22 lb.ft), then a further 80 degrees.
Tighten the M12 bolts a further 80 degrees.
Tighten the M8 bolts to 35 Nm (26 lb.ft).
9 .
Install the exhaust manifold. For additional information, refer to
Exhaust Manifold LH (30.15.10)
(Section 303-01)
10 .
Install the Torx bolt retaining the chain guide.
Install a new O-ring seal.
Tighten the bolt to 10 Nm (7 lb.ft).
Clean the component mating faces.
11 .
Install the A/C compressor mounting bracket assembly.
Clean the component mating faces.
Tighten the bolts to 45 Nm (33 lb.ft).
Secure the wiring harness.
Tighten the KS clip retaining bolt to 10 Nm (7 lb.ft).
12 .
Install the LH hydraulic timing chain tensioner.
13 .
Adjust the valve timing. For additional information, refer to (Section 303-01)
14 .
Install the electrical harness bridge.