Range Rover P38

CLUTCH
3
REPAIR
Refit
16. Ensure mating faces are clean.
NOTE: New friction plates are supplied
with splines pre-greased.
17. If refitting existing friction plate, smear splines
with ’Molycote FB180’.
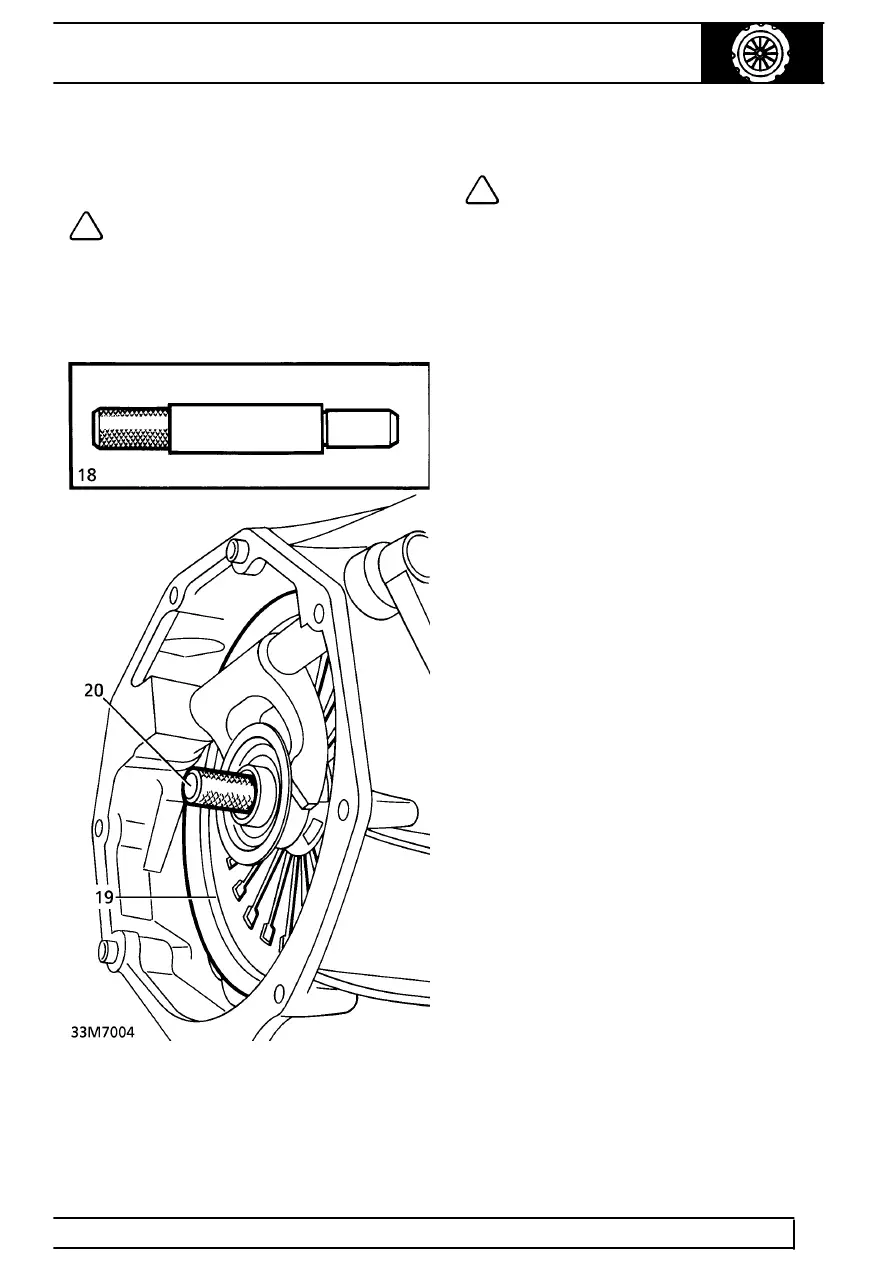
18. Position friction plate on flywheel. Fit
LRT-12-001 to align plate.
19. Position cover. Locate on dowels.
NOTE: If original cover is refitted, align
marks.
20. Secure cover with bolts. Tighten progressively,
in a diagonal sequence to
40 Nm (30 lbf.ft).
Remove LRT-12-001.
21. Position clutch housing onto dowels. Ensure
release fork engages with release bearing.
22. Secure clutch housing with bolts. Tighten to
40 Nm (30 lbf.ft)
23. Position flywheel access cover. Secure with
bolts.
24. Smear release lever push rod socket with
’Molycote FB180’.
25. Position slave cylinder on clutch housing.
Ensure pushrod is engaged with lever. Secure
cylinder with bolts. Tighten to
45 Nm (33 lbf.ft)
26. Secure push rod gaiter to clutch lever.
27. Fit gearbox assembly.
See MANUAL
GEARBOX, Repair.
