Range Rover P38

ZF AUTO
9
REPAIR
Refit
29. Clean shaft and seal housing.
30. Using a suitable adapter, fit new seal.
31. Fit selector quadrant and connecting rod.
32. Fit selector shaft and secure to quadrant using
new roll pin.
33. Fit valve block.
See this section.
34. Position selector switch and tighten nut and bolt.
35. Position selector shaft lever and tighten nut.
36. Fit selector switch multiplug to bracket and
connect harness to multiplug.
37. Align harness support bracket and gear selector
cable abutment bracket to gearbox and secure
with bolts.
38. Connect gear selector cable trunnion to lever
and fit split pin.
39. Adjust gear selector cable.
See this section.
40. Raise gearbox on transmission jack.
41. Fit handbrake cable through transmission tunnel.
42. Clean propeller shaft and transfer box flanges.
43. Fit shafts to transfer box flanges, align marks
and tighten nuts and bolts to
48 Nm (35 lbf.ft).
44. Fit rear propeller shaft guard and secure with
bolts.
45. Fit transmission mounting assembly and tighten
bolts to
45 Nm (33 lbf.ft).
46. Diesel models: Fit chassis crossmember.
See
CHASSIS AND BODY, Repair.
47. Petrol models: Fit exhaust front pipe.
See
MANIFOLD AND EXHAUST SYSTEM, Repair.
48. Connect handbrake cable to lever and fit clevis
pin and clip.
49. Fit window switch pack.
See ELECTRICAL,
Repair.
50. Petrol models: Fit engine RH lifting eye, align
earth strap and secure with bolts.
51. Petrol models: Fit cooling fan cowl and secure
with clips.
52. Connect battery earth lead.
53. Fit and secure battery cover.
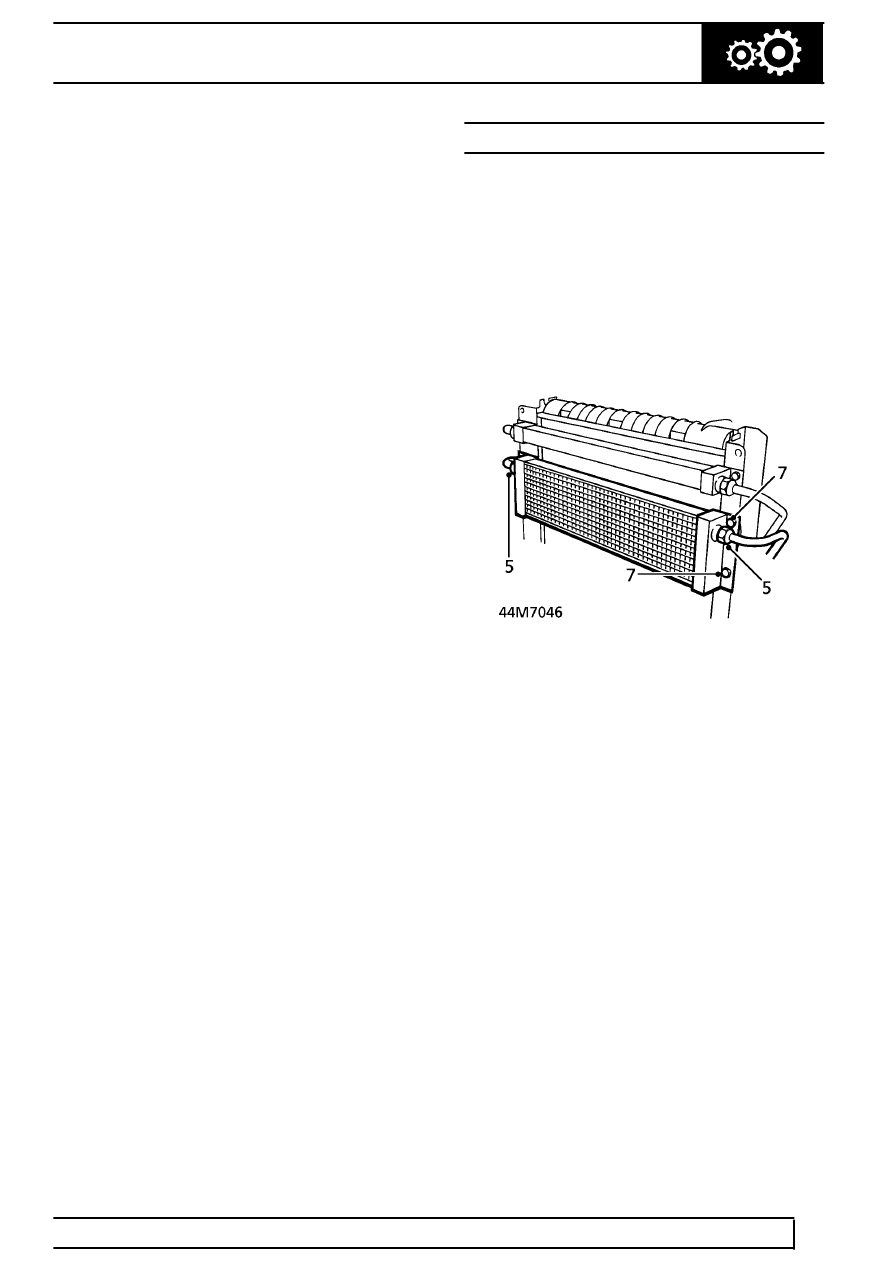
FLUID COOLER - V8 - UP TO 99MY
Service repair no - 44.24.10
Remove
1. Disconnect battery negative lead.
2. Remove engine oil cooler.
See ENGINE,
Repair.
3. Remove 4 trim studs securing air deflectors.
Remove deflectors.
4. Position container to collect fluid spillage.
5. Unscrew fluid cooler pipe union nuts and discard
’O’ rings.
6. Plug cooler and pipes.
7. Remove 4 bolts securing fluid cooler to radiator
mounting bracket.
8. Remove fluid cooler.
Refit
9. Fit fluid cooler.
10. Fit and tighten 4 bolts securing cooler to
mounting bracket.
11. Remove plugs from cooler and pipes.
12. Ensure pipe unions are clean.
13. Lubricate new ’O’rings with clean fluid and fit to
pipes.
14. Connect pipes to cooler. Tighten union nuts to
22 Nm (16 lbf.ft)
15. Remove container.
16. Fit air deflectors and secure with studs.
17. Fit engine oil cooler.
See ENGINE, Repair.
18. Reconnect battery negative lead.
19. Top up gearbox fluid.
See SECTION 10,
Maintenance.
