
BUMP STOP
- Make
- Land Rover
- Model
- Range Rover Classic
- Section
- REPAIR › BUMP STOP
AIR SUSPENSION
7
REPAIR
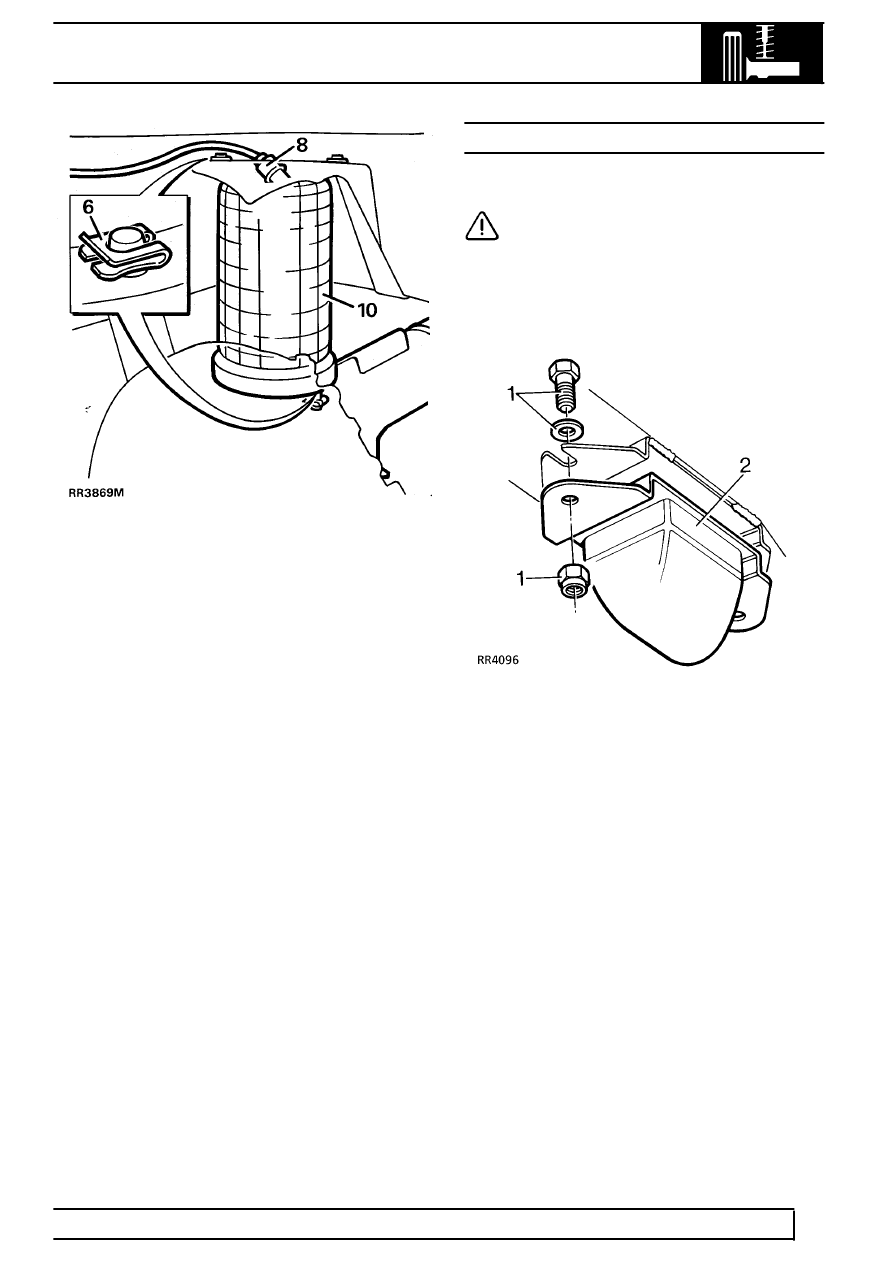
6. Remove four retaining clips from upper and
lower fixing.
7. Lower axle for access to air pipe connection at
top of air spring.
8. Clean connection with a stiff brush and soapy
water. Peel back rubber boot.
9. Disconnect air pipe.
See Disconnect/Connect
Air Pipe , seal all ends.
10. Remove air spring assembly.
Refit
11. Locate air spring assembly onto lower fixing.
Ensure air pipe connection points towards rear.
12. Connect air pipe to air spring assembly, fitting
rubber boot.
See Disconnect/Connect Air
Pipe
13. Raise axle to locate air spring assembly into
upper fixing, if required.
14. Fit four new retaining clips to fixing points.
15. Reverse removal instructions 1 to 5.
16. Leak test air spring and connector.
See
Adjustment, Leak Test Procedure
BUMP STOP
Service repair no - 60.30.10
CAUTION: Air suspension system uses
’progressive’ bump stops, which must not
be interchanged with those used on coil
spring suspension.
Remove
1. Remove 2 locknuts and bolts with flat washers.
2. Remove bump stop assembly.
Refit
3. Position fixing bolts and flat washers in chassis
bracket.
4. Fit bump stop.
5. Tighten fixings.
Parts & tools for this job For Land Rover Range Rover
- TOOLCoil spring compressorSearch: coil spring compressor
- TOOLBall joint separatorSearch: ball joint separator
- PARTShock absorbersSearch: Land Rover Range Rover shock absorbers
Links open Amazon search results in a new tab. As an Amazon Associate I earn from qualifying purchases.