
OPERATING SWITCHES AND BULBS
- Make
- Land Rover
- Model
- Range Rover Classic
- Section
- REPAIR › OPERATING SWITCHES AND BULBS
AIR SUSPENSION
1
REPAIR
SUSPENSION COMPONENTS
CAUTION: It is essential to note that
repairs to other suspension and
transmission components are affected by
air suspension.
The air suspension must be DEPRESSURISED
before attempting to remove the following
components:
Front panhard rod Radius arms Front axle
Rear top and bottom links Rear axle
WARNING: Before inflation, the air spring
must be restricted by suspension and the
dampers fitted. Unrestricted movement of
a pressurised air spring will result in failure of the
assembly, causing component and possible
personal injury.
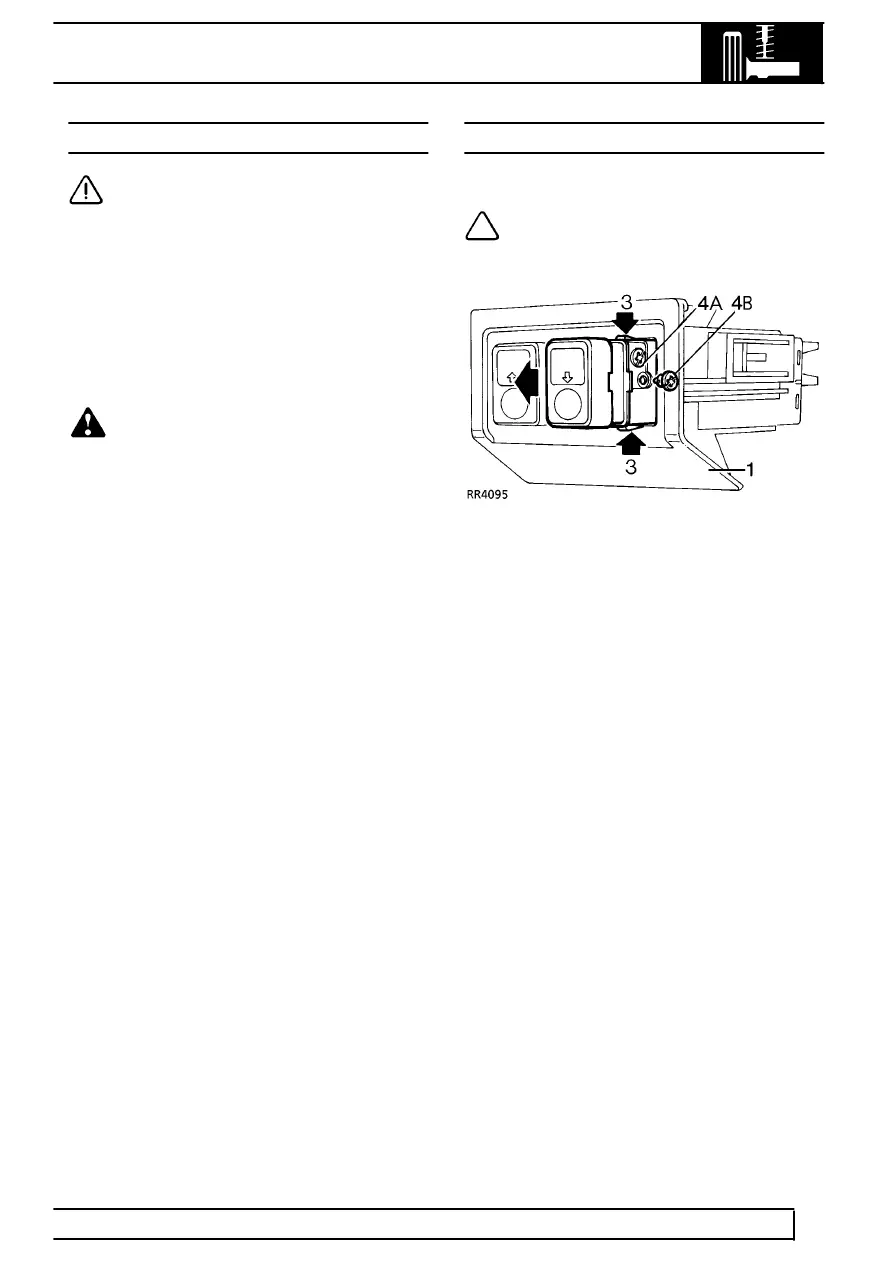
OPERATING SWITCHES AND BULBS
Service repair no - 60.50.17/18/19
NOTE: Each switch contains a warning
light bulb and an illumination bulb.
Remove
1. Release switch panel from its fitted position.
2. Disconnect multiplug from switch.
3. Depress locating tags of switch to remove switch
from panel.
4. Remove bulb by turning counter-clockwise:
A Warning
B Illumination
Refit
5. Fit new bulb and turn clockwise until fully
located.
6. Reverse removal procedure.
Parts & tools for this job For Land Rover Range Rover
- PARTReplacement bulbsSearch: Land Rover Range Rover bulbs
- TOOLDigital multimeterSearch: automotive digital multimeter
Links open Amazon search results in a new tab. As an Amazon Associate I earn from qualifying purchases.