
70 - BRAKES - ELECTRONIC TRACTION CONTROL (page 12 of 16)
- Make
- Land Rover
- Model
- Range Rover Classic
70
BRAKES
10
REPAIR
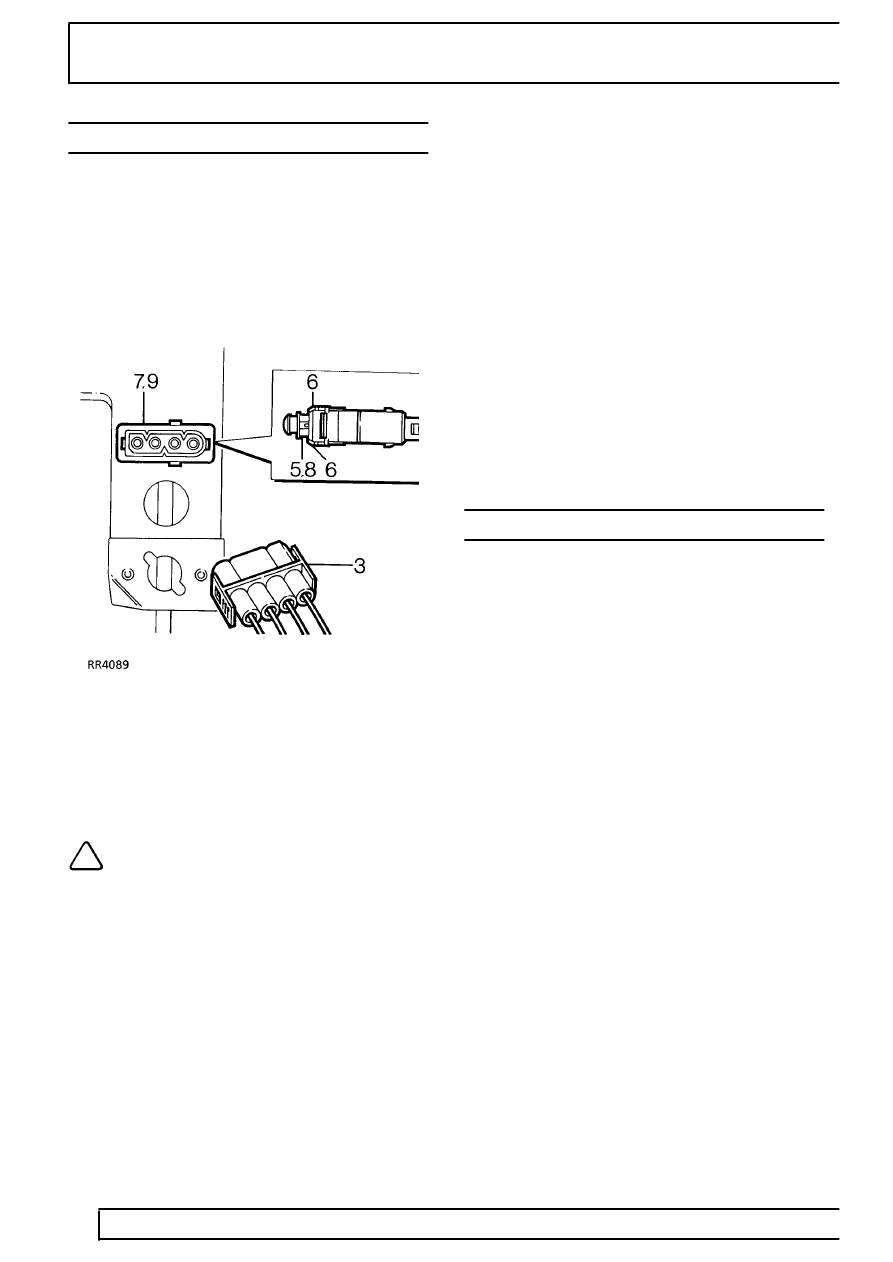
STOP LIGHT SWITCH
Service repair no - 86.65.51
Remove
1. Turn ignition off and disconnect battery negative
lead.
2. Remove lower fascia panel.
3. Disconnect multi-plug to switch.
4. Depressurise system.
See Depressurise
System
5. Depress brake pedal, pull WHITE sleeve and
BLACK plunger of switch FULLY forward.
6. Release switch retaining clips.
NOTE: If clips are difficult to release,
check WHITE sleeve is FULLY forward.
7. Remove switch.
Refit
8. Pull WHITE sleeve AND BLACK plunger of
switch fully forward.
9. Depress brake pedal, fit switch. Ensure retaining
clips are FULLY located.
10. Hold switch firmly in place, pull brake pedal back
fully to set switch.
11. Turn ignition on. Wait for ABS pump to shut off.
12. Check switch adjustment by slowly depressing
brake pedal and checking that the switch clicks
at least once before booster hisses.
13. If incorrect, adjust switch by depressing brake
pedal and pushing black plug in one detent at a
time.
14. Check that stop lamps go off when pedal is
released. If not, depress pedal and pull black
plunger out one detent at a time.
EXCITER RINGS
See REAR AXLE AND FINAL DRIVE, Repair, Rear
Hub Assembly or See FRONT AXLE AND FINAL
DRIVE, Overhaul, Front Stub Axle, Constant
Velocity Joint and Swivel Pin housing ABS
Parts & tools for this job For Land Rover Range Rover
- PARTBrake padsSearch: Land Rover Range Rover brake pads
- TOOLBrake bleeder kitSearch: one man brake bleeder kit
- FLUIDBrake fluidSearch: brake fluid
Links open Amazon search results in a new tab. As an Amazon Associate I earn from qualifying purchases.