
70 - BRAKES - ELECTRONIC TRACTION CONTROL (page 5 of 16)
- Make
- Land Rover
- Model
- Range Rover Classic
ABS
3
REPAIR
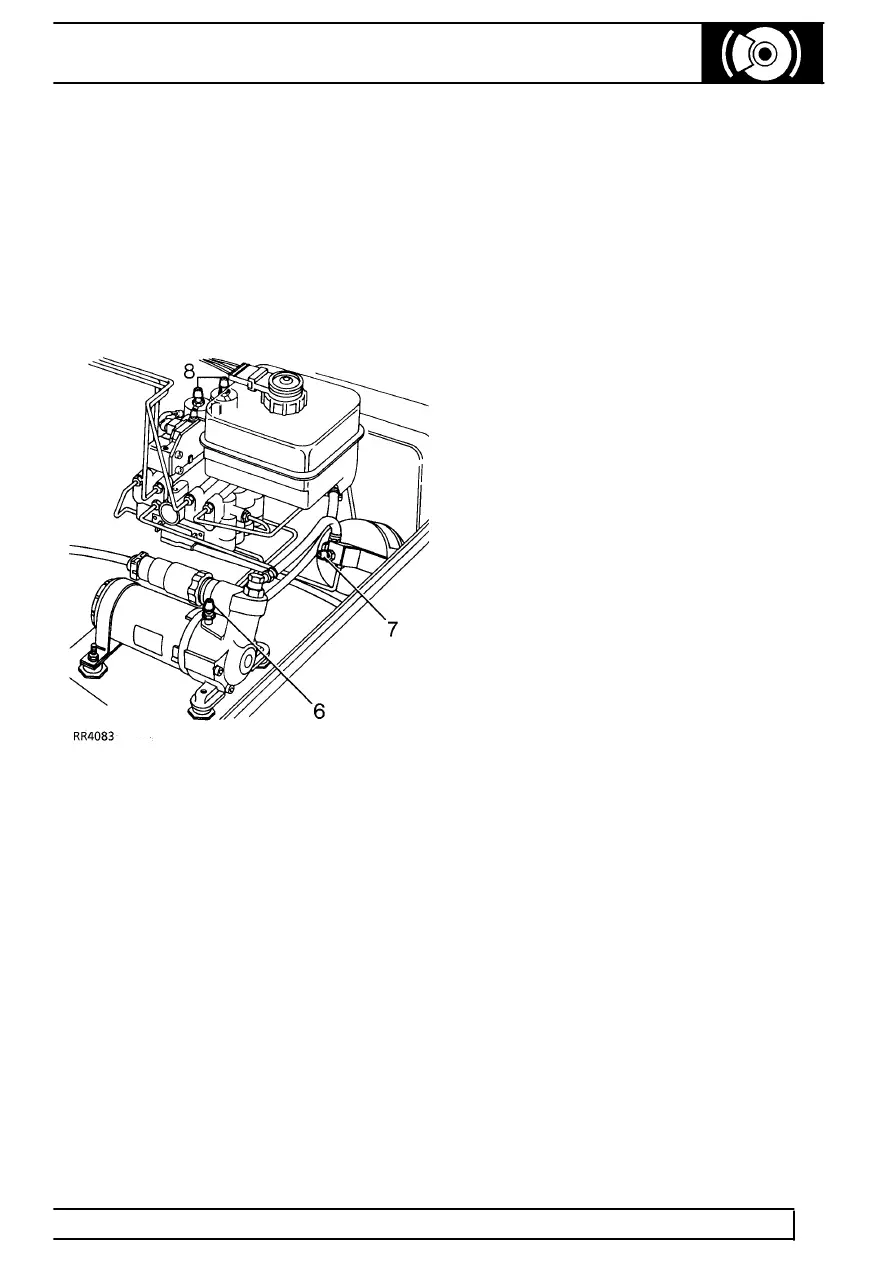
7. Bleed accumulator - open bleed screw. If vehicle
has ETC, accumulator bleed screw is on top of
ETC valve block. Switch on ignition, run pump
for 3-4 secs, switch off and repeat procedure
until fluid is clear of air bubbles. Switch off
ignition. Close bleed screw.
8. Bleed two hydraulic booster bleed screws. Open
one bleed screw, depress brake pedal, switch on
ignition, run pump until fluid is clear of air
bubbles. Close booster bleed screw, switch off
ignition, release pedal. Repeat for other bleed
screw.
9. Bleed power circuit at four calipers in turn.
Depress pedal, open bleed screw, (upper bleed
screw on front calipers). Switch on ignition, run
pump for 3-4 secs, switch off and repeat
procedure until fluid is clear of air bubbles.
Switch off ignition, close caliper bleed screw,
release pedal.
10. Bleed master cylinder - switch ignition on.
System pressure will increase until pump cuts
out. If pump does not cut out after running for 45
secs, check system for leaks.
11. Bleed hydrostatic circuit calipers - open one front
lower caliper bleed screw. Actuate brake pedal
several times, using only lower two thirds of
pedal travel, until fluid is clear of air bubbles.
Stop actuation if fluid warning light comes on
and allow pressure to build up.
12. Close caliper bleed screw before releasing
pedal, repeat for remaining three hydrostatic
bleed screws.
13. Check/top up reservoir fluid level.
See Fluid
Level Check / Top Up
14. Dry all connections, fully pressurise system,
check for leaks. If two full brake applications
switch on pump, from fully charged, rebleed
system.
Parts & tools for this job For Land Rover Range Rover
- PARTBrake padsSearch: Land Rover Range Rover brake pads
- TOOLBrake bleeder kitSearch: one man brake bleeder kit
- FLUIDBrake fluidSearch: brake fluid
Links open Amazon search results in a new tab. As an Amazon Associate I earn from qualifying purchases.