
76 - CHASSIS AND BODY (page 4 of 4)
- Make
- Land Rover
- Model
- Range Rover Classic
CHASSIS AND BODY
75
REPAIR
ADD: 09/95
27. Remove protective coverings and tape.
28. Pierce top and pre-cut nozzle to sealer cartridge,
remove lid and shake out crystals and install
cartridge in applicator gun.
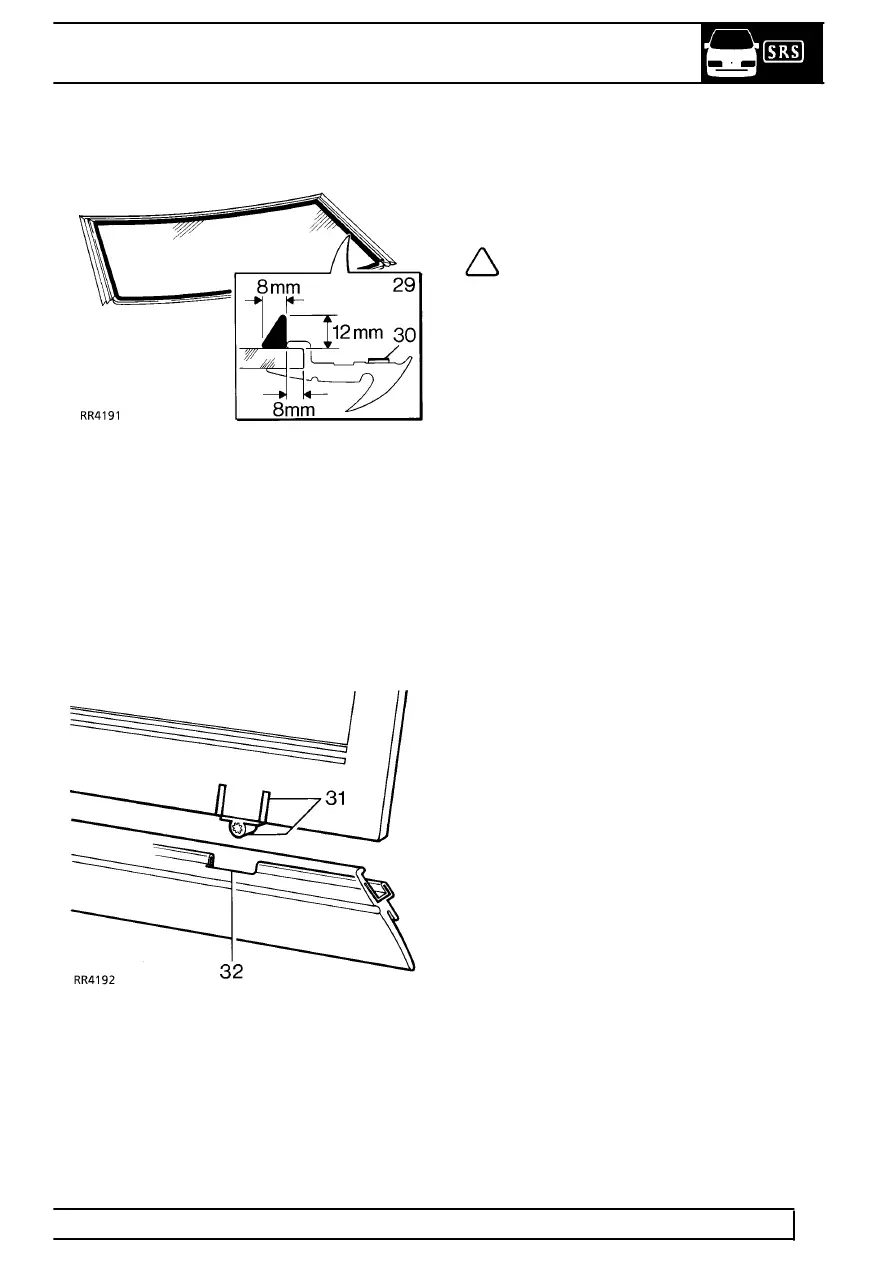
29. Apply a continuous bead of adhesive sealant
around the glass as shown. Vertical edge of
sealer to abutt finishers and to be 8mm from
bottom edge of glass.
30. Remove protective covering (RED) from side
finisher sealing strip.
31. With assistance: Attach suction cups to glass
and lift into position, carefully align the indicators
on the obscuration band with the supports.
Lower screen onto body flange, check alignment
and firmly press to seat glass in the aperture.
NOTE: The finisher on later vehicles will
not have cutouts, or supports fitted, as
shown.
32. Align cut outs with the supports and push
finisher fully onto the glass. Use a wooden block
to ensure fit.
33. Refit ’A’ post finishers and interior mirror.
34. Refit wiper arms.
Parts & tools for this job For Land Rover Range Rover
- TOOLTrim removal tool kitSearch: trim removal tool kit
- PARTTouch-up paintSearch: Land Rover touch up paint
- PARTPanel clip assortmentSearch: Land Rover panel clips assortment
Links open Amazon search results in a new tab. As an Amazon Associate I earn from qualifying purchases.