
70 - BRAKES - ELECTRONIC TRACTION CONTROL (page 7 of 16)
- Make
- Land Rover
- Model
- Range Rover Classic
ABS
5
REPAIR
RESERVOIR (INCLUDE SEALS)
Service repair no - 70.65.22
Remove
1. Disconnect battery negative lead.
2. Depressurise system.
See Depressurise
System
3. Disconnect low fluid warning plug.
4. Remove reservoir cap. Remove hose from
pump, plugging exposed apertures.
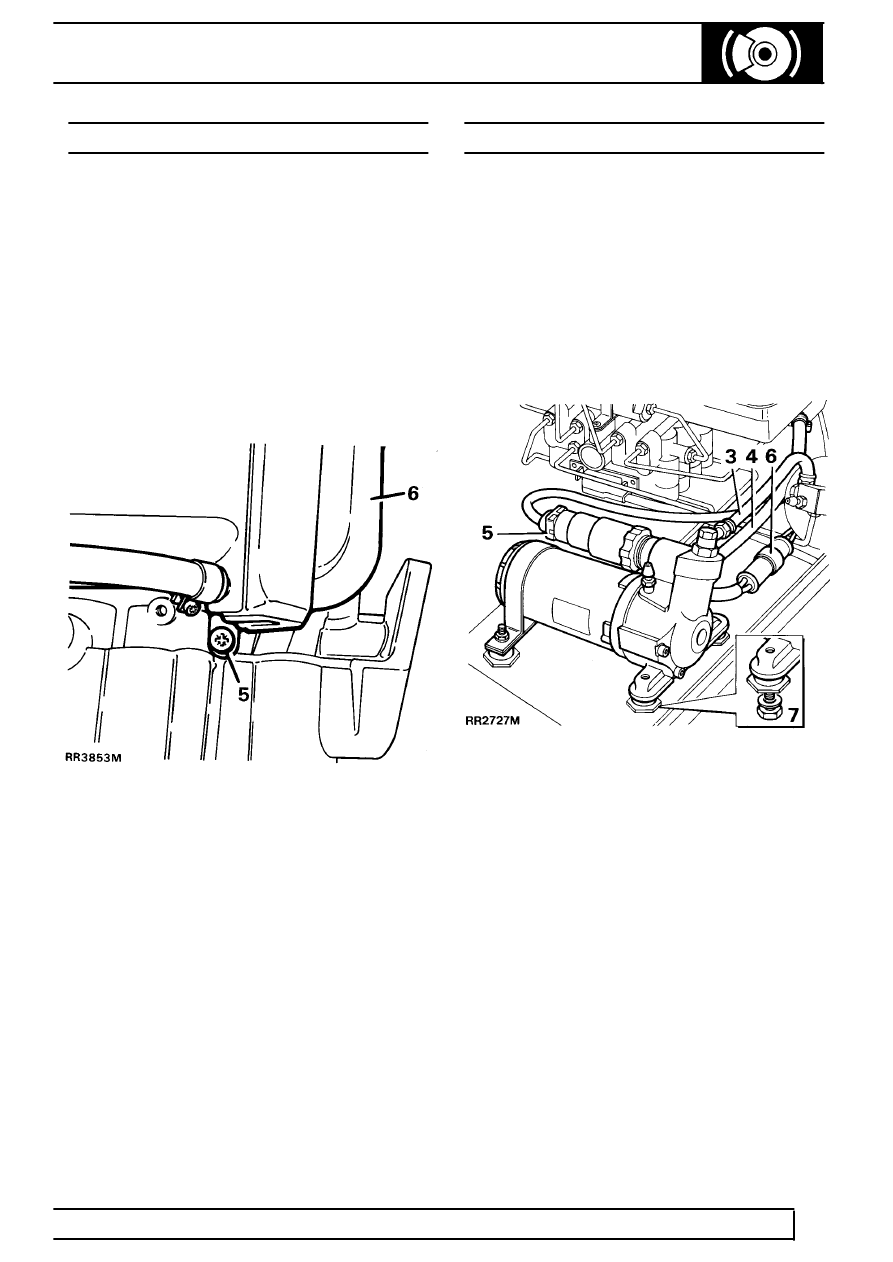
5. Remove securing bolt, adjacent to low pressure
hose.
6. Ease reservoir from booster unit.
7. Remove two seals from top of booster unit.
Avoid damage to seals which could result in
rubber particles entering system. Plug booster
unit apertures
Refit
8. Lubricate and fit new seals. Refit reservoir.
Tighten securing bolt to
10 Nm.
9. Bleed pump. Check/top up fluid level.
HYDRAULIC POWER UNIT
Service repair no - 70.65.20
Remove
1. Disconnect battery negative lead.
2. Depressurise system.
See Depressurise
System
3. Disconect braided hose to accumulator.
4. Disconnect low pressure hose to reservoir,
clamp hose to prevent fluid loss and ingress of
debris.
5. Disconnect pressure switch plug.
6. Disconnect power unit connector.
7. Working below unit remove four nuts and plain
washers.
8. Remove hydraulic power unit complete with
mountings. Note position of earth strap, if fitted,
when removing mountings.
Refit
9. Reverse removal procedure. Fit new sealing
washers on high pressure hose.
10. Bleed system.
See Brake System Bleed
(ABS)
Parts & tools for this job For Land Rover Range Rover
- PARTBrake padsSearch: Land Rover Range Rover brake pads
- TOOLBrake bleeder kitSearch: one man brake bleeder kit
- FLUIDBrake fluidSearch: brake fluid
Links open Amazon search results in a new tab. As an Amazon Associate I earn from qualifying purchases.