
70 - BRAKES - ELECTRONIC TRACTION CONTROL (page 11 of 16)
- Make
- Land Rover
- Model
- Range Rover Classic
ABS
9
REPAIR
SENSORS - REAR
Service repair no - 70.65.31
CAUTION: If a sensor is removed for any
reason, a NEW sensor bush must be fitted.
Remove
1. Disconnect battery negative lead.
2. Disconnect sensor electrical connections,
located above rear axle.
3. Remove sensor from its locating clip.
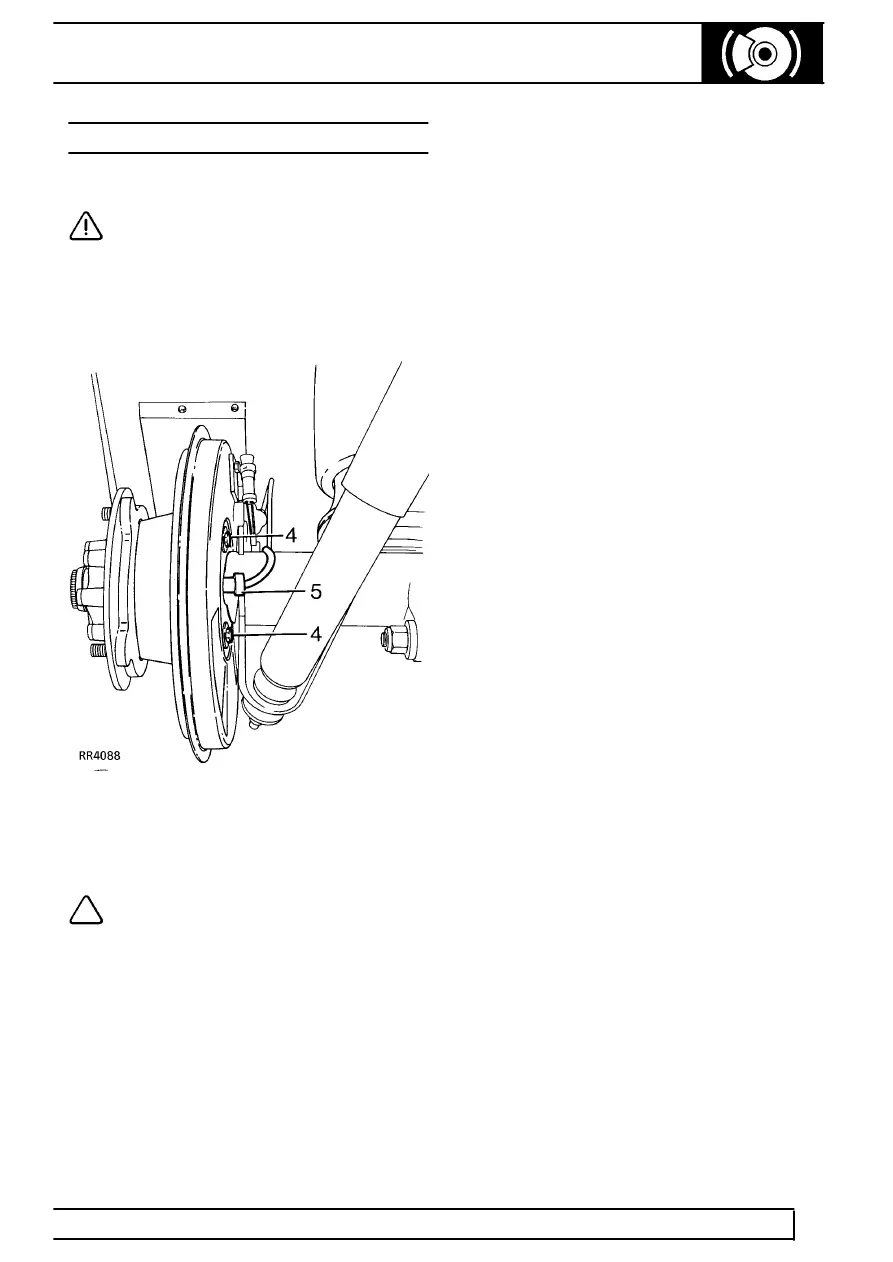
4. Remove bolts securing mudshield.
5. Using a suitable lever, pry sensor from mounting
bush.
6. Release harness cable ties, remove sensor lead
from vehicle.
NOTE: The two rear sensor leads are
integral with pad wear harness. In case of
sensor failure complete harness must be
changed.
7. Remove sensor bush.
Refit
8. Fit new sensor bush.
9. Lightly grease new sensor using silicone grease.
See LUBRICANTS, FLUIDS AND
CAPACITIES, Information, Recommended
Lubricants and Fluids
10. Push sensor through bush until it touches exciter
ring. Sensor will be ’knocked back’ to correct
position when vehicle is driven.
11. Secure harness in position.
12. Reconnect sensor electrical connection.
13. Clear error code.
See Fault diagnosis, Fault
Diagnosis Procedure
Drive vehicle to ensure ABS warning light is
extinguished.
Parts & tools for this job For Land Rover Range Rover
- PARTBrake padsSearch: Land Rover Range Rover brake pads
- TOOLBrake bleeder kitSearch: one man brake bleeder kit
- FLUIDBrake fluidSearch: brake fluid
Links open Amazon search results in a new tab. As an Amazon Associate I earn from qualifying purchases.