
70 - BRAKES - ELECTRONIC TRACTION CONTROL (page 8 of 16)
- Make
- Land Rover
- Model
- Range Rover Classic
70
BRAKES
6
REPAIR
ACCUMULATOR
Service repair no - 70.65.21
WARNING: The accumulator is precharged
with nitrogen at up to 80 bar. Handle with
extreme caution. DO NOT puncture or burn
if disposal is necessary.
Remove, refit and disposal
1. Disconnect battery negative lead.
2. Depressurise system.
See Depressurise
System
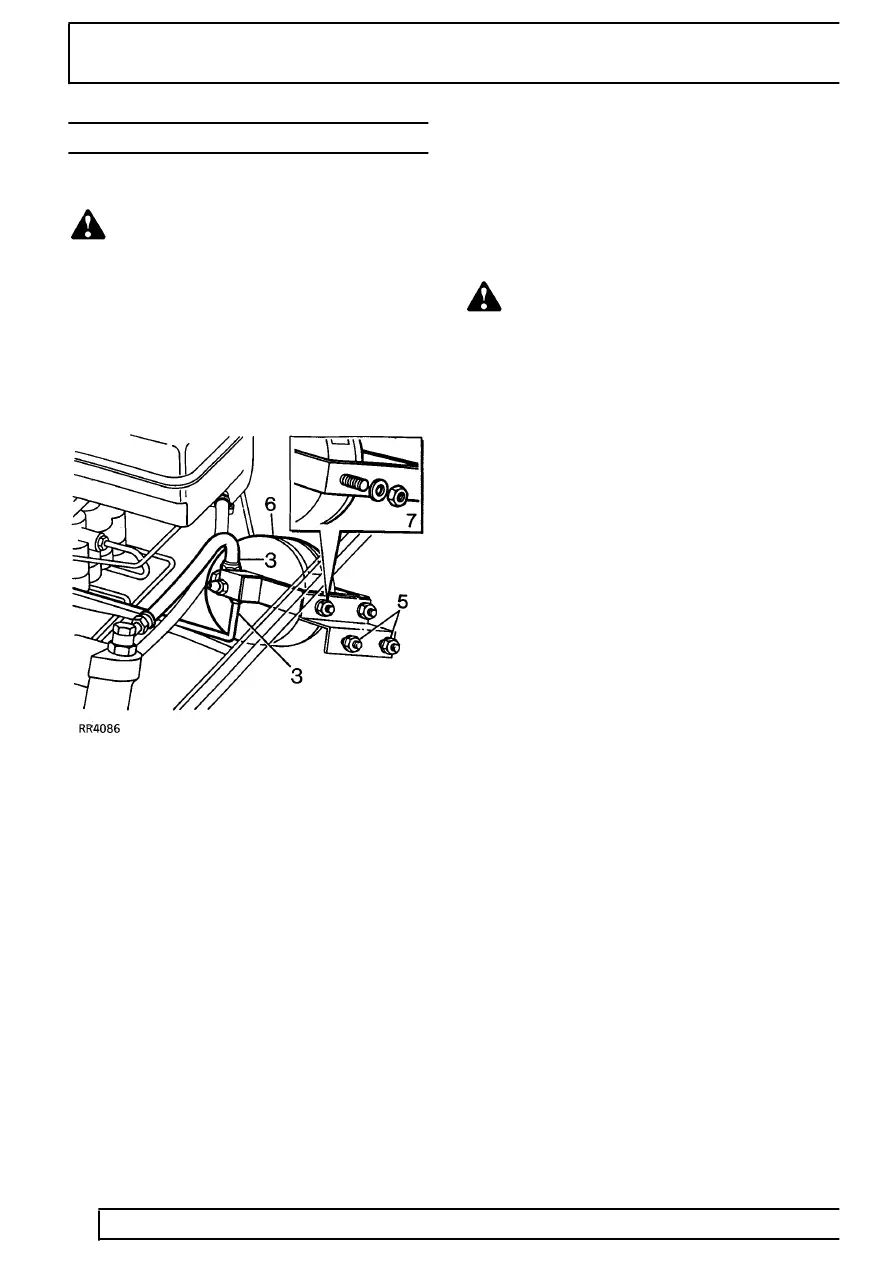
3. Remove fluid inlet and outlet pipes from
accumulator.
4. On driver’s side of vehicle, release rear of front
wheel arch inner liner.
5. From inside wheel arch, remove two nuts and
plain washers securing accumulator bracket to
wing valance
6. Remove accumulator assembly.
Do not carry
out further dismantling if component is
removed for access only.
7. Remove nuts and plain washers and remove
bracket from accumulator.
Refit
8. Reverse removal procedure. Fit new sealing
washers on high pressure hose.
9. Bleed brakes.
See Brake System Bleed (ABS)
Disposal
WARNING: It is essential that safety
goggles and gloves are worn when
carrying out this procedure.
1. Secure accumulator firmly using a suitable vice.
2. Drill 5mm diameter hole in accumulator, opposite
hole fluid ports, to depressurise nitrogen
chamber.
3. Dispose of accumulator in normal way.
Parts & tools for this job For Land Rover Range Rover
- PARTBrake padsSearch: Land Rover Range Rover brake pads
- TOOLBrake bleeder kitSearch: one man brake bleeder kit
- FLUIDBrake fluidSearch: brake fluid
Links open Amazon search results in a new tab. As an Amazon Associate I earn from qualifying purchases.