
Drive Belt: Testing and Inspection (page 3 of 6)
- Make
- Mazda
- Model
- 3
- Engine
- L4-2.5L
- Year
- 2010
- Section
- Drive Belt
Drive Belt: Service and Repair
DRIVE BELT REMOVAL/INSTALLATION [LF, L5]
LF
A/C drive belt removal
1. Remove the aerodynamic under cover No.2 and splash shield as a single unit. See: Body and Frame/Splash Guard/Service and
Repair/Aerodynamic Under Cover No.2 Removal/Installation See: Body and Frame/Splash Guard/Service and Repair/Splash Shield
Removal/Installation
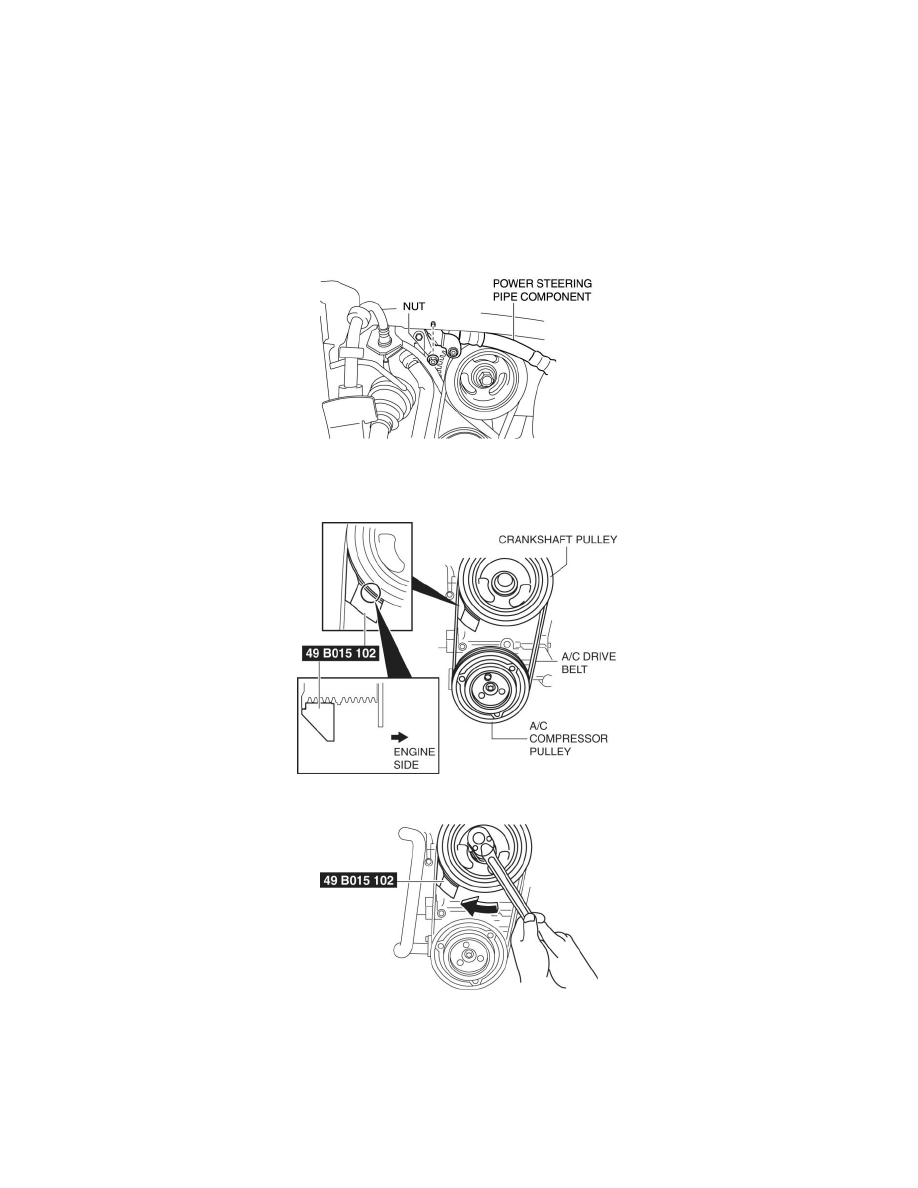
2. Remove the nut shown in the figure and set the power steering pipe component out of the way.
3. Set the SST as shown in the figure.
NOTE:
-
Hold the SST by hand until it fits between the A/C drive belt and the crankshaft pulley.
4. Rotate the crankshaft pulley clockwise using a wrench and remove the A/C drive belt.
A/C drive belt installation
1. Set the SST to the crankshaft pulley as shown in the figure.
NOTE:
-
Hang the A/C drive belt on to the A/C compressor pulley, then move the SST upward along the crankshaft pulley.
Pinch or Ctrl + scroll to zoom. Double-tap to reset.
Parts & tools for this job For 2010 Mazda 3 2.5L
- PARTOil filterSearch: Mazda 3 2010 2.5L oil filter
- TOOLOil filter wrenchSearch: oil filter wrench
- FLUIDEngine oilSearch: Mazda 3 engine oil
Links open Amazon search results in a new tab. As an Amazon Associate I earn from qualifying purchases.