
3 L4-2.5L (2010)
Pressure Plate: Testing and Inspection
Clutch Cover Inspection [A26M-R]
CLUTCH COVER INSPECTION [A26M-R]
1. Remove the battery cover. See: Starting and Charging/Battery/Service and Repair/Removal and Replacement
2. Disconnect the negative battery cable. See: Starting and Charging/Battery/Service and Repair/Removal and Replacement
3. Remove the PCM cover No.1. See: Powertrain Management/Computers and Control Systems/Engine Control Module/Service and
Repair/Removal and Replacement
4. Disconnect the PCM connector. See: Powertrain Management/Computers and Control Systems/Engine Control Module/Service and
Repair/Removal and Replacement
5. Remove the following parts:
a. Battery tray and PCM component See: Starting and Charging/Battery/Service and Repair/Removal and Replacement
b. Air cleaner component See: Engine, Cooling and Exhaust/Engine/Intake Manifold/Service and Repair
c. Charge air cooler cover See: Engine, Cooling and Exhaust/Engine/Intake Manifold/Service and Repair
d. Charge air cooler See: Engine, Cooling and Exhaust/Engine/Intake Manifold/Service and Repair
e. Fuel pump resistor
f.
Front tires See: Steering and Suspension/Suspension/Service and Repair
g. Splash shield See: Body and Frame/Splash Guard/Service and Repair/Splash Shield Removal/Installation
h. Aerodynamic under cover No.2 See: Body and Frame/Splash Guard/Service and Repair/Aerodynamic Under Cover No.2
Removal/Installation
i.
WU-TWC bracket See: Engine, Cooling and Exhaust/Exhaust System/Service and Repair
j.
Starter See: Starting and Charging/Starting System/Starter Motor/Service and Repair/Removal and Replacement
k. Front auto leveling sensor See: Lighting and Horns/Headlamp/Headlamp Alignment Sensor/Service and Repair
6. Drain the transaxle oil into a suitable container. See: Manual Transmission/Transaxle/Service and Repair/Removal and Replacement/Transaxle
Oil Replacement [A26M-R]
7. Remove the manual transaxle. See: Manual Transmission/Transaxle/Service and Repair/Removal and Replacement/Manual Transaxle
Removal/Installation [A26M-R]
8. Remove the clutch cover. See: Service and Repair/Clutch Unit Removal/Installation [A26M-R]
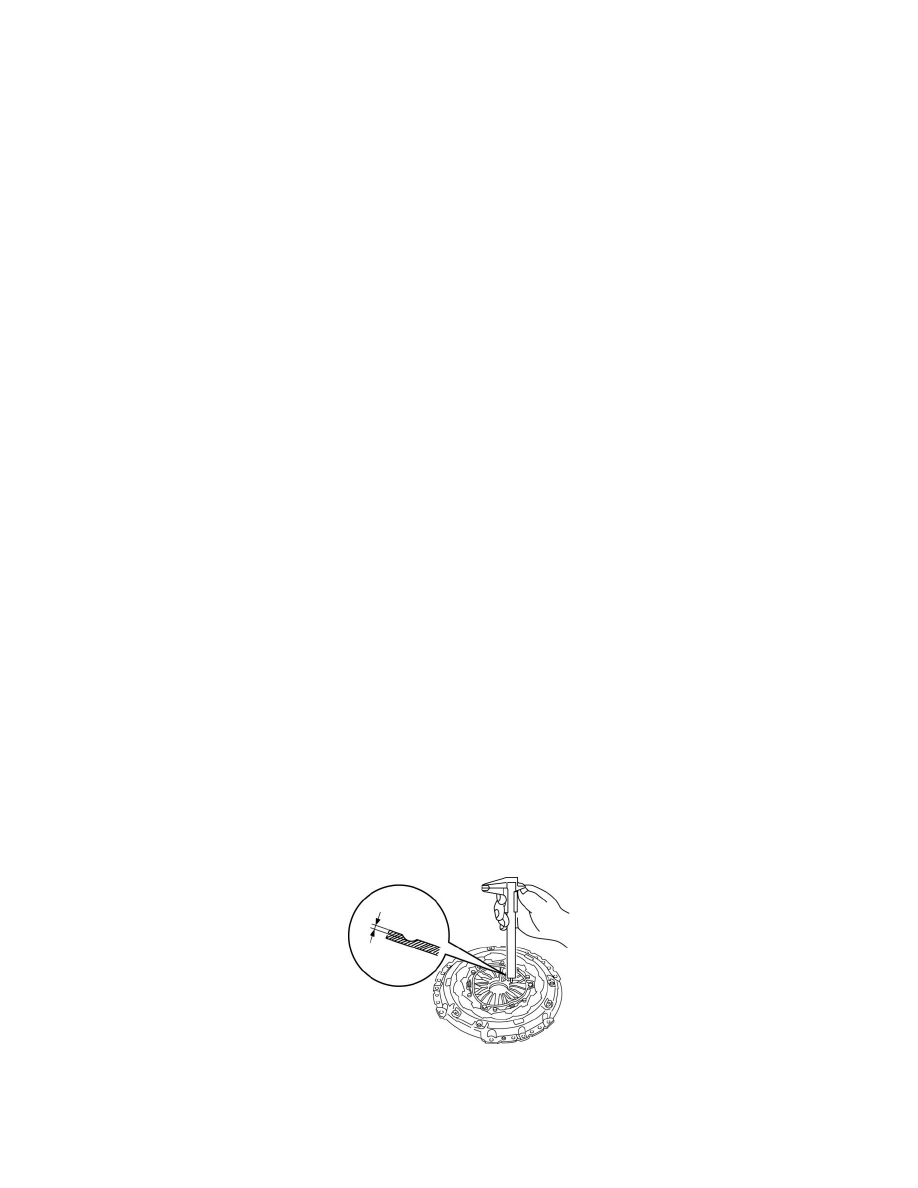
9. Measure the wear of the diaphragm spring fingers.
-
If it exceeds the maximum specification, replace the clutch cover. See: Service and Repair/Clutch Unit Removal/Installation [A26M-R]
Clutch cover diaphragm spring fingers maximum depth
-
0.6 mm {0.02 in} max.